


 Zoom is UNT’s web conferencing tool for courses and approved special use cases (e.g., student services such as advising, career center, and writing lab). Zoom is the leader in modern enterprise video communications, with a reliable platform for video/audio conferencing, collaboration, chat, and webinars across mobile devices, desktop computers, and telephones. It is easy to use and is integrated with Canvas. This Zoom license is exclusive to the UNT campus.
For non-course related web-conferencing or non-UNT personnel use, Skype for Business or Microsoft Teams is recommended by ITSS. The UNT System has a site license for Office 365 which includes Skype for Business and MS Teams. Please contact your network manager if you need help installing or using Skype or MS Teams.
To access your UNT Zoom account, visit: unt.zoom.us
UNT’s deployment includes the following feature set:
- HD Video and Audio Conferencing: Up to 100 people can participate in your meetings
- Screen Sharing: One-click HD screen sharing – even share video and audio with ease!
- Video Breakout Rooms: Create smaller teams to collaborate and learn from one another, all within the same meeting
- Co-Annotation: Draw directly on the shared screen so that notations are visible to all attendees
- Multi-Sharing: Allows multiple participants to share their screen at the same time
- Recording of Meetings / Class Sessions: Save your session for students to watch later
- Any Device: Mac, PC, Chromebooks, iOS, Android, and BlackBerry
- Closed Captioning Capability: Ensure all guests can participate equally
- Group Messaging: Send text and voice messages, files, or images with class groups or individuals
- Polling: Engage your students with quick polls, giving everyone a chance to participate
- Dashboards / Management Tools: View information ranging from overall usage to live in-meeting data
- LTI (Learning Tools Interoperability): Schedule meetings Canvas
- Security: Complete end-to-end 256-bit AES encryption
The Zoom Help Center offers 24/7 live chat and phone support, videos, and tutorials. You can also contact the CLEAR Faculty Helpdesk for UNT Zoom access and specific questions related to Canvas.
Zoom User Training Webinar
Additionally, you have access to the recording of the user training webinar that took place on November 9th, 2018. Items covered are:
- Logging in to our UNT web portal
- Scheduling via Outlook
- The Zoom Client
- In Session Controls
- Cloud Recordings
- Zoom Mobile Apps
- Zoom support
Click on the options below to learn how to access and use Zoom within Canvas.
Zoom in Canvas
Step 1. Authenticate Your Account
- Go to unt.zoom.us.
- Click on "Sign In."
- Log in with your EUID and password.
- You have authenticated your account; this is a one-time sign-on, and you can now integrate Zoom into Canvas. You can log out of this page!
Step 2. Access Zoom
Method 1: Add Zoom to a Module
- Go to your Canvas course and select the "Modules" menu item.
- Click on the "+" icon at the top-right of the module.
- Under the drop-down menu that defaults to "Assignment," select "External Tool."
- Scroll down and select "Zoom."
- Do not alter the URL that auto-populates under "URL."
- Under "Page Name," you can give your new module item a name. Only you will see it.
- Click "Add Item."
Leave the new item unpublished. It is only for you, and clicking on it will lead you to your Zoom menu (explained below).
Method 2: Add Zoom to the Course Menu
- Go to your Canvas course and select the "Settings" menu item.
- Click on the "Navigation" tab at the top of your screen.
- In the list of menu items that appear, locate "Zoom."
- Click on the vertical three dots to the right of "Zoom," and select "Enable."
- Scroll to the bottom of the "Navigation" page, and click "Save."
- This will allow both you and your students to see the Zoom menu (explained below).
Step 3. Schedule a Meeting
Your Zoom menu (pictured below) shows upcoming and previous meetings, your personal meeting room, and cloud recordings. When students access this menu, they only see upcoming and previous meetings.
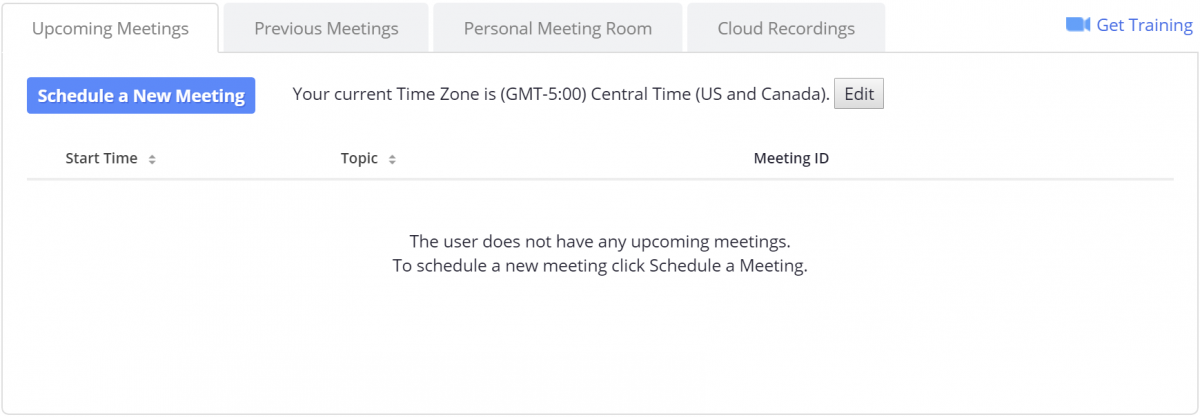
 From within the Zoom menu, select "Schedule a New Meeting" (pictured right). In the next page, you can choose to modify these settings:
- Topic and Description (optional).
- When your meeting can begin, as well as Duration and the Time Zone that will be listed alongside the meeting's time.
 Recurring meeting (pictured right) to make this meeting recur daily, weekly, monthly, or at no fixed time. You can also specify an end to the recurrence.
- You can choose to make Registration for the meeting mandatory.
- Turning on the Video option for host or participant enables the user's camera as soon as they enter the meeting.
- The Audio option allows you to choose to enable Telephone or Computer Audio (or both) for a meeting.
- Under Meeting Options, you can:
- Require a meeting password
- Enable participants to join before you (the host); if you do not enable this, students will see a notification that says "Please wait for the host to start this meeting."
- Mute participants upon entry (recommended)
- Enable a waiting room
- Record the meeting automatically; if you do not enable this option, you can still begin recording the meeting anytime after it begins.
- Alternative Hosts: This option allows you to designate another person as the host of your meeting.
- Click "Save" to be taken to the meeting's page. This page can also be accessed through "Upcoming Meetings" in your Zoom menu.
Multiple instructors (or teaching assistants) within a course cannot view meetings that each other have scheduled. For example, if an instructor schedules a Zoom meeting, their co-instructor or TA cannot see that meeting unless they go into "student view." Instructions for entering student view are below:
- Within your Canvas course, select the "Home" menu item.
- On the right-hand side of your page, select "Student View."
- You can now see how your course appears to a student. To exit student view, select "Leave Student View" at the bottom right.
Step 4. Invite Students
First, locate your meeting's Join URL.
- From within your Zoom menu, select "Upcoming Meetings."
- Click on the meeting topic.
- Locate the "Join URL."
- Send this URL to students in whatever way you prefer. You can e-mail the link to students, create an "External URL" link within a module (explained below), or copy/paste the link into the text of a page, assignment, etc.

Next, place the Join URL in a Module.
- Go to your Canvas course, and select the "Modules" menu item.
- Click on the "+" icon at the top-right of the module.
- Under the drop-down menu that defaults to "Assignment," select "External URL."
- Under URL, insert the meeting's "Join URL."
- Under "Page Name," you can give your Zoom meeting a name.
- Click "Add Item."
When students go to this URL, they will be prompted to download Zoom and enter the meeting. They can also opt to view the meeting in a browser instead of initiating a download.
Step 5. Use Meeting Tools
As soon as a user goes to the "Join URL" described above, they will have a series of options for communicating with other students and the meeting host. As a meeting host, you can use multiple tools (pictured below) that Zoom explains in a video about meeting controls.

- Invite allows you to send an e-mail invitation to a student, copy the Join URL, or copy an invitation that can be inserted into an invitation message.
- Manage Participants activates a window that displays participants who are currently in the meeting. When you hover over a user's name, you can mute the user or rename them.
- Polls are a tool that prompts the host to create a question and allows participants to vote on it.
- Share Screen displays all browser windows that you can select to show to meeting participants.
 Chat automatically allows students to speak with the instructor and fellow participants. Notifications appear for new messages, and students can select icons within chat that signify "yes," "no," "go slower," "go faster," "dislike," "like," "need a break," and "away."
- Record presents a choice between storing recordings on this computer or online in your Zoom menu.
- Closed Captions allows the host to write their own closed captions, use a third-party tool to create captions, or select a student to transcribe the meeting.
- To select a participant who will write captions, point your mouse at their name and click "More."
- Select "Assign to type Close Caption."
- Breakout Rooms facilitate separation of participants into their own groups for brief discussions. Participants can be brought back into a meeting at any time.
Step 6. Record and Archive Meetings
If you select "Record" in a meeting, you can opt to store the recorded meeting on your computer or on the Cloud.
- If you choose to store the recording on your computer, a "Zoom" folder will be created in your File Explorer under "Documents." When the meeting has concluded, its recording will appear within that folder.
- Recordings stored on the Cloud will appear in the "Cloud Recordings" tab within your Zoom menu. You will be sent an e-mail when the Cloud recording is ready.