AWS Blog
Introducing the AWS IoT Button Enterprise Program
The AWS IoT Button first made its appearance on the IoT scene in October of 2015 at AWS re:Invent with the introduction of the AWS IoT service. That year all re:Invent attendees received the AWS IoT Button providing them the opportunity to get hands-on with AWS IoT. Since that time AWS IoT button has been made broadly available to anyone interested in the clickable IoT device.
During this past AWS re:Invent 2016 conference, the AWS IoT button was launched into the enterprise with the AWS IoT Button Enterprise Program. This program is intended to help businesses to offer new services or improve existing products at the click of a physical button. With the AWS IoT Button Enterprise Program, enterprises can use a programmable AWS IoT Button to increase customer engagement, expand applications and offer new innovations to customers by simplifying the user experience. By harnessing the power of IoT, businesses can respond to customer demand for their products and services in real-time while providing a direct line of communication for customers, all via a simple device.

AWS IoT Button Enterprise Program
Let’s discuss how the new AWS IoT Button Enterprise Program works. Businesses start by placing a bulk order of the AWS IoT buttons and provide a custom label for the branding of the buttons. Amazon manufactures the buttons and pre-provisions the IoT button devices by giving each a certificate and unique private key to grant access to AWS IoT and ensure secure communication with the AWS cloud. This allows for easier configuration and helps customers more easily get started with the programming of the IoT button device.
Businesses would design and build their IoT solution with the button devices and creation of device companion applications. The AWS IoT Button Enterprise Program provides businesses some complimentary assistance directly from AWS to ensure a successful deployment. The deployed devices then would only need to be configured with Wi-Fi at user locations in order to function.

For enterprises, there are several use cases that would benefit from the implementation of an IoT button solution. Here are some ideas:
- Reordering services or custom products such as pizza or medical supplies
- Requesting a callback from a customer service agent
- Retail operations such as a call for assistance button in stores or restaurants
- Inventory systems for capturing products amounts for inventory
- Healthcare applications such as alert or notification systems for the disabled or elderly
- Interface with Smart Home systems to turn devices on and off such as turning off outside lights or opening the garage door
- Guest check-in/check-out systems
AWS IoT Button
At the heart of the AWS IoT Button Enterprise Program is the AWS IoT Button. The AWS IoT button is a 2.4GHz Wi-Fi with WPA2-PSK enabled device that has three click types: Single click, Double click, and Long press. Note that a Long press click type is sent if the button is pressed for 1.5 seconds or longer. The IoT button has a small LED light with color patterns for the status of the IoT button. A blinking white light signifies that the IoT button is connecting to Wi-Fi and getting an IP address, while a blinking blue light signifies that the button is in wireless access point (AP) mode. The data payload that is sent from the device when pressed contains the device serial number, the battery voltage, and the click type.
Currently, there are 3 ways to get started building your AWS IoT button solution. The first option is to use the AWS IoT Button companion mobile app. The mobile app will create the required AWS IoT resources, including the creation of the TLS 1.2 certificates, and create an AWS IoT rule tied to AWS Lambda. Additionally, it will enable the IoT button device via AWS IoT to be an event source that invokes a new AWS Lambda function of your choosing from the Lambda blueprints. You can download the aforementioned mobile apps for Android and iOS below.
 |
 |
The second option is to use the AWS Lambda Blueprint Wizard as an easy way to start using your AWS IoT Button. Like the mobile app, the wizard will create the required AWS IoT resources for you and add an event source to your button that invokes a new Lambda function.
The third option is to follow the step by step tutorial in the AWS IoT getting started guide and leverage the AWS IoT console to create these resources manually.
Once you have configured your IoT button successfully and created a simple one-click solution using one of the aforementioned getting started guides, you should be ready to start building your own custom IoT button solution. Using a click of a button, your business will be able to build new services for customers, offer new features for existing services, and automate business processes to operate more efficiently.
The basic technical flow of an AWS IoT button solution is as follows:
- A button is clicked and secure connection is established with AWS IoT with TLS 1.2
- The button data payload is sent to AWS IoT Device Gateway
- The rules engine evaluates received messages (JSON) published into AWS IoT and performs actions or trigger AWS Services based defined business rules.
- The triggered AWS Service executes or action is performed
- The device state can be read, stored and set with Device Shadows
- Mobile and Web Apps can receive and update data based upon action

Now that you have general knowledge about the AWS IoT button, we should jump into a technical walk-through of building an AWS IoT button solution.
AWS IoT Button Solution Walkthrough
We will dive more deeply into building an AWS IoT Button solution with a quick example of a use case for providing one-click customer service options for a business.
To get started, I will go to the AWS IoT console, register my IoT button as a Thing and create a Thing type. In the console, I select the Registry and then Things options in console menu.

The name of my IoT thing in this example will be TEW-AWSIoTButton. If you desire to categorize the IoT things, you can create a Thing type and assign a type to similar IoT ‘things’. I will categorize my IoT thing, TEW-AWSIoTButton, as an IoTButton thing type with a One-click-device attribute key and select Create thing button.

After my AWS IoT button device, TEW-AWSIoTButton, is registered in the Thing Registry, the next step is to acquire the required X.509 certificate and keys. I will have AWS IoT generate the certificate for this device, but the service allows for to use your own certificates. Authenticating the connection with the X.509 certificates helps to protect the data exchange between your device and AWS IoT service.

When the certificates are generated with AWS IoT, it is important that you download and save all of the files created since the public and private keys will not be available after you leave the download page. Additionally, do not forget to download the root CA for AWS IoT from the link provided on the page with your generated certificates.
The newly created certificate will be inactive, therefore, it is vital that you activate the certificate prior to use. AWS IoT uses the TLS protocol to authenticate the certificates using the TLS protocol’s client authentication mode. The certificates enable asymmetric keys to be used with devices, and AWS IoT service will request and validate the certificate’s status and the AWS account against a registry of certificates. The service will challenge for proof of ownership of the private key corresponding to the public key contained in the certificate. The final step in securing the AWS IoT connection to my IoT button is to create and/or attach an IAM policy for authorization.

I will choose the Attach a policy button and then select Create a Policy option in order to build a specific policy for my IoT button. In Name field of the new IoT policy, I will enter IoTButtonPolicy for the name of this new policy. Since the AWS IoT Button device only supports button presses, our AWS IoT button policy will only need to add publish permissions. For this reason, this policy will only allow the iot:Publish action.
For the Resource ARN of the IoT policy, the AWS IoT buttons typically follow the format pattern of: arn: aws: iot: TheRegion: AWSAccountNumber: topic/ iotbutton /ButtonSerialNumber. This means that the Resource ARN for this IoT button policy will be:

I should note that if you are creating an IAM policy for an IoT device that is not an AWS IoT button, the Resource ARN format pattern would be as follows: arn: aws: iot: TheRegion: AWSAccountNumber: topic/ YourTopic/ OptionalSubTopic/
The created policy for our AWS IoT Button, IoTButtonPolicy, looks as follows:

The next step is to return to the AWS IoT console dashboard, select Security and then Certificates menu options. I will choose the certificate created in the aforementioned steps.

Then on the selected certificate page, I will select the Actions dropdown on the far right top corner. In order to add the IoTButtonPolicy IAM policy to the certificate, I will click the Attach policy option.


I will repeat all of the steps mentioned above but this time I will add the TEW-AWSIoTButton thing by selecting the Attach thing option.

All that is left is to add the certificate and private key to the physical AWS IoT button and connect the AWS IoT Button to Wi-Fi in order to have the IoT button be fully functional.
Important to note: For businesses that have signed up to participate in the AWS IoT Button Enterprise Program, all of these aforementioned steps; Button logo branding, AWS IoT thing creation, obtaining certificate & key creation, and adding certificates to buttons, are completed for them by Amazon and AWS. Again, this is to help make it easier for enterprises to hit the ground running in the development of their desired AWS IoT button solution.
Now, going back to the AWS IoT button used in our example, I will connect the button to Wi-Fi by holding the button until the LED blinks blue; this means that the device has gone into wireless access point (AP) mode.

In order to provide internet connectivity to the IoT button and start configuring the device’s connection to AWS IoT, I will connect to the button’s Wi-Fi network which should start with Button ConfigureMe. The first time the connection is made to the button’s Wi-Fi, a password will be required. Enter the last 8 characters of the device serial number shown on the back of the physical AWS IoT button device.


The AWS IoT button is now configured and ready to build a system around it. The next step will be to add the actions that will be performed when the IoT button is pressed. This brings us to the AWS IoT Rules engine, which is used to analyze the IoT device data payload coming from the MQTT topic stream and/or Device Shadow, and trigger AWS Services actions. We will set up rules to perform varying actions when different types of button presses are detected.
Our AWS IoT button solution will be a simple one, we will set up two AWS IoT rules to respond to the IoT button being clicked and the button’s payload being sent to AWS IoT. In our scenario, a single button click will represent that a request is being sent by a customer to a fictional organization’s customer service agent. A double click, however, will represent that a text will be sent containing a customer’s fictional current account status.
The first AWS IoT rule created will receive the IoT button payload and connect directly to Amazon SNS to send an email only if the rule condition is fulfilled that the button click type is SINGLE. The second AWS IoT rule created will invoke a Lambda function that will send a text message containing customer account status only if the rule condition is fulfilled that the button click type is DOUBLE.

In order to create the AWS IoT rule that will send an email to subscribers of an SNS topic for requesting a customer service agent’s help, we will go to Amazon SNS and create a SNS topic.

I will create an email subscription to the topic with the fictional subscribed customer service email, which in this case is just my email address. Of course, this could be several customer service representatives that are subscribed to the topic in order to receive emails for customer assistance requests.

Now returning to the AWS IoT console, I will select the Rules menu and choose the Create rule option. I first provide a name and description for the rule.

Next, I select the SQL version to be used for the AWS IoT rules engine. I select the latest SQL version, however, if I did not choose to set a version, the default version of 2015-10-08 will be used. The rules engine uses a SQL-like syntax with statements containing the SELECT, FROM, and WHERE clauses. I want to return a literal string for the message, which is not apart of the IoT button data payload. I also want to return the button serial number as the accountnum, which are not apart of the payload. Since the latest version, 2016-03-23, supports literal objects, I will be able to send a custom payload to Amazon SNS.

I have created the rule, all that is left is to add a rule action to perform when the rule is analyzed. As I mentioned above, an email should be sent to customer service representatives when this rule is triggered by a single IoT button press. Therefore, my rule action will be the Send a message as an SNS push notification to the SNS topic that I created to send an email to our fictional customer service reps aka me. Remember that the use of an IAM role is required to provide access to SNS resources; if you are using the console you have the option to create a new role or update an existing role to provide the correct permissions. Also, since I am doing a custom message and pushing to SNS, I select the Message format type to be RAW.


Our rule has been created, now all that is left is for us to test that an email is successfully sent when the AWS IoT button is pressed once, and therefore the data payload has a click type of SINGLE.

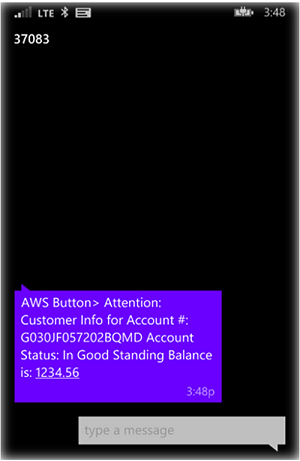
A single press of our AWS IoT Button and the custom message is published to the SNS Topic, and the email shown below was sent to the subscribed customer service agents email addresses; in this example, to my email address.

In order to create the AWS IoT rule that will send a text via Lambda and a SNS topic for the scenario in which customers request account status to be sent when the IoT Button is pressed twice. We will start by creating an AWS IoT rule with an AWS Lambda action. To create this IoT rule, we first need to create a Lambda function and the SNS Topic with a SNS text based subscription.
First, I will go to the Amazon SNS console and create a SNS Topic. After the topic is created, I will create a SNS text subscription for our SNS topic and add a number that will receive the text messages. I will then copy the SNS Topic ARN for use in my Lambda function. Please note, that I am creating the SNS Topic in a different region than previously created SNS topic to use a region with support for sending SMS via SNS. In the Lambda function, I will need to ensure the correct region for the SNS Topic is used by including the region as a parameter of the constructor of the SNS object. The created SNS topic, aws-iot-button-topic-text is shown below.

We now will go to the AWS Lambda console and create a Lambda function with an AWS IoT trigger, an IoT Type as IoT Button, and the requested Device Serial Number will be the serial number on the back of our AWS IoT Button. There is no need to generate the certificate and keys in this step because the AWS IoT button is already configured with certificates and keys for secure communication with AWS IoT.

The next is to create the Lambda function, IoTNotifyByText, with the following code that will receive the IoT button data payload and create a message to publish to Amazon SNS.
'use strict';

console.log('Loading function');
var AWS = require("aws-sdk");
var sns = new AWS.SNS({region: 'us-east-1'});

exports.handler = (event, context, callback) => {
    // Load the message as JSON object
    var iotPayload = JSON.stringify(event, null, 2);

    // Create a text message from IoT Payload
    var snsMessage = "Attention: Customer Info for Account #: " + event.accountnum + " Account Status: In Good Standing " +
    "Balance is: 1234.56"

    // Log payload and SNS message string to the console and for CloudWatch Logs
    console.log("Received AWS IoT payload:", iotPayload);
    console.log("Message to send: " + snsMessage);

    // Create params for SNS publish using SNS Topic created for AWS IoT button
    // Populate the parameters for the publish operation using required JSON format
    // - Message : message text
    // - TopicArn : the ARN of the Amazon SNS topic
    var params = {
        Message: snsMessage,
        TopicArn: "arn:aws:sns:us-east-1:xxxxxxxxxxxx:aws-iot-button-topic-text"
     };

     sns.publish(params, context.done);
};
All that is left is for us to do is to alter the AWS IoT rule automatically created when we created a Lambda function with an AWS IoT trigger. Therefore, we will go to the AWS IoT console and select Rules menu option. We will find and select the IoT button rule created by Lambda which usually has a name with a suffix that is equal to the IoT button device serial number.

Once the rule is selected, we will choose the Edit option beside the Rule query statement section.

We change the Select statement to return the serial number as the accountnum and click Update button to save changes to the AWS IoT rule.

Time to Test. I click the IoT button twice and wait for the green LED light to appear, confirming a successful connection was made and a message was published to AWS IoT. After a few seconds, a text message is received on my phone with the fictitious customer account information.
This was a simple example of how a business could leverage the AWS IoT Button in order to build business solutions for their customers. With the new AWS IoT Button Enterprise Program which helps businesses in obtaining the quantities of AWS IoT buttons needed, as well as, providing AWS IoT service pre-provisioning and deployment support; Businesses can now easily get started in building their own customized IoT solution.
Available Now
The original 1st generation of the AWS IoT button is currently available on Amazon.com, and the 2nd generation AWS IoT button will be generally available in February. The main difference in the IoT buttons are the amount of battery life and/or clicks available for the button. Please note that right now if you purchase the original AWS IoT button, you will receive $20 in AWS credits when you register.
Businesses can sign up today for the AWS IoT Button Enterprise Program currently in Limited Preview. This program is designed to enable businesses to expand their existing applications or build new IoT capabilities with the cloud and a click of an IoT button device. You can read more about the AWS IoT button and learn more about building solutions with a programmable IoT button on the AWS IoT Button product page. You can also dive deeper into the AWS IoT service by visiting the AWS IoT developer guide, the AWS IoT Device SDK documentation, and/or the AWS Internet of Things Blog.
– Tara
New – Create an Amazon Aurora Read Replica from an RDS MySQL DB Instance
Migrating from one database engine to another can be tricky when the database is supporting an application or a web site that is running 24×7. Without the option to take the database offline, an approach that is based on replication is generally the best solution.
Today we are launching a new feature that allows you to migrate from an Amazon RDS DB Instance for MySQL to Amazon Aurora by creating an Aurora Read Replica. The migration process begins by creating a DB snapshot of the existing DB Instance and then using it as the basis for a fresh Aurora Read Replica. After the replica has been set up, replication is used to bring it up to date with respect to the source. Once the replication lag drops to 0, the replication is complete. At this point, you can make the Aurora Read Replica into a standalone Aurora DB cluster and point your client applications at it.
Migration takes several hours per terabyte of data, and works for MySQL DB Instances of up to 6 terabytes. Replication runs somewhat faster for InnoDB tables than it does for MyISAM tables, and also benefits from the presence of uncompressed tables. If migration speed is a factor, you can improve it by moving your MyISAM tables to InnoDB tables and uncompressing any compressed tables.
To migrate an RDS DB Instance, simply select it in the AWS Management Console, click on Instance Actions, and choose Create Aurora Read Replica:

Then enter your database instance identifier, set any other options as desired, and click on Create Read Replica:

You can monitor the progress of the migration in the console:

After the migration is complete, wait for the Replica Lag to reach zero on the new Aurora Read Replica (use the SHOW SLAVE STATUS command on the replica and look for “Seconds behind master”) to indicate that the replica is in sync with the source, stop the flow of new transactions to the source MySQL DB Instance, and promote the Aurora Read Replica to a DB cluster:

Confirm your intent and then wait (typically a minute or so) until the new cluster is available:

Instruct your application to use the cluster’s read and write endpoints, and you are good to go!
— Jeff;
From Raspberry Pi to Supercomputers to the Cloud: The Linux Operating System
Matthew Freeman and Luis Daniel Soto are back talking about the use of Linux through the AWS Marketplace.
– Ana
Linux is widely used in corporations now as the basis for everything from file servers to web servers to network security servers. The no-cost as well as commercial availability of distributions makes it an obvious choice in many scenarios. Distributions of Linux now power machines as small as the tiny Raspberry Pi to the largest supercomputers in the world. There is a wide variety of minimal and security hardened distributions, some of them designed for GPU workloads.
Even more compelling is the use of Linux in cloud-based infrastructures. Its comparatively lightweight architecture, flexibility, and options for customizing it make Linux ideal as a choice for permanent network infrastructures in the cloud, as well as specialized uses such as temporary high-performance server farms that handle computational loads for scientific research. As a demonstration of their own commitment to the Linux platform, AWS developed and continues to maintain their own version of Linux that is tightly coupled with AWS services.
AWS has been a partner to the Linux and Open Source Communities through AWS Marketplace:
- It is a managed software catalog that makes it easy for customers to discover, purchase, and deploy the software and services they need to build solutions and run their businesses.
- It simplifies software licensing and procurement by enabling customers to accept user agreements, choose pricing options, and automate the deployment of software and associated AWS resources with just a few clicks.
- It can be searched and filtered to help you select the Linux distribution – independently or in combination with other components – that best suits your business needs.
Selecting a Linux Distribution for Your Company
If you’re new to Linux, the dizzying array of distributions can be overwhelming. Deciding which distribution to use depends on a lot of different factors, and customers tell us that the following considerations are important to them:
- Existing investment in Linux, if any. Is this your first foray into Linux? If so, then you’re in a position to weight all options pretty equally.
- Existing platforms in use (such as on-premises networks). Are you adding a cloud infrastructure that must connect to your in-house network? If so, you need to consider which of the Linux distributions has the networking and application connectors you require.
- Intention to use more than one cloud platform. Are you already using another cloud provider? Will it need to interconnect with AWS? Your choice of Linux distribution may be affected by what’s available for those connections.
- Available applications, libraries, and components. Your choice of Linux distribution should take into consideration future requirements, and ongoing software and technical support.
- Specialized uses, such as scientific or technical requirements. Certain applications only run on specific, customized Linux distributions.
By examining your responses to each of these areas, you can narrow the list of possible Linux distributions to suit your business needs.
Linux in AWS Marketplace
AWS Marketplace is a great place to locate and begin using Linux distributions along with the top applications that run on them. You can deploy different versions of the distributions from this online store, and AWS scans the catalog daily for security, if we found an issue we notify you — this increases your speed. Scans are run continuously to identify vulnerabilities. AWS notifies customers of any issues found and works with experts to find work-arounds and updates. In addition to support provided by the sellers, the AWS Forums are a great place to ask questions about using Linux on AWS by setting up a free account on the forum. You can also get further details about Linux on AWS from the AWS Documentation.
Applications from AWS Marketplace Running on Linux
Here is a sampling of the featured Linux distributions and applications that run on them, which customers launch from AWS Marketplace.
CentOS Versions 7, 6.5, and 6
The CentOS Project is a community-driven, free software effort focused on delivering a robust open source ecosystem. CentOS is derived from the sources of Red Hat Enterprise Linux (RHEL), and it aims to be functionally compatible with RHEL. CentOS Linux is no-cost to use, and free to redistribute. For users, CentOS offers a consistent, manageable platform that suits a wide variety of deployments. For open source communities, it offers a solid, predictable base to build upon, along with extensive resources to build, test, release, and maintain their code. AWS has several CentOS AMIs that you can launch to take advantage of the stability and widespread use of this distribution.
Debian GNU Linux
Debian GNU/Linux, which includes the GNU OS tools and Linux kernel, is a popular and influential Linux distribution. Users have access to repositories containing thousands of software packages ready for installation and use. Debian is known for relatively strict adherence to the philosophies of Unix and free software as well as using collaborative software development and testing processes. It is popular as a web server operating system. Debian officially contains only free software, but non-free software can be downloaded from the Debian repositories and installed. Debian focuses on stability and security, and is used as a base for many other distributions. AWS has AMIs for Debian available for launch immediately.
Amazon Linux AMI
Amazon Linux is a supported and maintained Linux image provided by AWS. Amazon EC2 Container Service makes it easy to manage Docker containers at scale by providing a centralized service that includes programmatic access to the complete state of the containers and Amazon EC2 instances in the cluster, schedules containers in the proper location, and uses familiar Amazon EC2 features like security groups, Amazon EBS volumes, and IAM roles. Amazon ECS allows you to make containers a foundational building block for your applications by eliminating the need to run a cluster manager, and by providing programmatic access to the full state of your cluster.
Other popular distributions available in AWS Marketplace include Ubuntu, SUSE, Red Hat, Oracle Linux, Kali Linux and more.
Getting Started with Linux on AWS Marketplace
You can view a list hundreds of Linux offerings by simply selecting the Operating System category from the Shop All Categories link on the AWS Marketplace home screen.

From there you can select your preferred distribution and browse the available offerings:

Most offerings include the ability to launch using 1-Click, so your Linux server can be up and running in minutes.
Flexibility with Pay-As-You-Go Pricing
You pay Amazon EC2 usage costs plus per hour (or per month or annual) and, if applicable, commercial Linux cost for certain distributions directly through your AWS account. You can see in advance what your costs will be, depending on the instance type you select. As a result, using AWS Marketplace is one of the fastest and easiest ways to launch your Linux solution.
Visit http://aws.amazon.com/mp/linux to learn more about Linux on AWS Marketplace.
Matthew Freeman and Luis Daniel Soto
Ready-to-Run Solutions: Open Source Software in AWS Marketplace
There are lot’s of exciting things going on in the AWS Marketplace. Here to tell you more about open source software in the marketplace are Matthew Freeman and Luis Daniel Soto.
– Ana
According to industry research, enterprise use of open source software (OSS) is on the rise. More and more corporate-based developers are asking to use available OSS libraries as part of ongoing development efforts at work. These individuals may be using OSS in their own projects (i.e. evenings and weekends), and naturally want to bring to work the tools and techniques that help them elsewhere.
Consequently, development organizations in all sectors are examining the case for using open source software for applications within their own IT infrastructures as well as in the software they sell. In this Overview, we’ll show you why obtaining your open source software through AWS makes sense from a development and fiscal perspective.
Open Source Development Process
Because open source software is generally developed in independent communities of participants, acquiring and managing software versions is usually done through online code repositories. With code coming from disparate sources, it can be challenging to get the code libraries and development tools to work well together. But AWS Marketplace lets you skip this process and directly launch EC2 instances with the OSS you want. AWS Marketplace also has distributions of Linux that you can use as the foundation for your OSS solution.
Preconfigured Stacks Give You an Advantage
While we may take this 1-Click launch ability for granted with commercial software, for OSS, having preconfigured AMIs is a huge advantage. AWS Marketplace gives software companies that produce combinations or “stacks” of the most popular open source software a location from which these stacks can be launched into the AWS cloud. Companies such as TurnKey and Bitnami use their OSS experts to configure and optimize these code stacks so that the software works well together. These companies stay current with new releases of the OSS, and update their stacks accordingly as soon as new versions are available. Some of these companies also offer cloud hosting infrastructures as a paid service to make it even easier to launch and manage cloud-based servers.
As an example, one of the most popular combinations of open source software is the LAMP stack, which consists of a Linux distribution, Apache Web Server, a MySQL database, and the PHP programming library. You can select a generic LAMP stack based on the Linux distribution you prefer, then install your favorite development tools and libraries.

You would then add to it any adjustments to the underlying software that you need or want to make for your application to run as expected. For example, you may want to change the memory allocations for the application, or change the maximum file upload size in the PHP settings.
You could select an OSS application stack that contains the LAMP elements plus a single application such as WordPress, Moodle, or Joomla!®. These stacks would be configured by the vendor with optimal settings for that individual application so that it runs smoothly, with sufficient memory and disk allocations based on the application requirements. This is where stack vendors excel in providing added value to the basic software provisioning.

You might instead choose a generic LAMP stack because you need to combine multiple applications on a single server that use common components. For example, WordPress has plugins that allow it to interoperate with Moodle directly. Both applications use Apache Web Server, PHP, and MySQL. You save time by starting with the LAMP stack, and configuring the components individually as needed for WordPress and Moodle to work well together.

These are just 2 real-world examples of how you could use a preconfigured solution from AWS Marketplace and adapt it to your own needs.
OSS in AWS Marketplace
AWS Marketplace is one of the largest sites for obtaining and deploying OSS tools, applications, and servers. Here are some of the other categories in which OSS is available.
- Application Development and Test Tools. You can find on AWS Marketplace solutions and CloudFormation templates for EC2 servers configured with application frameworks such as Zend, ColdFusion, Ruby on Rails, and Node.js. You’ll also find popular OSS choices for development and testing tools, supporting agile software development with key product such as Jenkins for test automation, Bugzilla for issue tracking, Subversion for source code management and configuration management tools. Learn more »
- Infrastructure Software. The successful maintenance and protection of your network is critical to your business success. OSS libraries such as OpenLDAP and OpenVPN make it possible to launch a cloud infrastructure to accompany or entirely replace an on-premises network. From offerings dedicated to handling networking and security processing to security-hardened individual servers, AWS Marketplace has numerous security solutions available to assist you in meeting the security requirements for different workloads. Learn more »
- Database and Business Intelligence. Including OSS database, data management and open data catalog solutions. Business Intelligence and advanced analytics software can help you make sense of the data coming from transactional systems, sensors, cell phones, and a whole range of Internet-connected devices. Learn more »
- Business Software. Availability, agility, and flexibility are key to running business applications in the cloud. Companies of all sizes want to simplify infrastructure management, deploy more quickly, lower cost, and increase revenue. Business Software running on Linux provides these key metrics. Learn more »
- Operating Systems. AWS Marketplace has a wide variety of operating systems from FreeBSD, minimal and security hardened Linux installations to specialized distributions for security and scientific work. Learn more »
How to Get Started with OSS on AWS Marketplace
Begin by identifying the combination of software you want, and enter keywords in the Search box at the top of the AWS Marketplace home screen to find suitable offerings.

Or if you want to browse by category, just click “Shop All Categories” and select from the list.

Once you’ve made your initial search or selection, there are nearly a dozen ways to filter the results until the best candidates remain. For example, you can select your preferred Linux distribution by expanding the All Linux filter to help you find the solutions that run on that distribution. You can also filter for Free Trials, Software Pricing Plans, EC2 Instance Types, AWS Region, Average Rating, and so on.

Click on the title of the listing to see the details of that offering, including pricing, regions, product support, and links to the seller’s website. When you’ve made your selections, and you’re ready to launch the instance, click Continue, and log into your account.

Because you log in, AWS Marketplace can detect the presence of existing security groups, key pairs, and VPC settings. Make adjustments on the Launch on EC2 page, then click Accept Software Terms & Launch with 1-Click, and your instance will launch immediately.

If you prefer you can do a Manual Launch using the AWS Console with the selection you’ve made, or start the instance using the API or command line interface (CLI). Either way, your EC2 instance is up and running within minutes.
Flexibility with Pay-As-You-Go Pricing
You pay Amazon EC2 usage costs plus per hour (or per month or annual) and, if applicable, commercial open source software fees directly through your AWS account. As a result, using AWS Marketplace is one of the fastest and easiest ways to get your OSS software up and running.
Visit http://aws.amazon.com/mp/oss to learn more about open source software on AWS Marketplace.
Matthew Freeman, Category Development Lead, AWS Marketplace
Luis Daniel Soto, Sr. Category GTM Leader, AWS Marketplace
AWS Lambda – A Look Back at 2016
2016 was an exciting year for AWS Lambda, Amazon API Gateway and serverless compute technology, to say the least. But just in case you have been hiding away and haven’t heard of serverless computing with AWS Lambda and Amazon API Gateway, let me introduce these great services to you. AWS Lambda lets you run code without provisioning or managing servers, making it a serverless compute service that is event-driven and allows developers to bring their functions to the cloud easily for virtually any type of application or backend. Amazon API Gateway helps you quickly build highly scalable, secure, and robust APIs at scale and provides the ability to maintain and monitor created APIs.
With the momentum of serverless in 2016, of course, the year had to end with a bang as the AWS team launched some powerful service features at re:Invent to make it even easier to build serverless solutions. These features include:
- AWS Greengrass: Run local compute, messaging & data caching for connected IoT devices using Lambda and AWS IoT; https://aws.amazon.com/blogs/aws/aws-greengrass-ubiquitous-real-world-computing/
- Lambda@Edge Preview: New Lambda feature that allows code to be run at global AWS edge locations and triggered in response to Amazon CloudFront requests to reduce network latency to end users; https://aws.amazon.com/blogs/aws/coming-soon-lambda-at-the-edge/
- AWS Batch Preview: Batch computing workload planning, scheduling, and execution across AWS compute services including upcoming Lambda integration as a batch Job; https://aws.amazon.com/blogs/aws/aws-batch-run-batch-computing-jobs-on-aws/
- AWS X-Ray: Analyze and debug distributed applications, such as those built using a microservices architecture, written in Java, Node.js, and .NET deployed on EC2, ECS, AWS Elastic Beanstalk, and upcoming AWS Lambda support; https://aws.amazon.com/blogs/aws/aws-x-ray-see-inside-of-your-distributed-application/
- Continuous Deployment for Serverless: AWS services to create a continuous deployment pipeline for your serverless applications; https://aws.amazon.com/blogs/compute/continuous-deployment-for-serverless-applications/
- Step Functions: Using visual workflows as a reliable way to organize the components of microservices and distributed applications; https://aws.amazon.com/blogs/aws/new-aws-step-functions-build-distributed-applications-using-visual-workflows/
- Snowball Edge: Petabyte-scale data transport appliance with on-board storage and Lambda-powered local processing: https://aws.amazon.com/blogs/aws/aws-snowball-edge-more-storage-local-endpoints-lambda-functions/
- Dead Letter Queues: Support for Lambda function failure notifications to queue or another notification system
- C# Support: C# code as a supported language for AWS Lambda
- API Gateway Monetization: Integration of API Gateway with AWS Marketplace
- API Gateway Developer Portal: Open source serverless web application to get started building your own developer portal
Since Jeff has already introduced most of the aforementioned new service features for building distributed applications and microservices like Step Functions, let’s walk-through the last four new features not yet discussed using a common serverless use case example: Real-time Stream Processing. In our walk-through of the stream processing use case, we will implement a Dead Letter Queue for notifications of errors that may come from the Lambda function processing a stream of data, we will take an existing Lambda function written in Node.js to process the stream and rewrite it using the C# language. We then will build an example of the monetization of a Lambda backed API using API Gateway’s integration with AWS Marketplace. This will be exciting, so let’s get started.
During the AWS Developer Days in San Francisco and Austin, I presented an example of leveraging AWS Lambda for real-time stream processing by building a demo showcasing a streaming solution with Twitter Streaming APIs. I will build upon this example to demonstrate the power of Dead Letter Queues (DLQ), C# Support, API Gateway Monetization features, and the open source template for API Gateway Developer Portal. In the demo, a console or web application streams tweets gathered from the Twitter Streaming API that has the keywords ‘awscloud’ and/or ‘serverless’. Those tweets are sent real-time to Amazon Kinesis Streams where Lambda detects the new records and processes the stream batch by writing the tweets to the NoSQL database, Amazon DynamoDB.
Now that we understand the real-time streaming process demo’s workflow, let’s take a deeper look at the Lambda function that processes the batch records from Kinesis. First, you will notice below that the Lambda function, DevDayStreamProcessor, has an event source or trigger that is a Kinesis stream named DevDay2016Stream with a Batch size of 100. Our Lambda function will poll the stream periodically for new records and automatically read and process batches of records, in this case, the tweets detected on the stream.

Now we will examine our Lambda function code which is written in Node.js 4.3. The section of the Lambda function shown below loops through the batch of tweet records from our Kinesis stream, parses each record, and writes desired tweet information into an array of JSON data. The array of the JSON tweet items is passed to the function, ddbItemsWrite which is outside of our Lambda handler.
'use strict';
console.log('Loading function');

var timestamp;
var twitterID;
var tweetData;
var ddbParams;
var itemNum = 0;
var dataItemsBatch = [];
var dbBatch = [];
var AWS = require('aws-sdk');
var ddbTable = 'TwitterStream';
var dynamoDBClient = new AWS.DynamoDB.DocumentClient();

exports.handler = (event, context, callback) => {
    var counter = 0;

    event.Records.forEach((record) => {
        // Kinesis data is base64 encoded so decode here
        console.log("Base 64 record: " + JSON.stringify(record, null, 2));
        const payload = new Buffer(record.kinesis.data, 'base64').toString('ascii');
        console.log('Decoded payload:', payload);

        var data = payload.replace(/[\u0000-\u0019]+/g," ");
        try
        {  tweetData = JSON.parse(data);   }
        catch(err)
        {  callback(err, err.stack);   }

        timestamp = "" + new Date().getTime();
        twitterID = tweetData.id.toString();
        itemNum = itemNum+1;

         var ddbItem = {
                PutRequest: {
                    Item: {
                        TwitterID: twitterID,
                        TwitterUser: tweetData.username.toString(),
                        TwitterUserPic: tweetData.pic,
                        TwitterTime: new Date(tweetData.time.replace(/( \+)/, ' UTC$1')).toLocaleString(),
                        Tweet: tweetData.text,
                        TweetTopic: tweetData.topic,
                        Tags: (tweetData.hashtags) ? tweetData.hashtags : " ",
                        Location: (tweetData.loc) ? tweetData.loc : " ",
                        Country: (tweetData.country) ? tweetData.country : " ",
                        TimeStamp: timestamp,
                        RecordNum: itemNum
                    }
                }
            };

            dataItemsBatch.push(ddbItem);
            counter++;
});

    var twitterItems = {};
    twitterItems[ddbTable] = dataItemsBatch;
    ddbItemsWrite(twitterItems, 0, context, callback);

};
The ddbItemsWrite function shown below will take the array of JSON tweet records processed from the Kinesis stream, and write the records multiple items at a time to our DynamoDB table using batch operations. This function leverages the DynamoDB best practice of retrying unprocessed items by implementing an exponential backoff algorithm to prevent write request failures due to throttling on the individual tables.
 function ddbItemsWrite(items, retries, ddbContext, ddbCallback)
    {
        dynamoDBClient.batchWrite({ RequestItems: items }, function(err, data)
            {
                if (err)
                {
                    console.log('DDB call failed: ' + err, err.stack);
                    ddbCallback(err, err.stack);
                }
                else
                {
                    if(Object.keys(data.UnprocessedItems).length)
                    {
                        console.log('Unprocessed items remain, retrying.');
                        var delay = Math.min(Math.pow(2, retries) * 100, ddbContext.getRemainingTimeInMillis() - 200);
                        setTimeout(function() {ddbItemsWrite(data.UnprocessedItems, retries + 1, ddbContext, ddbCallback)}, delay);
                    }
                    else
                    {
                         ddbCallback(null, "Success");
                         console.log("Completed Successfully");
                    }
                }
            }
        );
    }
Currently, this Lambda function works as expected and will successfully process tweets captured in Kinesis from the Twitter Streaming API, however, this function has a flaw that will cause an error to occur when processing batch write requests to our DynamoDB table. In the Lambda function, the current code does not take into account that the DynamoDB batchWrite function should be comprised of no more than 25 write (put) requests per single call to this function up to 16 MB of data. Therefore, without changing the code appropriately to have the ddbItemsWrite function to handle batches of 25 or have the handler function put items in the array in groups of 25 requests before sending to the ddbItemsWrite function; there will be a validation exception thrown when the batch of tweets items sent is greater than 25. This is a great example of a bug that is not easily detected in small-scale testing scenarios yet will cause failures under production load.
Dead Letter Queues
Now that we are aware of an event that will cause the ddbItemsWrite Lambda function to throw an exception and/or an event that will fail while processing records, we have a first-rate scenario for leveraging Dead Letter Queues (DLQ).
Since AWS Lambda DLQ functionality is only available for asynchronous event sources like Amazon S3, Amazon SNS, AWS IoT or direct asynchronous invocations, and not for streaming event sources such as Amazon Kinesis or Amazon DynamoDB streams; our first step is to break this Lambda function into two functions. The first Lambda function will handle the processing of the Kinesis stream, and the second Lambda function will take the data processed by the first function and write the tweet information to DynamoDB. We will then setup our DLQ on the second Lambda function for the error that will occur on writing the batch of tweets to DynamoDB as noted above.
We have two options when setting up a target for our DLQ; Amazon SNS topic or an Amazon SQS queue. In this walk-through, we will opt for using an Amazon SQS queue. Therefore, my first step in using DLQ is to create a SQS Standard queue. A Standard queue type is a queue which has high transactions throughput, a message will be delivered at least once, but another copy of the message may also be delivered, and it is possible that messages might be delivered in an order different from which they were sent. You can learn more about creating SQS queues and queue type in the Amazon SQS documentation.
Once my queue, StreamDemoDLQ, is created, I will grab the ARN from the Details tab of this selected queue. If I am not using the console to designate the DLQ resource for this function, I will need the ARN for the queue for my Lambda function to identify this SQS queue as the DLQ target for error and event failure notifications. Additionally, I will use the ARN to add permissions to my Lambda execution role policy in order to access this SQS queue.

I will now return to my Lambda function and select the Configuration tab and expand the Advanced settings section. I will select SQS in the DLQ Resource field and select my StreamDemoDLQ queue in the SQS Queue field dropdown.

Remember, the execution role for the Lambda function must explicitly provide sqs:SendMessage access permissions to in order to successfully send messages to your SQS DLQ. Therefore, I ensured that my Lambda role, lambda_kinesis_role, has the following IAM policy for SQS permissions.

We have now successfully configured a Dead Letter Queue for our Lambda function using Amazon SQS. To learn more about Dead Letter Queues in Lambda, read the Troubleshooting and Monitoring section of the AWS Lambda Developer Guide and check out the AWS Compute Blog post on Dead Letter Queues.
C# Support
As I mentioned earlier, another very exciting feature added to Lambda during AWS re:Invent was the support for the C# language via the open source .NET Core 1.0 platform. Since the Lambda console does not offer editing for compiled languages yet, in order to author a C# Lambda function you can use tooling in Visual Studio with the AWS Toolkit, Yeoman, and/or the .NET CLI. To deploy Lambda functions written in C#, you can use the Lambda plugin in the AWS ToolKit for Visual Studio or create a deployment package with the .NET Core command line.
A C# Lambda function handler should be defined as an instance or static method in a class. There are two handler function parameters; the first is the input type which is the event data and second is the Lambda context object of type ILambdaContext. The event data input object types for AWS Services include the following:
- Amazon.Lambda.APIGatewayEvents
- Amazon.Lambda.CognitoEvents
- Amazon.Lambda.ConfigEvents
- Amazon.Lambda.DynamoDBEvents
- Amazon.Lambda.KinesisEvents
- Amazon.Lambda.S3Events
- Amazon.Lambda.SNSEvents
Now that we have discussed more detail around C# Support in Lambda, let’s rewrite our DevDayStreamProcessor lambda function with the C# language. For this example, I will use Visual Studio IDE to write the Lambda function, and additionally take advantage of the AWS Lambda Visual Studio plugin to deploy the function. Remember in order to use the AWS Toolkit for Visual Studio with Lambda, you will need to have Visual Studio 2015 Update 3 version and NET Core tools. You can read more about installing Visual Studio 2015 Update 3 and .NET Core here.
To create the C# function using Visual Studio, I start a New Project, select AWS Lambda Project (.NET Core) and name it ServerlessStreamProcessor.

What’s really cool about taking advantage of the AWS Toolkit for Visual Studio to author this function, is that inside of Visual Studio I can use Lambda blueprints to get started in a similar way that I would in using the Lambda console. Therefore in order to replicate the DevDayStreamProcessor in C#, I will select the Simple Kinesis Function blueprint.

It should be noted that when writing Lambda functions in C#, there is no need to mark the class declaration nor the target handler function as a Lambda function. Additionally, when writing CloudWatch logs you can use the standard C# Console class WriteLine function or use the ILambdaContext LogLine function found as a part of the ILambdaContext interface. With the template for accessing the Kinesis stream in place, I finish writing the C# Lambda function, ServerlessStreamProcessor, utilizing the same variable names as in the Node.js code in DevDayStreamProcessor. Please note the C# Lambda handler function below.
using System.Collections.Generic;
using Amazon.Lambda.Core;
using Amazon.Lambda.KinesisEvents;
using Amazon.DynamoDBv2;
using Amazon.DynamoDBv2.DataModel;
using Newtonsoft.Json.Linq;

// Assembly attribute to enable the Lambda function's JSON input to be converted into a .NET class.
[assembly: LambdaSerializerAttribute(typeof(Amazon.Lambda.Serialization.Json.JsonSerializer))]

namespace ServerlessStreamProcessor
{
    public class LambdaTwitterStream
    {
        string twitterID, timeStamp;
        int itemNum = 0;

        private static AmazonDynamoDBClient dynamoDBClient = new AmazonDynamoDBClient();
        List<TwitterItem> dataItemsBatch = new List<TwitterItem>();

        public void FunctionHandler(KinesisEvent kinesisEvent, ILambdaContext context)
        {
            DynamoDBContext dbContext = new DynamoDBContext(dynamoDBClient);
            context.Logger.LogLine($"Beginning to process {kinesisEvent.Records.Count} records...");

            foreach (var record in kinesisEvent.Records)
            {
                context.Logger.LogLine($"Event ID: {record.EventId}");
                context.Logger.LogLine($"Event Name: {record.EventName}");

                // Kinesis data is base64 encoded so decode here
                string tweetData = GetRecordContents(record.Kinesis);
                context.Logger.LogLine($"Decoded Payload: {tweetData}");
                tweetData = @"" + tweetData;
                JObject twitterObj = JObject.Parse(tweetData);

                twitterID = twitterObj["id"].ToString();
                timeStamp = DateTime.Now.Millisecond.ToString();
                itemNum++;
                context.Logger.LogLine(timeStamp);
                context.Logger.LogLine($"Twitter ID is: {twitterID}");
                context.Logger.LogLine(itemNum.ToString());

                TwitterItem ddbItem = new TwitterItem()
                {
                    TwitterID = twitterID,
                    TwitterUser = twitterObj["username"].ToString(),
                    TwitterUserPic = twitterObj["pic"].ToString(),
                    TwitterTime = DateTime.Parse(twitterObj["time"].ToString()).ToUniversalTime().ToString(),
                    Tweet = twitterObj["text"].ToString(),
                    TweetTopic = twitterObj["topic"].ToString(),
                    Tags = twitterObj["hashtags"] != null ? twitterObj["hashtags"].ToString() : String.Empty,
                    Location = twitterObj["loc"] != null ? twitterObj["loc"].ToString() : String.Empty,
                    Country = twitterObj["country"] != null ? twitterObj["country"].ToString() : String.Empty,
                    TimeStamp =  timeStamp,
                    RecordNum = itemNum
                };

                dataItemsBatch.Add(ddbItem);
            }

            context.Logger.LogLine(JObject.FromObject(dataItemsBatch).ToString());
            ddbItemsWrite(dataItemsBatch, 0, dbContext, context);
            context.Logger.LogLine("Success - Completed Successfully");
            context.Logger.LogLine("Stream processing complete.");
        }
There are only a few differences that should be noted between our Kinesis stream processor written in C# and our original Node.js code. Since the input parameter type supported by default in C# Lambda functions is the System.IO.Stream type, the Kinesis base64 string is decoded by using a StreamReader with ASCII encoding in a blueprint provided function, GetRecordContents.
private string GetRecordContents(KinesisEvent.Record streamRecord)
{
    using (var reader = new StreamReader(streamRecord.Data, Encoding.ASCII))
    {
        return reader.ReadToEnd();
    }
}
The other thing to note is that in order to write the tweet data to the DynamoDB Table, I added the AWS .NET SDK NuGet package for DynamoDB; AWSSDK.DynamoDBv2 to the Lambda function project via the NuGet package manager within Visual Studio. I also created a .NET data object, TwitterItem, to map to the data being stored in the DynamoDB table. Using the AWS .NET SDK higher level programming interface, object persistence model for DynamoDB, I created a collection of TwitterItem objects to be written via the BatchWrite object class in our ddbItemsWrite C# function.
private async void ddbItemsWrite(List<TwitterItem> items, int retries, DynamoDBContext ddbContext, ILambdaContext context)
{
BatchWrite<TwitterItem> twitterStreamBatchWrite = ddbContext.CreateBatchWrite<TwitterItem>();

        try
        {
            twitterStreamBatchWrite.AddPutItems(items);
            await twitterStreamBatchWrite.ExecuteAsync();
        }
        catch (Exception ex)
        {
            context.Logger.LogLine($"DDB call failed: {ex.Source} ");
            context.Logger.LogLine($"Exception: {ex.Message}");
            context.Logger.LogLine($"Exception Stacktrace: {ex.StackTrace}");
        }
}
Another benefit of using AWS Toolkit for Visual Studio to author my C# Lambda function is that I can deploy my Lambda function directly to AWS with a single click. Selecting my project name in the Solution Explorer and performing a right-click, I get a menu option, Publish to AWS Lambda, which brings up a menu for information to include about my Lambda function for deployment to AWS.

It is important to note that the handler function signature follows the nomenclature of Assembly :: Namespace :: ClassName :: Method, therefore, the signature of our C# Lambda function shown here is: ServerlessStreamProcessor :: ServerlessStreamProcessor.LambdaTwitterStream :: FunctionHandler. We provide this information to the Upload to AWS Lambda dialog box and select Next to assign a role for the function.


Upon completion, you can test in the Lambda console or in Visual Studio with AWS toolkit provided plugin (shown below) using the sample data of the triggering event source for an iterative approach to developing the Lambda function.

You can learn more about authoring AWS Lambda functions using the C# Language in the AWS Lambda developer guide or by reading the post announcing C# Support on the Compute Blog.
API Gateway Monetization and Developer Portal
If you have been following the microservices momentum, you may be aware of an architectural pattern that calls for using smart endpoints and/or using an API gateway via REST APIs to manage access and exposure of individual services that make up a microservices solution. Amazon API Gateway enables creation and management of RESTful APIs to expose AWS Lambda functions, external HTTP endpoints, as well as, other AWS services. In addition, Amazon API Gateway allows clients and external developers to have access to a deployed APIs by via HTTP protocol or a platform/language targeted SDK.
With the introduction of SaaS Subscriptions on AWS Marketplace and the API Gateway integration with the AWS Marketplace, you can now monetize your APIs by allowing customers to directly consume the APIs you create with API Gateway in the AWS Marketplace. AWS customers can subscribe and be billed for the APIs published on the marketplace with their existing AWS account. With the integration of API Gateway with the AWS Marketplace, the process to get started is easy on the AWS Marketplace.
To get started, you must ensure that you have enabled the Usage Plan feature in Amazon API Gateway.

Once enabled the next step is to create a Usage Plan, enable throttling (if desired) with targeted rate and burst request thresholds, and finally enable quotas (if you choose) by providing targeted request quota per a set timeframe.

Next, we would choose our APIs and related stage(s) that we wish to be associated with the usage plan. Please note that this is an optional step as you can opt not associate a specific API with your usage plan.

All that is left to do is add or create an API key for the usage plan. Again, it should be noted that this is also an optional step in creating your usage plan.

Now that we have our usage plan, StreamingPlan, we are ready for the next step in preparation for selling our API on the marketplace. You have the option to create multiple usage plans with varying APIs and limits, and sell these plans as differentiated API products on AWS Marketplace.

In order to enable customers to buy our new API product, however, the AWS Marketplace requires that each API product has an external developer portal to handle subscription requests, provide API information details and ability for the management of usage.
This customer need for an external developer portal for the marketplace birthed the new open source API Gateway developer portal serverless web application implementation. The goal of the API Gateway developer portal project was to allow customers to follow a few easy steps to create a serverless web application that lists a catalog of your APIs built with API Gateway while allowing for developer signups.
The API Gateway developer portal was built upon AWS Serverless Express; an open source library published by AWS which aids you in utilizing AWS Lambda and Amazon API Gateway in building web applications/services with the Node.js Express framework. Additionally, the API Gateway developer portal application uses an AWS SAM (Serverless Application Model) template to deploy its serverless resources. AWS SAM is a simplified CloudFormation template and specification that allows easier management and deployment of serverless applications on AWS.
To build your developer portal using the API Gateway portal, you would start by cloning the aws-api-gateway-developer-portal project from GitHub.

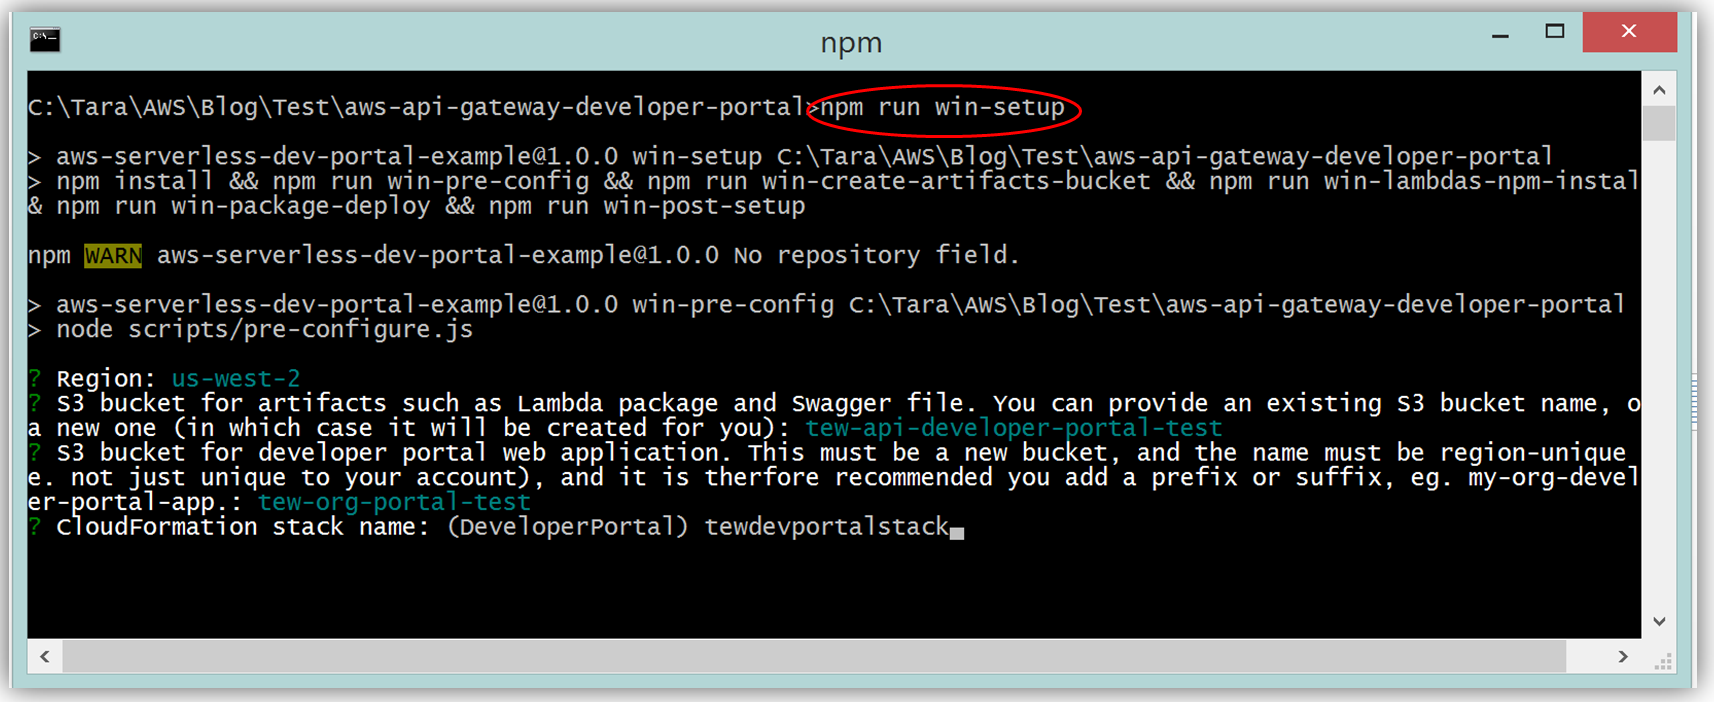
Assuming you have the latest version of the AWS CLI and Node.js installed, you would setup the developer portal by running “npm run setup” on the command line for Mac and Linux OS users. For Windows users, you would run “npm run win-setup” on the command line setup the developer portal.

The result is a functional sample developer portal website running on S3 that you can customize in order to create your own developer portal for your APIs.

The frontend of the sample developer portal website is built with the React JavaScript library, and the backend is an AWS Lambda function running using the aws-serverless-express library. Additionally, a Lambda function with a SNS event source was created as a listener for notification when customers subscribe or unsubscribe to your API via the AWS Marketplace console. You can learn more about the steps to build, customize, and deploy your API Gateway developer portal web application with this reference project by visiting the AWS Compute blog post which discusses the architecture and implementation in more detail.
The next key step in monetizing our API is establishing an account on the AWS Marketplace. If an account is not already established, registering is simply verifying that you meet the requirement prerequisites provided in the AWS Marketplace Seller Guide and completing a seller registration form on the AWS Marketplace Management Portal. You can see a snapshot of the start of the seller registration form below.

To list the API, you would fill a product load form describing the API, establish the pricing for the API, and provide t\he IDs of AWS Accounts that will test the API subscription process. Completing this form would also require you to submit the URL for your API developer portal.
When your seller registration is complete, you will be supplied an AWS Marketplace product code. You will need to associate your marketplace product code with your API usage plan. In order to complete this step, you would simply log into the API Gateway console and go to your API usage plan. Go to the Marketplace tab and enter your product code. This tells API Gateway to send measurement data to AWS Marketplace when your API is used.

With your Amazon API Gateway managed API packaged into a usage plan, the accompanying API developer portal created, seller account registration completed, and product code associated with API usage plan; we are now ready to monetize our API on the AWS Marketplace.
Learn more about monetizing your APIs created with API Gateway by checking out the related blog post and reviewing the API Gateway developer guide documentation.
Summary
As you can see, the AWS teams were busy in 2016 working to make the customer experience easier for creating and deploying serverless architectures, as well as, providing mechanisms for customers to generate and monetize their API Gateway managed APIs.
Visit the product documentation for AWS Lambda and Amazon API Gateway to learn more about these services and all the newly released features.
– Tara
AWS re:Start – Training and Job Placement in the UK
 As a follow-on to the recent launch of the AWS Region in London, I am happy to be able to tell you about a new UK-centric training and job placement program that we call AWS re:Start. This program is designed to educate young adults, military veterans, members of the military reserve, those leaving the Armed Forces, and service spouses on the latest software development and cloud computing technologies.
We’re working closely with QA Consulting (an APN Training Partner), The Prince’s Trust, and the Ministry of Defence (MoD). In conjunction with members of AWS Partner Network (APN) and customers, work placements will be offered to 1,000 people as part of this program.
AWS re:Start is designed to accommodate participants at all levels of experience – even those with no previous technical knowledge can sign up. Participants who join AWS re:Start will complete technical training classes, led by AWS certified instructors, and will gain experience through on-the-job training. They will also learn about about multi-tier architectures, application programming interfaces (APIs), and microservices, giving them the knowledge and skills needed to help businesses to build secure, elastically scalable, and highly-reliable applications in the cloud. Training content for the AWS re:Start program will be curated by AWS in collaboration with QA Consulting, who will also deliver the training courses.
Organizations that have pledged job placements to AWS re:Start include Annalect, ARM, Claranet, Cloudreach, Direct Line Group, EDF Energy, Funding Circle, KCOM, Sage, Tesco Bank, and Zopa. Participants completing the program can expect to be eligible for many different technical positions within these companies, including highly sought-after entry level positions such as such as first line help desk support, IT support analyst, software developer, IT support technician, network engineer, IT recruitment consultant, and IT sales roles. They will also have the fundamental knowledge needed to immediately start working with AWS and building their own technology start-up business. To learn more about this aspect of the program, read AWS re:Start for Employers.
AWS re:Start for the Military
AWS re:Start training and work placements for the Armed Forces, including reservists, veterans, service leavers, and service spouses will be delivered through the Ministry of Defence and the Career Transition Partnership (CTP). AWS is also proud to be signing the Armed Forces Covenant, which establishes how businesses support members of the UK Armed Forces community and guards against discrimination returning service men and women may face when entering the civilian workforce.
AWS re:Start for Young Adults
The AWS re:Start program will be delivered to young adults through The Prince’s Trust Get into Technology program. The Prince’s Trust is a youth charity that helps young people aged 13 to 30 find jobs, education, and training to help them succeed. In addition to technical training, the ‘Get into Technology’ program will support students with mentoring, soft work skills, and help in applying for jobs including resume writing and interview skills.
Learn More / Apply Now
The first intake of participants for AWS re:Start is scheduled for March 27, 2017. Those who complete the AWS re:Start program will be eligible to apply for further training courses offered by QA Consulting to prepare them to take the AWS Associate Level Certification exam and other certifications. Visit the AWS re:Start site to learn more.
— Jeff;
Reduce DDoS Risks Using Amazon Route 53 and AWS Shield
In late October of 2016 a large-scale cyber attack consisting of multiple denial of service attacks targeted a well-known DNS provider. The attack, consisting of a flood of DNS lookups from tens of millions of IP addresses, made many Internet sites and services unavailable to users in North America and Europe. This Distributed Denial of Service (DDoS) attack was believe to have been executed using a botnet consisting of a multitude of Internet-connected devices such as printers, camera, residential network gateways, and even baby monitors. These devices had been infected with the Mirai malware and generated several hundreds of gigabytes of traffic per second. Many corporate and educational networks simply do not have the capacity to absorb a volumetric attack of this size.
In the wake of this attack and others that have preceded it, our customers have been asking us for recommendations and best practices that will allow them to build systems that are more resilient to various types of DDoS attacks. The short-form answer involves a combination of scale, fault tolerance, and mitigation (the AWS Best Practices for DDoS Resiliency white paper goes in to far more detail) and makes use of Amazon Route 53 and AWS Shield (read AWS Shield – Protect Your Applications from DDoS Attacks to learn more).
Scale – Route 53 is hosted at numerous AWS edge locations, creating a global surface area capable of absorbing large amounts of DNS traffic. Other edge-based services, including Amazon CloudFront and AWS WAF, also have a global surface area and are also able to handle large amounts of traffic.
Fault Tolerance – Each edge location has many connections to the Internet. This allows for diverse paths and helps to isolate and contain faults. Route 53 also uses shuffle sharding and anycast striping to increase availability. With shuffle sharding, each name server in your delegation set corresponds to a unique set of edge locations. This arrangement increases fault tolerance and minimizes overlap between AWS customers. If one name server in the delegation set is not available, the client system or application will simply retry and receive a response from a name server at a different edge location. Anycast striping is used to direct DNS requests to an optimal location. This has the effect of spreading load and reducing DNS latency.
Mitigation – AWS Shield Standard protects you from 96% of today’s most common attacks. This includes SYN/ACK floods, Reflection attacks, and HTTP slow reads. As I noted in my post above, this protection is applied automatically and transparently to your Elastic Load Balancers, CloudFront distributions, and Route 53 resources at no extra cost. Protection (including deterministic packet filtering and priority based traffic shaping) is deployed to all AWS edge locations and inspects all traffic with just microseconds of overhead, all in a totally transparent fashion. AWS Shield Advanced includes additional DDoS mitigation capability, 24×7 access to our DDoS Response Team, real time metrics and reports, and DDoS cost protection.
To learn more, read the DDoS Resiliency white paper and learn about Route 53 anycast.
— Jeff;
New – AWS OpsWorks for Chef Automate
![]() AWS OpsWorks helps you to configure and run applications using Chef. You use a Domain Specific Language (DSL) to write cookbooks that define your application’s architecture and the configuration of each component. The Chef server is an essential part of the configuration process. It stores all of the cookbooks and tracks state information for each of the instances (nodes in Chef terminology).
AWS OpsWorks helps you to configure and run applications using Chef. You use a Domain Specific Language (DSL) to write cookbooks that define your application’s architecture and the configuration of each component. The Chef server is an essential part of the configuration process. It stores all of the cookbooks and tracks state information for each of the instances (nodes in Chef terminology).
Because the Chef server is in the critical path when newly launched instances are configured, it must be reliable. Many OpsWorks and Chef users install and maintain this important architectural component themselves. In production-scale environments, this leaves them to handle backups, restores, version upgrades, and so forth.
New AWS OpsWorks for Chef Automate
Early this month we launched AWS OpsWorks for Chef Automate from the AWS re:Invent stage. You can launch the Chef Automate server with just 3 clicks and start using it within minutes. You can use community cookbooks from Chef Supermarket and community tools such as Test Kitchen and Knife.
You can use Chef Automate to manage your infrastructure throughout the life-cycle of your application’s infrastructure. For example, newly launched EC2 instances can automatically connect to the Chef server and run a specified recipe by using an unattended association script (read Adding Nodes Automatically in AWS OpsWorks for Chef Automate to learn more). The registration script can be used to register EC2 instances created dynamically through an Auto Scaling Group and to register on-premises servers.
Take a Look
Let’s launch a Chef Automate server from the OpsWorks Console. Click on Go to OpsWorks for Chef Automate to get started.

Click on Create Chef Automate server, give your server a name, choose a region, and select a suitable EC2 instance type:

Choose one of your SSH key pairs, or opt out of SSH:

Finally, configure your network (VPC), IAM, maintenance window, and backup settings:

Click on Next, review your settings, and then click on Launch! The launch process takes less than 20 minutes. During that time you can download the sign-in credentials for your Chef Automate dashboard along with a Starter Kit:

You can see all of your Chef Automate servers at a glance:

Click on the server name (BorkBorkBork here), and then on Open Chef Automate dashboard, then enter your credentials to log in:

And here’s the dashboard:

You can see and manage your nodes:

Manage your workflows:

And much more!
Behind the scenes, the launch process invokes a AWS CloudFormation template. The template creates an EC2 instance, an Elastic IP Address, and a Security Group.
Available Now
You can launch AWS OpsWorks for Chef Automate today in the US East (Northern Virginia), US West (Oregon), and EU (Ireland) Regions. Pricing is based on the number of nodes and the number of hours that they are connected to the server; see the Chef Automate Pricing page for more info. As part of the AWS Free Tier, you can use up to 10 nodes at no charge for 12 months.
— Jeff;
New – Daily Aggregated Price List notifications
Last year, AWS customers and partners were asking for a systematic way to retrieve prices for AWS services. We answered the need by launching the AWS Price List API last December with pricing for thirteen (13) AWS services. The API provides pricing data in JSON and CSV format for download and enables customers to query for the prices of AWS services. The Price List API also allows customers to receive price change updates via Amazon SNS notifications.
Expanding the AWS Price List API
Over last three months we have expanded the AWS Price List API service to provide pricing data for all of the AWS services. Now customers that are doing cost analysis around building cloud-based solutions or moving on-premises workloads to the cloud have easier access to the comprehensive price list of AWS services. This will enable customer and partners to have greater control over the budgeting, forecasting and planning of their cloud solutions.
In addition to the expansion of the AWS Price List API, customers can sign up to receive notification around price cuts, new services and instance types. Upon subscribing to receive notifications, you can customize the timing of the receipt of the updates to be once a day or every time a price update occurs. If you choose to be notified once a day, the SNS notification will include all price changes applied during that day. Here’s a sample of an email notification that would be received upon subscribing to the price list API:

Let’s do a quick review of how to use the Price List API. First to access pricing information via the Price List API, you would download two types of files: Offer index file and Offer file. The Offer index file is available as a JSON file and lists the supported AWS services and the URL for the associated service Offer file. The Offer file lists the products and prices for a single AWS service and is available as either CSV or JSON file format. Both can be accessed via simple download links for an easy method to obtain the pricing data files.
You can get started today by using the price list API to obtain pricing data for any of the AWS services. With the expansion of the AWS Price List API to include all of the AWS Services, subscribing to the price list API is a great way to keep up to date on the latest AWS cuts prices and get introductions to new services.
To learn more about the AWS Price List API and get to more information on how to subscribe to API notifications, check out the previous AWS Blog post introducing the service and the Using the AWS Price List API documentation.
– Tara
Look Before You Leap – December 31, 2016 Leap Second on AWS
If you are counting down the seconds before 2016 is history, be sure to add one at the very end!
The next leap second (the 27th so far) will be inserted on December 31, 2016 at 23:59:60 UTC. This will keep Earth time (Coordinated Universal Time) close to mean solar time and means that the last minute of the year will have 61 seconds.
The information in our last post (Look Before You Leap – The Coming Leap Second and AWS), still applies, with a few nuances and new developments:
AWS Adjusted Time – We will spread the extra second over the 24 hours surrounding the leap second (11:59:59 on December 31, 2016 to 12:00:00 on January 1, 2017). AWS Adjusted Time and Coordinated Universal time will be in sync at the end of this time period.
Microsoft Windows – Instances that are running Microsoft Windows AMIs supplied by Amazon will follow AWS Adjusted Time.
Amazon RDS – The majority of Amazon RDS database instances will show “23:59:59” twice. Oracle versions 11.2.0.2, 11.2.0.3, and 12.1.0.1 will follow AWS Adjusted Time. For Oracle versions 11.2.0.4 and 12.1.0.2 contact AWS Support for more information.
Need Help?
If you have any questions about this upcoming event, please contact AWS Support or post in the EC2 Forum.
— Jeff;