


Lens User Guide
Contents
- 1. Lens Overview
- 2. Requesting Access to OLCF Resources
- 2.1. Project Allocation Requests
- 2.2. User Account Requests
- 3. OLCF Help and Policies
- 3.1. User Assistance Center
- 3.2. Communications to Users
- 3.3. My OLCF Site
- 3.4. Special Requests and Policy Exemptions
- 3.5. OLCF Acknowledgement
- 4. Accessing OLCF Systems
- 4.1. OLCF System Hostnames
- 4.2. General-Purpose Systems
- 4.3. X11 Forwarding
- 4.4. RSA Key Fingerprints
- 4.5. Authenticating to OLCF Systems
- 5. Data Management
- 5.1. User-Centric Data Storage
- 5.1.1. User Home Directories (NFS)
- 5.1.2. User Work Directories (Lustre)
- 5.1.3. User Archive Directories (HPSS)
- 5.2. Project-Centric Data Storage
- 5.2.1. Project Home Directories (NFS)
- 5.2.2. Project Work Directories (Lustre)
- 5.2.3. Project Archive Directories (HPSS)
- 5.3. Transferring Data
- 5.4. Storage Policy Summary
- 6. Software and Shell Environments
- 6.1. Default Shell
- 6.2. Using Modules
- 6.3. Installed Software
- 7. Compiling on Lens
- 7.1. Controlling the Programming Environment on Commodity Clusters
- 8. Running Jobs on Lens
- 8.1. Login vs Compute Nodes on Commodity Clusters
- 8.2. Writing Batch Scripts for Commodity Clusters
- 8.3. Interactive Batch Jobs on Commodity Clusters
- 8.4. Common Batch Options to PBS
- 8.5. Batch Environment Variables
- 8.6. Modifying Batch Jobs
- 8.7. Monitoring Batch Jobs
- 8.8. Batch Queues on Lens
- 8.9. Job Execution on Commodity Clusters
- 8.9.1. Serial Job Execution on Commodity Clusters
- 8.9.2. Parallel Job Execution on Commodity Clusters
- 8.9.3. Resource Sharing on Commodity Clusters
- 8.9.4. Task-Core Affinity on Commodity Clusters
- 8.10. Job Accounting on Commodity Clusters
- 8.11. Lens Scheduling Policy
1. Lens Overview
Lens is a (77)-node commodity-type Linux cluster. The primary purpose of Lens is to provide a conduit for large-scale scientific discovery via data analysis and visualization of simulation data generated on Titan. Users with accounts on Titan-supported projects will automatically be given an account on Lens.
High-memory Nodes
(45) High-memory nodes are configured with (4) 2.3 GHz AMD Opteron processors and (128) GB of memory.
GPU Nodes
The remaining (32) GPU nodes are configured with (4) 2.3 GHz AMD Opteron processors and (64) GB of memory. These nodes also contain an NVIDIA 8800 GTX GPU with (768) MB of memory and an NVIDIA Tesla GPGPU with (4) GB of memory.
File Systems
The OLCF’s center-wide Lustre file system, named Spider, is available on Lens for computational work. With over 52,000 clients and (10) PB of disk space, it is the largest-scale Lustre file system in the world. A separate, NFS-based file system provides $HOME storage areas, and an HPSS-based file system provides Lens users with archival spaces.
2. Requesting Access to OLCF Resources
Access to the computational resources of the Oak Ridge Leadership Facility (OLCF) is limited to approved users via project allocations. There are different kinds of projects, and the type of project request will determine the application and review procedure. Approved projects will be granted an allocation of hours for a period of time on one or more systems.
Every user account at the OLCF must be associated with at least one allocation. Once an allocation has been approved and established, users can request to be added to the project allocation so they may run jobs against it.
2.1. Project Allocation Requests
The OLCF grants (3) different types of project allocations. The type of allocation you should request depends on a few different factors. The table below outlines the types of project allocations available at the OLCF and the some general policies that apply to each:
| INCITE | Director’s Discretion | ALCC | |
|---|---|---|---|
| Allocations | Large | Small | Large |
| Call for Proposals | Once per year | At any time | Once per year |
| Closeout Report | Required | Required | Required |
| Duration | 1 year | 1 year | 1 year |
| Job Priority | High | Medium | High |
| Quarterly Reports | Required | Required | Required |
| Apply for INCITE | Apply for DD | Apply for ALCC |
Project Type Details
INCITE – The Novel Computational Impact on Theory and Experiment (INCITE) program invites proposals for large-scale, computationally intensive research projects to run at the OLCF. The INCITE program awards sizeable allocations (typically, millions of processor-hours per project) on some of the world’s most powerful supercomputers to address grand challenges in science and engineering. There is an annual call for INCITE proposals and awards are made on an annual basis. For more information or to apply for an INCITE project, please visit the DOE INCITE page.
ALCC – The ASCR Leadership Computing Challenge (ALCC) is open to scientists from the research community in national laboratories, academia and industry. The ALCC program allocates computational resources at the OLCF for special situations of interest to the Department with an emphasis on high-risk, high-payoff simulations in areas directly related to the Department’s energy mission in areas such as advancing the clean energy agenda and understanding the Earth’s climate, for national emergencies, or for broadening the community of researchers capable of using leadership computing resources. For more information or to submit a proposal, please visit the DOE ALCC page.
DD – Director’s Discretion (DD) projects are dedicated to leadership computing preparation, INCITE and ALCC scaling, and application performance to maximize scientific application efficiency and productivity on leadership computing platforms. The OLCF Resource Utilization Council, as well as independent referees, review and approve all DD requests. Applications are accepted year round via the OLCF Director’s Discretion Project Application page.
After Project Approval
Once a project is approved, an OLCF Accounts Manager will notify the PI, outlining the steps (listed below) necessary to create the project. If you have any questions, please feel free to contact the OLCF Accounts Team at accounts@ccs.ornl.gov.
Steps for Activating a Project Once the Allocation is Approved
- A signed Principal Investigator’s PI Agreement must be submitted with the project application.
- Export Control: The project request will be reviewed by ORNL Export Control to determine whether sensitive or proprietary data will be generated or used. The results of this review will be forwarded to the PI. If the project request is deemed sensitive and/or proprietary, the OLCF Security Team will schedule a conference call with the PI to discuss the data protection needs.
- ORNL Personnel Access System (PAS): All PI’s are required to be entered into the ORNL PAS system. An OLCF Accounts Manager will send the PI a PAS invitation to submit all the pertinent information. Please note that processing a PAS request may take 15 or more days.
- User Agreement/Appendix A or Subcontract: A User Agreement/Appendix A or Subcontract must be executed between UT-Battelle and the PI’s institution. If our records indicate this requirement has not been met, all necessary documents will be provided to the applicant by an OLCF Accounts Manager.
Upon completion of the above steps, the PI will be notified that the project has been created and provided with the Project ID and system allocation. At this time, project participants may apply for an account via the OLCF User Account Application page.
Users can apply for an account on existing projects. There are several steps in applying for an account; OLCF User Assistance can help you through the process. If you have any questions, please feel free to contact the Accounts Team at accounts@ccs.ornl.gov.
Steps to Obtain a User Account
- Apply for an account using the Account Request Form.
- The principal investigator (PI) of the project must approve your account and system access. The Accounts Team will contact the PI for this approval.
- If you have or will receive a RSA SecurID from our facility, additional paperwork will be sent to you via email to complete for identity proofing.
- Foreign national participants will be sent an Oak Ridge National Lab (ORNL) Personnel Access System (PAS) request specific for the facility and cyber-only access. After receiving your response, it takes between (2) to (5) weeks for approval.
- Fully-executed User Agreements with each institution having participants are required. If our records indicate your institution needs to sign either a User Agreement and/or Appendix A, the form(s) along with instructions will be sent via email.
- If you are processing sensitive or proprietary data, additional paperwork is required and will be sent to you.
Your account will be created and you will be notified via email when all of the steps above are complete. To begin the process, visit the OLCF User Account Application page.
3. OLCF Help and Policies
The OLCF provides many tools to assist users, including direct hands-on assistance by trained consultants. Means of assistance at the OLCF include:
- The OLCF User Assistance Center (UAC), where consultants answer your questions directly via email or phone.
- Various OLCF communications, which provide status updates of relevance to end-users.
- The My OLCF site, which provides a mechanism for viewing project allocation reports.
- The OLCF Policy Guide, which details accepted use of our computational resources.
- Upcoming and historical OLCF Training Events, both in-person and web-based, that cover topics of interest to end-users.
The OLCF User Assistance Center (UAC) provides direct support to users of our computational resources.
Hours
The center’s normal support hours are 9am EST to 5pm EST Monday through Friday, exclusive of holidays.
Contact Us
| help@olcf.ornl.gov | |
| Phone: | 865-241-6536 |
| Fax: | 865-241-4011 |
| Address: | 1 Bethel Valley Road, Oak Ridge, TN 37831 |
The OLCF UAC is located at the Oak Ridge National Laboratory (ORNL) in Building 5600, Room C103.
After Hours
Outside of normal business hours, calls are directed to the ORNL Computer Operations staff. If you require immediate assistance, you may contact them at the phone number listed above. If your request is not urgent, you may send an email to help@olcf.ornl.gov, where it will be answered by a OLCF User Assistance member the next business day.
Ticket Submission Webform
In lieu of sending email, you can also use the Ticket Submission Web Form to submit a request directly to OLCF User Assistance.
The OLCF provides users with several ways of staying informed.
OLCF Announcements Mailing Lists
These mailing lists provides users with email messages of general interest (system upgrades, long-term outages, etc.) Since the mailing frequency is low and the information sent is important to all users, users are automatically subscribed to these lists as applicable when an account is set up.
OLCF “Notice” Mailing Lists
The OLCF also provides opt-in email lists that provide automated notices about the status of OLCF systems as well as other notable system events. Since the mailing frequency of these lists are high, they are offered on an opt-in basis. More information on the lists can be found at the OLCF Notifications List page.
Weekly Update
Each week, typically on Friday afternoon, an email announcing the next week’s scheduled outages is sent to all users. This message also includes meeting announcements and other items of interest to all OLCF users. If you are an OLCF user but are not receiving this weekly message, please contact the OLCF User Assistance Center.
System Status Pages
The OLCF Main Support page shows the current up/down status of selected OLCF systems at the top.
Mobile Apps
The OLCF StatusApp for iOS and the OLCF StatusApp for Android are available in the Apple App Store and Google Play Store, respectively. These Apps are free to download and report real-time system statuses and other general information.
The OLCF posts messages of interest on the OLCF Twitter Feed. We also post tweets specific to system outages on the OLCF Status Twitter Feed.
Message of the Day
In addition to other methods of notification, the system “Message of the Day” (MOTD) that is echoed upon login shows recent system outages. Important announcements are also posted to the MOTD. Users are encouraged to take a look at the MOTD upon login to see if there are any important notices.
To assist users in managing project allocations, we provide end-users with My OLCF, a web application with valuable information about OLCF projects and allocations on a per user basis. Users must login to the site with their OLCF username and SecurID fob:
Detailed metrics for users and projects can be found in each project’s usage section:
- YTD usage by system, subproject, and project member
- Monthly usage by system, subproject, and project member
- YTD usage by job size groupings for each system, subproject, and project member
- Weekly usage by job size groupings for each system, and subproject
- Batch system priorities by project and subproject
- Project members
3.4. Special Requests and Policy Exemptions
Users can request policy exemptions by submitting the appropriate web form available on the OLCF Documents and Forms page. Special requests forms allow a user to:
- Request Software installations
- Request relaxed queue limits for a job
- Request a system reservation
- Request a disk quota increase
- Request a User Work area purge exemption
Special requests are reviewed weekly and approved or denied by management via the OLCF Resource Utilization Council.
Users should acknowledge the OLCF in all publications and presentations that speak to work performed on OLCF resources:
4. Accessing OLCF Systems
This section covers the basic procedures for accessing OLCF computational resources.
To avoid risks associated with using plain-text communication, the only supported remote client on OLCF systems is a secure shell (SSH) client, which encrypts the entire session between OLCF systems and the client system.
For UNIX-based SSH clients, the following line should be in either the default ssh_config file or your $HOME/.ssh/config file:
PreferredAuthentications keyboard-interactive,password
The line may also contain other authentication methods, but keyboard-interactive must be included.
SSH clients are also available for Windows-based systems, such as SecureCRT published by Van Dyke Software. For recent SecureCRT versions, the preferred authentications change above can be made through the “connection properties” menu.
Each OLCF system has a single, designated hostname for general user-initiated user connections. Sometimes this is a load-balancing mechanism that will send users to other hosts as needed. In any case, the designated OLCF host names for general user connections are as follows:
| System Name | Hostname | RSA fingerprint |
|---|---|---|
| Titan | titan.ccs.ornl.gov |
-- |
| Lens | lens.ccs.ornl.gov |
cc:6e:ef:84:7e:7c:dc:72:71:7b:76:7f:f3:46:57:2b |
| Everest | everest.ccs.ornl.gov |
cc:6e:ef:84:7e:7c:dc:72:71:7b:76:7f:f3:46:57:2b |
| Smoky | smoky.ccs.ornl.gov |
e3:88:b9:ba:fe:3a:fd:99:00:24:fc:e6:9d:5c:69:2b |
| Sith | sith.ccs.ornl.gov |
28:63:5e:41:32:39:c2:ec:9b:63:e0:86:16:2f:e4:bd |
| Data Transfer Nodes | dtn.ccs.ornl.gov |
50:dc:59:7b:e1:7c:ad:b2:30:55:9c:fa:fb:e8:6e:55 |
| Home (machine) | home.ccs.ornl.gov |
12:9b:10:f7:b9:c7:1b:a2:b0:52:5e:13:e2:b9:b2:8c |
For example, to connect to Titan from a UNIX-based system, use the following:
$ ssh userid@titan.ccs.ornl.gov
After a user account has been approved and created, the requesting user will be sent an email listing the system(s) to which the user requested and been given access. In addition to the system(s) listed in the email, all users also have access to the following general-purpose systems:
home.ccs.ornl.gov
Home is a general purpose system that can be used to log into other OLCF systems that are not directly accessible from outside the OLCF network. For example, running the screen or tmux utility is one common use of Home. Compiling, data transfer, or executing long-running or memory-intensive tasks should never be performed on Home. More information can be found on the The Home Login Host page.
dtn.ccs.ornl.gov
The Data Transfer Nodes are hosts specifically designed to provide optimized data transfer between OLCF systems and systems outside of the OLCF network. More information can be found on the Employing Data Transfer Nodes page.
HPSS
The High Performance Storage System (HPSS) provides tape storage for large amounts of data created on OLCF systems. The HPSS can be accessed from any OLCF system through the hsi utility. More information can be found on the HPSS page.
Automatic forwarding of the X11 display to a remote computer is possible with the use of SSH and a local X server. To set up automatic X11 forwarding within SSH, you can do (1) of the following:
- Invoke ssh on the command line with:
$ ssh -X hostname
Note that use of the
-xoption (lowercase) will disable X11 forwarding. - Edit (or create) your
$HOME/.ssh/configfile to include the following line:ForwardX11 yes
All X11 data will go through an encrypted channel. The $DISPLAY environment variable set by SSH will point to the remote machine with a port number greater than zero. This is normal, and happens because SSH creates a proxy X server on the remote machine for forwarding the connections over an encrypted channel. The connection to the real X server will be made from the local machine.
$DISPLAY environment variable for X11 forwarding; a non-encrypted channel may be used in this case.
Occasionally, you may receive an error message upon logging in to a system such as the following:
@@ WARNING: REMOTE HOST IDENTIFICATION HAS CHANGED! @@
IT IS POSSIBLE THAT SOMEONE IS DOING SOMETHING NASTY!
Someone could be eavesdropping on you right now (man-in-the-middle attack)!
It is also possible that the RSA host key has just been changed.
This can be a result of normal system maintenance that results in a changed RSA public key, or could be an actual security incident. If the RSA fingerprint displayed by your SSH client does not match the OLCF-authorized RSA fingerprint for the machine you are accessing, do not continue authentication; instead, contact help@olcf.ornl.gov.
4.5. Authenticating to OLCF Systems
All OLCF systems currently employ two-factor authentication only. To login to OLCF systems, an RSA SecurID® key fob is required.
Activating a new SecurID® fob
- Initiate an SSH connection to
home.ccs.ornl.gov. - When prompted for a PASSCODE, enter the 6-digit code shown on the fob.
- You will be asked if you are ready to set your PIN. Answer with “Y”.
- You will be prompted to enter a PIN. Enter a (4) to (6) digit number you can remember. You will then be prompted to re-enter your PIN.
- You will then be prompted to wait until the next code appears on your fob and to enter your PASSCODE. When the (6) digits on your fob change, enter your PIN digits followed immediately by the new (6) digits displayed on your fob. Note that any set of (6) digits on the fob can only be “used” once.
- Your PIN is now set, and your fob is activated and ready for use.
Using a SecurID® fob
When prompted for your PASSCODE, enter your PIN digits followed immediately by the (6) digits shown on your SecurID® fob. For example, if your pin is 1234 and the (6) digits on the fob are 000987, enter 1234000987 when you are prompted for a PASSCODE.
5. Data Management
OLCF users have many options for data storage. Each user has a series of user-affiliated storage spaces, and each project has a series of project-affiliated storage spaces where data can be shared for collaboration between users. The storage areas are mounted across all OLCF systems, making your data available to you from multiple locations.
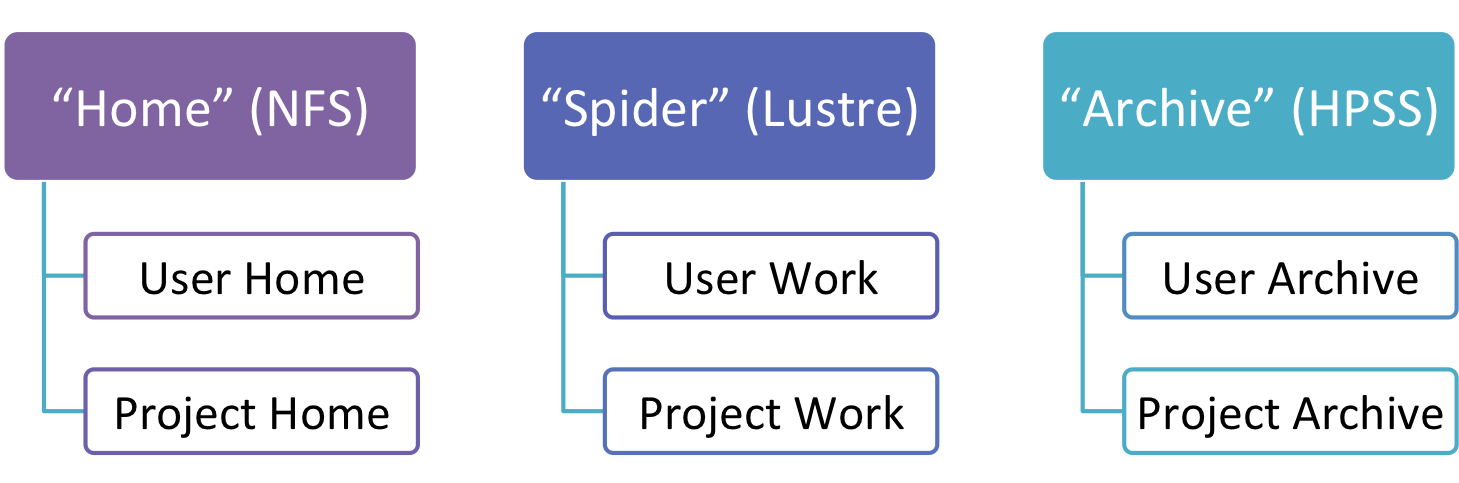
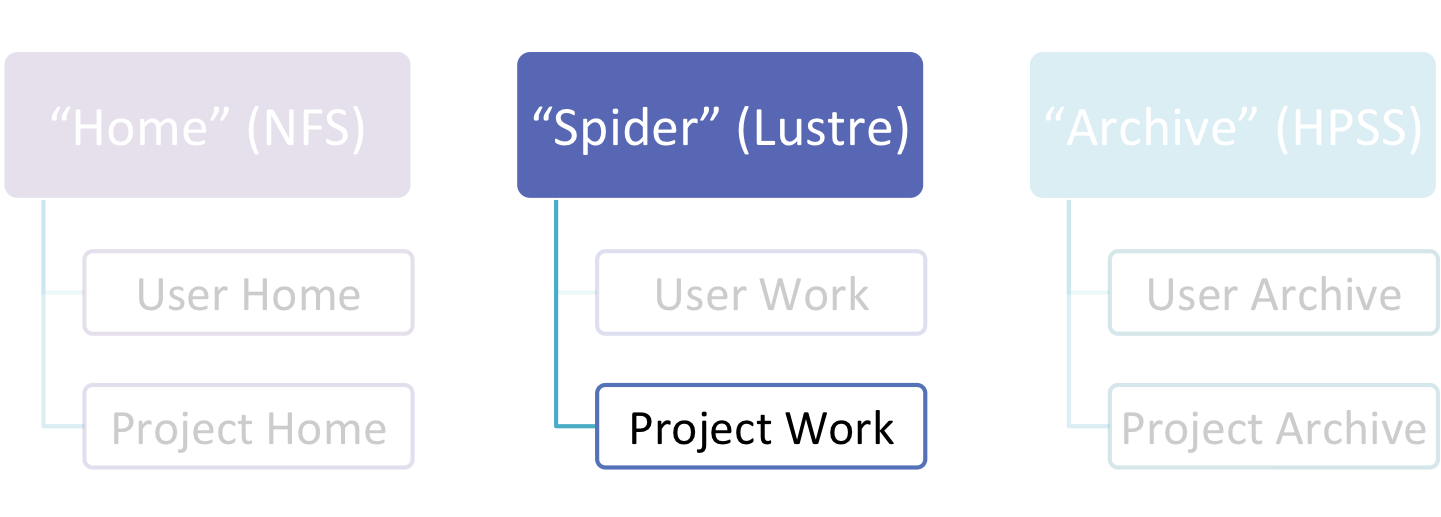
The storage area to use at any given time depends upon the activities being carried out. Both users and projects are provided with three distinct types of storage areas: Home areas, Work areas, and Archive areas.
User Home areas (directories) are provided on a Network File System (NFS), User Work directories on a Lustre file system, and User Archive directories are provided on the High Performance Storage System (HPSS). User storage areas are intended to house user-specific files.
Similarly, projects have a Project Home area on NFS, a Project Work area on Lustre, and a Project Archive space on HPSS. Project storage areas are intended to house project-centric files that need to be accessed by multiple users.
5.1. User-Centric Data Storage
Users are provided with several storage areas, each of which serve different purposes. These areas are intended for storage of data for a particular user and not for storage of project data.
The following table summarizes user-centric storage areas available on OLCF resources and lists relevant polices.
| Area | Nickname | Path | Type | Quota | Backups | Purge | Retention |
|---|---|---|---|---|---|---|---|
| User Home | – | /ccs/home/$USER | NFS | 5 GB | Yes | Not purged | 1 month after account deactivation |
| User Work | “Spider” | /tmp/work/$USER | Lustre | None | No | Files > 14 days old subject to deletion | Not retained |
| User Archive | “HPSS” | /home/$USER | HPSS | 2 TB (or 2k files) | No | Not purged | 3 months after account deactivation |
5.1.1. User Home Directories (NFS)
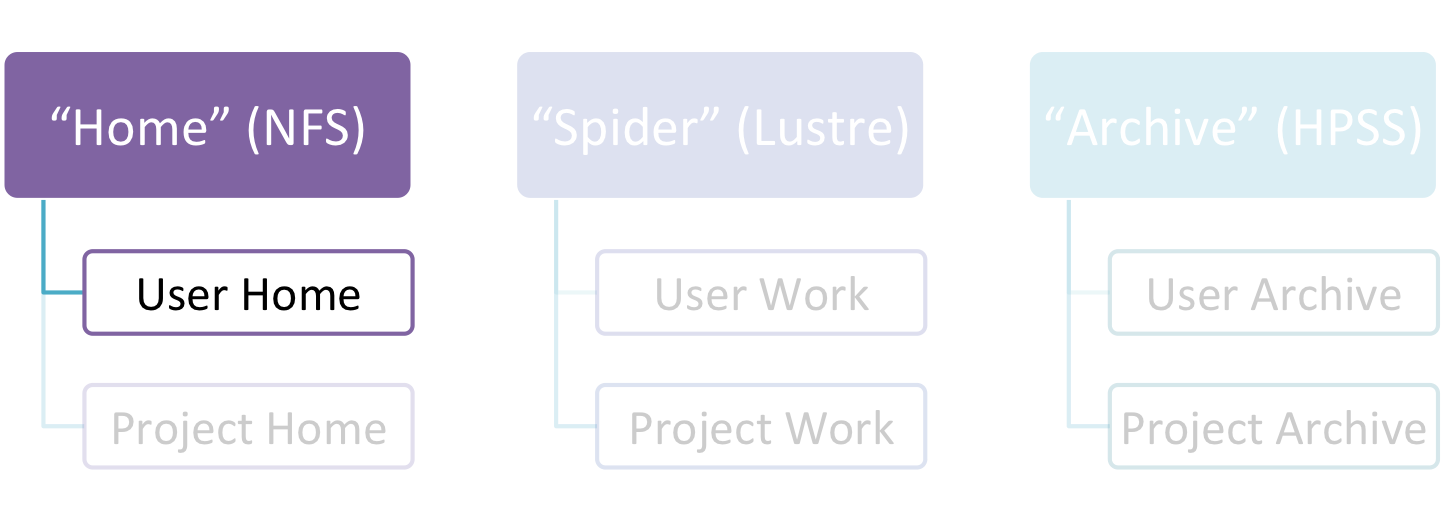
Each user is provided a home directory to store frequently used items such as source code, binaries, and scripts.
User Home Path
Home directories are located in a Network File Service (NFS) that is accessible from all OLCF resources as /ccs/home/$USER.
The environment variable $HOME will always point to your current home directory. It is recommended, where possible, that you use this variable to reference your home directory. In cases in which using $HOME is not feasible, it is recommended that you use /ccs/home/$USER.
Users should note that since this is an NFS-mounted filesystem, its performance will not be as high as other filesystems.
User Home Quotas
Quotas are enforced on user home directories. To request an increased quota, contact the OLCF User Assistance Center. To view your current quota and usage, use the quota command:
$ quota -Qs
Disk quotas for user usrid (uid 12345):
     Filesystem  blocks   quota   limit   grace   files   quota   limit   grace
nccsfiler1a.ccs.ornl.gov:/vol/home
                  4858M   5000M   5000M           29379   4295m   4295m
User Home Backups
If you accidentally delete files from your home directory, you may be able to retrieve them. Online backups performed hourly and nightly, with the most recent 6 hours and the most recent 2 nights available. These are available in /ccs/home/.snapshot/hourly.* and /ccs/home/.snapshot/nightly.*.
It is possible the files that were deleted will be available in one of those directories. Note that in the directory name, lower numbers represent more recent backups. Thus, /ccs/home/.snapshot/hourly.0 is a more recent backup than /ccs/home/.snapshot/hourly.1.
A ~/.yesterday link exists in many users' home directory pointing to the most recent hourly backup directory.
User Home Permissions
The default permissions for user home directories are 0750 (full access to the user, read and execute for the group). Users have the ability to change permissions on their home directories, although it is recommended that permissions be set to as restrictive as possible (without interfering with your work).
Special User Website Directory
User Home spaces may contain a directory named /www. If this directory exists, and if appropriate permissions exist, files in that directory will be accessible via the World Wide Web at http://users.nccs.gov/~user (where user is your userid).
5.1.2. User Work Directories (Lustre)
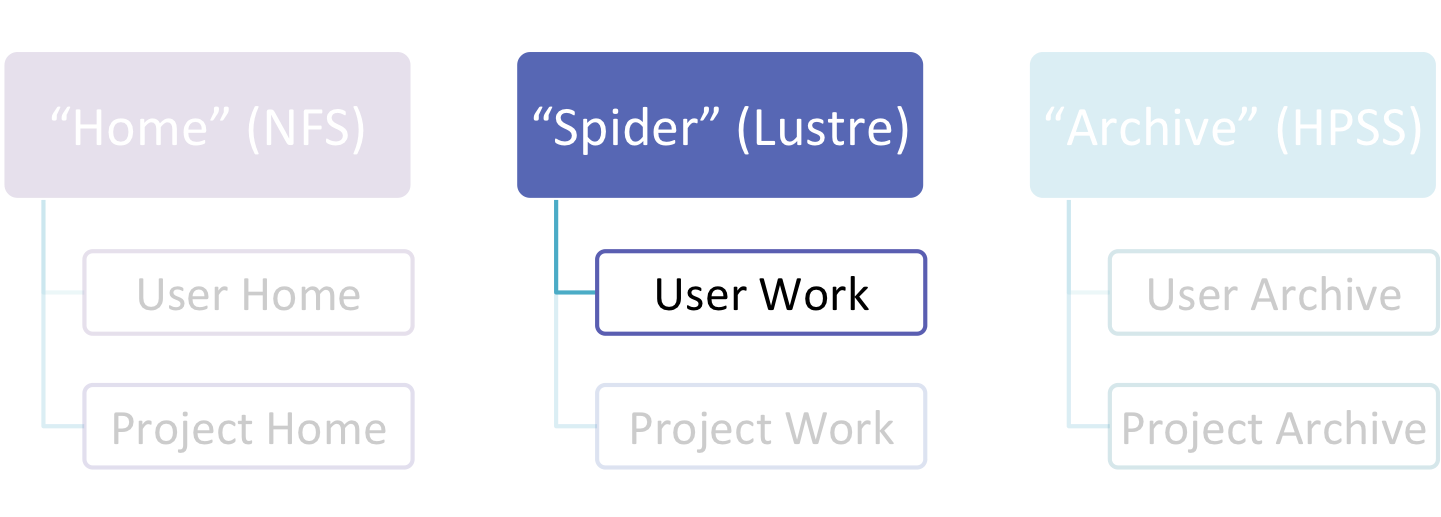
"User Work" storage areas are available across each OLCF system for fast access to job-related temporary files and for staging large files to and from archival storage.
The OLCF center-wide file systems is referred to as Spider. Spider is made up of multiple Lustre filesystems.
User Work Path
User Work directories can be accessed from each system via /tmp/work/$USER. This path is available on all systems. This path references a space on the Center-Wide Shared Lustre Filesystem, Spider.
User Work Backup
User Work directories are scratch areas intended for temporary storage of data (either while a batch job is running or while a file is being staged from an off-site location to archival storage). As such, files in user work directories are not backed up. Users are responsible for backing up these files, either to archival storage (HPSS) or to an off-site location.
User Work Purge
To ensure adequate work space is available for user jobs, a script that finds and deletes old files runs on the system nightly. This script deletes files that have not been accessed or modified in more than 14 days. If the file system does not have sufficient free space after the script runs, then the script will run again with a threshold of fewer than 14 days. Thus, it is critical to archive files from the scratch area as soon as possible.
User Work Permissions
By default, each user’s /tmp/work/$USER directory permissions are set to 0700. Changes to the default permissions of the temporary work directory are allowed by the owning user, but will be reset hourly for security purposes.
To request a permanent permission change, please contact the OLCF User Assistance Center. Only the top-level directory permissions (i.e. those of /tmp/work/$USER) are overwritten. Users may change permissions of sub-directories and of files within their work directory, and these will not be overwritten.
The /tmp directory
The default path to user work directories, /tmp/work/$USER is actually a symbolic link. This is important to note because the actual location of the directory is not in the /tmp filesystem but rather in some other filesystem such as /lustre/widow1/scratch/$USER. Thus, the /tmp filesystem itself is not intended as a storage location for temporary files. This filesystem is relatively small and is used by the system for tasks such as compiling, editing, etc. If the directory fills up, it can cause system problems.
/tmp filesystem itself. Rather cd /tmp/work/$USER to access your User Work directory and create temporary files there.
5.1.3. User Archive Directories (HPSS)

Users are also provided with user-centric archival space on the High Performance Storage System (HPSS).
User archive areas on HPSS are intended for storage of data not immediately needed in either User Home directories (NFS) or User Work directories (Lustre). User Archive areas also serve as a location for users to store backup copies of user files. User Archive directories should not be used to store project-related data. Rather, Project Archive directories should be used for project data.
User Archive Path
User archive directories are located at /home/$USER.
User Archive Access
User archive directories may be accessed only via specialized tools called HSI and HTAR. For more information on using HSI or HTAR, see the HSI and HTAR page.
User Archive Accounting
Each file and directory on HPSS is associated with an HPSS storage allocation. For information on storage allocation, please visit the Understanding HPSS Storage Allocations page.
5.2. Project-Centric Data Storage
Projects are provided with several storage areas for the data they need. Project directories provide members of a project with a common place to store code, data files, documentation, and other files related to their project. While this information could be stored in one or more user directories, storing in a project directory provides a common location to gather all files.
The following table summarizes project-centric storage areas available on OLCF resources and lists relevant policies.
| Area | Nickname | Path | Type | Quota | Backups | Purge | Retention |
|---|---|---|---|---|---|---|---|
| Project Home | -- | /ccs/proj/[projectid] |
NFS | 50 GB | Yes | Not purged | 1 month after project deactivation |
| Project Work | "Spider" | /tmp/proj/[projectid] |
Lustre | 2 TB | No | Not purged | Not retained |
| Project Archive | "HPSS" | /proj/[projectid] |
HPSS | 100 TB (or 100k files) | No | Not purged | 3 months after project deactivation |
5.2.1. Project Home Directories (NFS)

Projects are provided with a Project Home storage area in the Network File Service (NFS) mounted filesystem. This area is intended for storage of data, code, and other files that are of interest to all members of a project. Since Project Home is an NFS-mounted filesystem, its performance will not be as high as other filesystems.
Project Home Path
Project Home area is accessible at /ccs/proj/abc123 (where abc123 is your project ID).
Project Home Quotas
Quotas are enforced on project home directories. The current limit is shown on the Storage Policy page. To request an increased quota, contact the User Assistance Center.
Project Home Backups
If you accidentally delete one or more files from your project home directory, you may be able to retrieve it/them. Online backups performed hourly and nightly, with the most recent 6 hours and the most recent 2 nights available. These are available in: /ccs/proj/.snapshot/hourly.* and /ccs/proj/.snapshot/nighty.*. It is possible the files that were deleted will be available in one of those directories.
Note that in the directory name, lower numbers represent more recent backups. Thus, /ccs/proj/.snapshot/hourly.0 is a more recent backup than /ccs/proj/.snapshot/hourly.1.
Project Home Permissions
The default permissions for project home directories are 0770 (full access to the user and group). The directory is owned by root and the group is the project's group. All members of a project should also be members of that group-specific project. For example, all members of project "ABC123" should be members of the "abc123" UNIX group.
5.2.2. Project Work Directories (Lustre)
To provide projects with a high-performance storage area that is accessible to batch jobs, projects are given Project Work areas in a Lustre filesystem.
The OLCF center-wide file systems is referred to as Spider. Spider comprises multiple Lustre filesystems.
Project Work Path
Project Work directories can be accessed from each system via /tmp/proj/pjt000 (where pjt000 is your project ID). This path is available on all systems. This path references a space on the center-wide shared Lustre filesystem called Spider.
Project Work Backup
As with user work directories, Project Work directories are not backed up. Project members are responsible for backing up these files, either to Project Archive areas (HPSS) or to an off-site location.
Project Work Permissions
Project Work directory permissions are set to 0770 with root as the owner and the project group. Changes to the default permissions of the Project Work directory are allowed, but will be reset hourly for security purposes.
To request a permanent permission change, please contact the OLCF User Assistance Center. Only the top-level directory permissions (i.e. those of /tmp/proj/pjt000) are overwritten. Users may change permissions of sub-directories and of files within The Project Work directory, and these will not be overwritten.
5.2.3. Project Archive Directories (HPSS)

Projects are also allocated project-specific archival space on the High Performance Storage System (HPSS). The default quota is shown on the Storage Policy page. If a higher quota is needed, contact the User Assistance Center.
The Project Archive space on HPSS is intended for storage of data not immediately needed in either Project Home (NFS) areas nor Project Work (Lustre) areas, and to serve as a location to store backup copies of project-related files.
Project Archive Path
The project archive directories are located at /proj/pjt000 (where pjt000 is your Project ID).
Project Archive Access
Project Archive directories may only be accessed via utilities called HSI and HTAR. For more information on using HSI or HTAR, see the HSI and HTAR page.
Project Archive Accounting
Each file and directory on HPSS is associated with an HPSS storage allocation. For information on HPSS storage allocations, please visit the Understanding HPSS Storage Allocations page.
OLCF users are provided with several options for transferring data among systems at the OLCF as well as between the OLCF and other sites.
Data Transfer Nodes
Dedicated data transfer nodes are provided to OLCF users and are accessible via the load-balancing hostname dtn.ccs.ornl.gov. The nodes have been tuned specifically for wide area data transfers, and also perform well on the local area. They are recommended for data transfers as they will, in most cases, improve transfer speed and help decrease load on computational systems’ login nodes. More information on these nodes can be found on the Data Transfer Nodes page.
Local Transfers
The OLCF provides a shared-storage environment, so transferring data between our machines is largely unnecessary. However, we provide tools both to move large amounts of data between scratch and archival storage and from one scratch area to another.
SPDCP
spdcp is a parallel Lustre-aware copy tool. The tool can be used to copy large datasets between Lustre filesystems. More information can be found on the SPDCP page.
HSI and HTAR
Access to the HPSS is accomplished through the Hierarchical Storage Interface (hsi) and HPSS Tar (htar) utilities. More information can be found on the HSI and HTAR page.
Remote Transfers
The OLCF provides several tools for moving data between computing centers or between OLCF machines and local user workstations. The following tools are primarily designed for transfers over the internet, and aren't recommended for use transferring data between OLCF machines.
The following table summarizes options for remote data transfers:
| GridFTP + GridCert | GridFTP + SSH | SFTP/SCP | BBCP | |
|---|---|---|---|---|
| Data Security | insecure (default) / secure (w/configation) | insecure (default) / secure (w/configation) | secure | insecure (unsuited for sensitive projects) |
| Authentication | GridCert | Passcode | Passcode | Passcode |
| Transfer speed | Fast | Fast | Slow | Fast |
| Required Infrastructure | GridFTP server at remote site + user DOE GridCert | GridFTP server at remote site | Comes standard with SSH install | BBCP installed at remote site |
GridFTP
GridFTP is a high-performance data transfer protocol based on FTP and optimized for high-bandwidth wide-area networks. It is typically used to move large amounts of data between the OLCF and other majors centers. More information can be found on the GridFTP page.
SFTP and SCP
The SSH-based SFTP and SCP utilities can be used to transfer files to and from OLCF systems. Because these utilities can be slow, we recommend using them only to transfer limited numbers of small files. More information on these utilities can be found on the SFTP and SCP page.
BBCP
For larger files, the multi-streaming transfer utility BBCP is recommended. The BBCP utility is capable of breaking up your transfer into multiple simultaneously transferring streams, thereby transferring data much faster than single-streaming utilities such as SCP and SFTP. Note: BBCP is not secure, but is much faster than SFTP. More information can be found on the BBCP page.
Users must agree to the full storage policy as part of their account application. The current policy is summarized below. This policy applies to all projects with allocations on OLCF systems, regardless of the machine on which they have an allocation.
Storage Policy Summary Table
| Area | The general name of storage area/directory discussed in the storage policy. |
|---|---|
| Nickname | The branded name given to some storage areas or file systems. |
| Path | The path (symlink) to the storage area's directory. |
| Type | The underlying software technology supporting the storage area. |
| Quota | The limits placed on total number of bytes and/or files in the storage area. |
| Backups | States if the data is automatically duplicated for disaster recovery purposes. |
| Purged | States when data will be marked as eligible for permanent deletion. |
| Retention | States when data will be marked as eligible for permanent deletion after an account/project is deactivated. |
| Area | Nickname | Path | Type | Quota | Backups | Purged | Retention | |
|---|---|---|---|---|---|---|---|---|
| User | Home | -- | /ccs/home/$USER |
NFS | 5 GB | Yes | Not purged | 1 month |
| Work | "Spider" | /tmp/work/$USER |
Lustre | None | No | 14 days | Not retained | |
| Archive | "HPSS" | /home/$USER |
HPSS | 2 TB or 2k files | No | Not purged | 3 months | |
| Project | Home | -- | /ccs/proj/[projid] |
NFS | 50 GB | Yes | Not purged | 1 month |
| Work | "Spider" | /tmp/proj/[projid] |
Lustre | 2 TB | No | Not purged | 1 month | |
| Archive | "HPSS" | /proj/[projid] |
HPSS | 100 TB or 100k files | No | Not purged | 3 months | |
Storage Policy Implementation
User Home / Project Home Quotas (NFS)
User home directories and project home directories have hard quotas enabled on them to prevent users from exceeding their specified limits.
User Archive / Project Archive Quotas (HPSS)
A noticeable change from past policy deals with archival storage. Soft quotas are used on user archive and project archive directories. You will receive an email notifying you that you have exceeded your limits when we notice usage exceeding the specified limits. The email will ask you to clean up the appropriate storage area to get it below your limits.
We are strongly encouraging users to associate their files with projects as opposed to their individual user account. This helps us understand project needs and usage. Information on modifying an account associated with a file or directory can be found on the following page.
We recognize that not everyone will fall under the default limits. We will work with users and projects to negotiate additional space in some cases. If you feel your project needs additional space, please direct all requests and questions to the User Assistance Center.
Check Current Archive Usage
You can check your current overall archive (HPSS) usage by running the showusage command on any OLCF system:
$ showusage -s hpss

HPSS Storage in GB:
                                  Project Totals         user123
 Project                       Storage                    Storage
__________________________|__________________________|______________
 user123                  |     243.30               |     243.30
 legacy                   |                          |       7.01
 abc123                   |       5.86               |       3.01
Every user gets a default overhead account. This is a "project" with the same name as your username. This is how your user archive storage usage is calculated.
The project total is shown in the first storage column, and your usage in that project is shown in the second Storage column.
Files stored on the system prior to March 15, 2008 are associated with a legacy project. Any file associated with the legacy project is not used in the quota calculation. Users are not able to associate new files to the legacy account. We also strongly encourage users to associate legacy files with projects. More information on HPSS usage and accounting can be found on the Understanding HPSS Storage Allocations page.
Please direct all requests and questions to the OLCF User Assistance Center.
6. Software and Shell Environments
The OLCF provides hundreds of pre-installed software packages and scientific libraries for your use, in addition to taking software requests. Due to the large number of software packages and versions on OLCF resources, environment management tools are needed to handle changes to your shell environment. This chapter discusses how to manage your shell and software environment on OLCF systems.
Users request their preferred shell on their initial user account request form. The default shell is enforced across all OLCF resources. The OLCF currently supports the following shells:
- bash
- tsch
- csh
- ksh
Please contact the OLCF User Assistance Center to request a different default shell.
The modules software package allows you to dynamically modify your user environment by using pre-written modulefiles.
Modules Overview
Each modulefile contains the information needed to configure the shell for an application. After the modules software package is initialized, the environment can be modified on a per-module basis using the module command, which interprets a modulefile.
Typically, a modulefile instructs the module command to alter or set shell environment variables such as PATH or MANPATH. Modulefiles can be shared by many users on a system, and users can have their own personal collection to supplement and/or replace the shared modulefiles.
As a user, you can add and remove modulefiles from your current shell environment. The environment changes performed by a modulefile can be viewed by using the module command as well.
More information on modules can be found by running man module on OLCF systems.
Summary of Module Commands
| Command | Description |
|---|---|
module list |
Lists modules currently loaded in a user’s environment |
module avail |
Lists all available modules on a system in condensed format |
module avail -l |
Lists all available modules on a system in long format |
module display |
Shows environment changes that will be made by loading a given module |
module load |
Loads a module |
module unload |
Unloads a module |
module help |
Shows help for a module |
module swap |
Swaps a currently loaded module for an unloaded module |
Re-initializing the Module Command
Modules software functionality is highly dependent upon the shell environment being used. Sometimes when switching between shells, modules must be re-initialized. For example, you might see an error such as the following:
$ module list
-bash: module: command not found
To fix this, just re-initialize your modules environment:
$ source $MODULESHOME/init/myshell
Where myshell is the name of the shell you are using and need to re-initialize.
Examples of Module Use
To show all available modules on a system:
$ module avail
------------ /opt/cray/modulefiles ------------
atp/1.3.0                          netcdf/4.1.3                       tpsl/1.0.01
atp/1.4.0(default)                 netcdf-hdf5parallel/4.1.2(default) tpsl/1.1.01(default)
atp/1.4.1                          netcdf-hdf5parallel/4.1.3          trilinos/10.6.4.0(default)
...
To search for availability of a module by name:
$ module avail -l netcdf
- Package -----------------------------+- Versions -+- Last mod. ------
/opt/modulefiles:
netcdf/3.6.2                                         2009/09/29 16:38:25
/sw/xk6/modulefiles:
netcdf/3.6.2                                         2011/12/09 18:07:31
netcdf/4.1.3                              default    2011/12/12 20:43:37
...
To show the modulefiles currently in use (loaded) by the user:
$ module list
Currently Loaded Modulefiles:
  1) modules/3.2.6.6                           12) pmi/3.0.0-1.0000.8661.28.2807.gem
  2) xe-sysroot/4.0.30.securitypatch.20110928  13) ugni/2.3-1.0400.3912.4.29.gem
  3) xtpe-network-gemini                       14) udreg/2.3.1-1.0400.3911.5.6.gem
To show detailed help info on a modulefile:
$ module help netcdf/4.1.3
------------ Module Specific Help for 'netcdf/4.1.3' ------------
Purpose:
  New version of hdf5 1.8.7 and netcdf 4.1.3
Product and OS Dependencies:
  hdf5_netcdf 2.1 requires SLES 11 systems and was tested on Cray XE and
...
To show what a modulefile will do to the shell environment if loaded:
$ module display netcdf/4.1.3
------------
/opt/cray/modulefiles/netcdf/4.1.3:
setenv           CRAY_NETCDF_VERSION 4.1.3
prepend-path     PATH /opt/cray/netcdf/4.1.3/gnu/45/bin
...
To load or unload a modulefile
$ module load netcdf/4.1.3
$ module unload netcdf/4.1.3
To unload a modulefile and load a different one:
$ module swap netcdf/4.1.3 netcdf/4.1.2
The OLCF provides hundreds of pre-installed software packages and scientific libraries for your use, in addition to taking software installation requests.
See the software section for complete details on existing installs.
To request a new software install, use the software installation request form.
7. Compiling on Lens
Compiling code on Lens is typical of commodity or beowulf-style HPC linux clusters.
Available Compilers
The following compilers are available on Lens:
- PGI, the Portland Group Compiler Suite (default)
- GCC, the GNU Compiler Collection
- CCE, the Cray Compiling Environment
- Intel, Intel Composer XE
7.1. Controlling the Programming Environment on Commodity Clusters
Upon login, default versions of the PGI compiler and OpenMPI (Message Passing Interface) libraries are added to each user's environment through a programming environment (PE) module. Users do not need to make any environment changes to use the default version of PGI and OpenMPI.
Changing Compilers
If a different compiler is required, it is important to use the correct environment for each compiler. To aid users in pairing the correct compiler and environment, programming environment modules are provided. The programming environment modules will load the correct pairing of compiler version, message passing libraries, and other items required to build and run code. We highly recommend that the programming environment modules be used when changing compiler vendors.
The following programming environment modules are available on OLCF commodity clusters (e.g. Lens):
- PE-pgi
- PE-gnu
- PE-intel
- PE-pathscale
To change the default loaded PGI environment to the default GCC environment use:
$ module unload PE-pgi
$ module load PE-gnu
Or alternatively:
$ module swap PE-pgi PE-gnu
Changing Versions of the Same Compiler
To use a specific compiler version, you must first ensure the compiler's PE module is loaded, and then swap to the correct compiler version. For example, the following will configure the environment to use the GCC compilers, then load a non-default GCC compiler version:
$ module swap PE-pgi PE-gnu
$ module swap gcc gcc/4.6.1
General Programming Environment Guidelines
We recommend the following general guidelines for using the programming environment modules:
- Do not purge all modules; rather, use the default module environment provided at the time of login, and modify it.
- Do not swap moab, torque, or MySQL modules after loading a programming environment modulefile.
8. Running Jobs on Lens
In High Performance Computing (HPC), computational work is performed by jobs. Individual jobs produce data that lend relevant insight into grand challenges in science and engineering. As such, the timely, efficient execution of jobs is the primary concern in the operation of any HPC system.
A job on Lens typically comprises a few different components:
- A batch submission script.
- A binary executable.
- A set of input files for the executable.
- A set of output files created by the executable.
And the process for running a job, in general, is to:
- Prepare executables and input files.
- Write a batch script.
- Submit the batch script to the batch scheduler.
- Optionally monitor the job before and during execution.
The following sections describe in detail how to create, submit, and manage jobs for execution on Lens.
8.1. Login vs Compute Nodes on Commodity Clusters
(Back to Top)
Login Nodes
When you log into an OLCF cluster, you are placed on a login node. Login node resources are shared by all users of the system. Because of this, users should be mindful when performing tasks on a login node.
Login nodes should be used for basic tasks such as file editing, code compilation, data backup, and job submission. Login nodes should not be used for memory or processing intensive tasks. Users should also limit the number of simultaneous tasks performed on the login resources. For example, a user should not run (10) simultaneous tar processes on a login node.
Compute Nodes
Memory and processor intensive tasks as well as production work should be performed on a cluster's compute nodes. Access to compute nodes is managed by the cluster's batch scheduling system (e.g., Torque/MOAB).
8.2. Writing Batch Scripts for Commodity Clusters
Batch scripts are used to run a set of commands on a cluster's compute partition. The batch script is simply a shell script containing options to the batch scheduler software (e.g., PBS) followed by commands to be interpreted by a shell. The batch script is submitted to the batch scheduler software, PBS, where it is parsed. Based on the parsed data, PBS places the script in the queue as a batch job. Once the batch job makes its way through the queue, the script will be executed on the primry compute node of the allocated resources.
Components of a Batch Script
Batch scripts are parsed into the following (3) sections:
Interpreter Line
The first line of a script can be used to specify the script’s interpreter; this line is optional. If not used, the submitter’s default shell will be used. The line uses the hash-bang syntax, i.e., #!/path/to/shell.
PBS Submission Options
The PBS submission options are preceded by the string#PBS, making them appear as comments to a shell. PBS will look for #PBS options in a batch script from the script’s first line through the first non-comment line. A comment line begins with #. #PBS options entered after the first non-comment line will not be read by PBS.
Shell Commands
The shell commands follow the last #PBS option and represent the executable content of the batch job. If any #PBS lines follow executable statements, they will be treated as comments only. The exception to this rule is shell specification on the first line of the script.
The execution section of a script will be interpreted by a shell and can contain multiple lines of executables, shell commands, and comments. Commands within this section will be executed on the batch job's primary compute node after the job has been allocated. During normal execution, the batch script will end and exit the queue after the last line of the script.
Example Batch Script
  1: #!/bin/bash
  2: #PBS -A XXXYYY
  3: #PBS -N test
  4: #PBS -j oe
  5: #PBS -l walltime=1:00:00,nodes=2:ppn=4
  6:
  7: cd $PBS_O_WORKDIR
  8: date
  9: mpirun -n 8 ./a.out
This batch script can be broken down into the following sections:
Interpreter Line
1: This line is optional and can be used to specify a shell to interpret the script.
PBS Options
2: The job will be charged to the “XXXYYY” project.
3: The job will be named test.
4: The job's standard output and error will be combined into one file.
5: The job will request (8) total compute cores from (2) unique physical nodes for (1) hour.
Shell Commands
6: This line is left blank, so it will be ignored.
7: This command will change the current directory to the directory from where the script was submitted.
8: This command will run the date command.
9: This command will run the executable a.out on (8) cores via MPI.
Batch scripts can be submitted for execution using the qsub command. For example, the following will submit the batch script named test.pbs:
qsub test.pbs
If successfully submitted, a PBS job ID will be returned. This ID can be used to track the job. It is also helpful in troubleshooting a failed job,; make a note of the job ID for each of your jobs in case you must contact the OLCF User Assistance Center for support.
8.3. Interactive Batch Jobs on Commodity Clusters
Batch scripts are useful when one has a pre-determined group of commands to execute, the results of which can be viewed at a later time. However, it is often necessary to run tasks on compute resources interactively.
Users are not allowed to access cluster compute nodes directly from a login node. Instead, users must use an interactive batch job to allocate and gain access to compute resources. This is done by using the -I option to qsub. Other PBS options are passed to qsub on the command line as well:
$ qsub -I -A abc123 -q qname -V -l nodes=4:ppn=4 -l walltime=30:00:00
This request will:
-I |
Start an interactive session |
-A |
Charge to the abc123 project |
-q qname |
Run in the qname queue |
-V |
Export the user's shell environment to the job's environment |
-l nodes=4:ppn=4 |
Request (16) cores... |
-l walltime=30:00:00 |
...for (30) minutes |
After running this command, the job will wait until enough compute nodes are available, just as any other batch job must. However, once the job starts, the user will be given an interactive prompt on the primary compute node within the allocated resource pool. Commands may then be executed directly (instead of through a batch script).
Using to Debug
A common use of interactive batch is to aid in debugging efforts. Interactive access to compute resources allows the ability to run a process to the point of failure; however, unlike a batch job, the process can be restarted after brief changes are made without losing the compute resource pool; thus speeding up the debugging effort.
Choosing a Job Size
Because interactive jobs must sit in the queue until enough resources become available to allocate, it is useful to base core selection on the number of currently unallocated cores (to shorten the queue wait time).
Use the showbf command (i.e. "show backfill") to see resource limits that would allow your job to be immediately backfilled (and thus started) by the scheduler. For example, the snapshot below shows that (8) nodes are currently free.
  $ showbf

  Partition   Tasks  Nodes  StartOffset   Duration   StartDate
  ---------   -----  -----  ------------  ---------  --------------
  lens        4744   8      INFINITY      00:00:00   HH:MM:SS_MM/DD
See the output of the showbf –help command for additional options.
8.4. Common Batch Options to PBS
The following table summarizes frequently-used options to PBS:
| Option | Use | Description |
|---|---|---|
-A |
#PBS -A <account> |
Causes the job time to be charged to <account>. The account string, e.g. pjt000, is typically composed of three letters followed by three digits and optionally followed by a subproject identifier. The utility showproj can be used to list your valid assigned project ID(s). This option is required by all jobs. |
-l |
#PBS -l nodes=<value> |
Maximum number of compute nodes. Jobs cannot request partial nodes. |
#PBS -l walltime=<time> |
Maximum wall-clock time. <time> is in the format HH:MM:SS. |
|
#PBS -l gres=<filesystem> |
Associate batch job with one or more Lustre filesystems. Valid options are widow1, widow2, and widow3. Include multiple filesystems like widow2%widow3. Useful to omit associations in the event of file system outages. |
|
-o |
#PBS -o <filename> |
Writes standard output to <name> instead of <job script>.o$PBS_JOBID. $PBS_JOBID is an environment variable created by PBS that contains the PBS job identifier. |
-e |
#PBS -e <filename> |
Writes standard error to <name> instead of <job script>.e$PBS_JOBID. |
-j |
#PBS -j {oe,eo} |
Combines standard output and standard error into the standard error file (eo) or the standard out file (oe). |
-m |
#PBS -m a |
Sends email to the submitter when the job aborts. |
#PBS -m b |
Sends email to the submitter when the job begins. | |
#PBS -m e |
Sends email to the submitter when the job ends. | |
-M |
#PBS -M <address> |
Specifies email address to use for -m options. |
-n |
#PBS -N <name> |
Sets the job name to <name> instead of the name of the job script. |
-S |
#PBS -S <shell> |
Sets the shell to interpret the job script. |
-q |
#PBS -q <queue> |
Directs the job to the specified queue.This option is not required to run in the default queue on any given system. |
-V |
#PBS -V |
Exports all environment variables from the submitting shell into the batch job shell. |
Further details and other PBS options may be found through the qsub man page.
8.5. Batch Environment Variables
PBS sets multiple environment variables at submission time. The following PBS variables are useful within batch scripts:
| Variable | Description |
|---|---|
$PBS_O_WORKDIR |
The directory from which the batch job was submitted. By default, a new job starts in your home directory. You can get back to the directory of job submission with cd $PBS_O_WORKDIR. Note that this is not necessarily the same directory in which the batch script resides. |
$PBS_JOBID |
The job’s full identifier. A common use for PBS_JOBID is to append the job’s ID to the standard output and error files. |
$PBS_NUM_NODES |
The number of nodes requested. |
$PBS_NUM_PPN |
The number of cores requested. |
$PBS_JOBNAME |
The job name supplied by the user. |
$PBS_NODEFILE |
The name of the file containing the list of nodes assigned to the job. Used sometimes on non-Cray clusters. |
The batch scheduler provides a number of utility commands for managing submitted jobs. See each utilities' man page for more information.
Removing and Holding Jobs
qdel
Jobs in the queue in any state can be stopped and removed from the queue using the command qdel.
$ qdel 1234
qhold
Jobs in the queue in a non-running state may be placed on hold using the qhold command. Jobs placed on hold will not be removed from the queue, but they will not be eligible for execution.
$ qhold 1234
qrls
Once on hold the job will not be eligible to run until it is released to return to a queued state. The qrls command can be used to remove a job from the held state.
$ qrls 1234
Modifying Job Attributes
qalter
Non-running jobs in the queue can be modified with the PBS qalter command. The qalter utility can be used to do the following (among others):
Modify the job’s name:
$ qalter -N newname 130494
Modify the number of requested cores:
$ qalter -l nodes=12 130494
Modify the job’s walltime:
$ qalter -l walltime=01:00:00 130494
PBS and Moab provide multiple tools to view queue, system, and job status. Below are the most common and useful of these tools.
Job Monitoring Commands
showq
The Moab utility showq can be used to view a more detailed description of the queue. The utility will display the queue in the following states:
| Active | These jobs are currently running. |
|---|---|
| Eligible | These jobs are currently queued awaiting resources. A user is allowed two jobs in the eligible state. Eligible jobs are shown in the order in which the scheduler will consider them for allocation. |
| Blocked | These jobs are currently queued but are not eligible to run. Common reasons for jobs in this state are jobs on hold and the owning user currently having (2) jobs in the eligible state. |
To see all jobs currently in the queue:
$ showq
To see all jobs owned by userA currently in the queue:
$ showq -u userA
checkjob
The Moab utility checkjob can be used to view details of a job in the queue. For example, if job 736 is a job currently in the queue in a blocked state, the following can be used to view why the job is in a blocked state:
$ checkjob 736
The return may contain a line similar to the following:
BlockMsg: job 736 violates idle HARD MAXJOB limit of 2 for user (Req: 1 InUse: 2)
This line indicates the job is in the blocked state because the owning user has reached the limit of (2) jobs currently in the eligible state.
qstat
The PBS utility qstat will poll PBS (Torque) for job information. However, qstat does not know of Moab's blocked and eligible states. Because of this, the showq Moab utility (see above) will provide a more accurate batch queue state.
To show show all queued jobs:
$ qstat -a
To show details about job 1234:
$ qstat -f 1234
To show all currently queued jobs owned by userA:
$ qstat -u userA
Batch queues are used by the cluster's batch scheduler to aid in the organization of jobs. There are (2) major types of queues on Lens: computation queues and analysis queues.
Computation queues are the standard queues for production-type work. All users have access to the computation queues by default.
Analysis queues are specifically for analysis or visualization of data generated on flagship OLCF systems (e.g. Titan). Users must request access to the analysis queues by contacting the OLCF User Assistance Center.
In addition to (2) types of queues, Lens also contains (2) types of nodes. (32) GPU nodes contain (4) quad-core 2.3 GHz AMD Opteron processors, (64) GB of memory, and an Nvidia Tesla C1060 GPU, while (45) high-memory nodes contain (4) quad-core 2.3 GHz AMD Opteron processors, (128) GB of memory and no GPU.
The table below summarizes the queues available on Lens:
| Queue Name | Queue Type | Max. Walltime | Available Node Types | Max. Jobs | Preemption Policy | |
|---|---|---|---|---|---|---|
| Running | Total | |||||
comp |
computation | 06:00:00 | All (77) nodes | (1) | (2) | Can be preempted by jobs in analysis queues |
comp_gpu |
GPU nodes only | |||||
comp_mem |
High-memory nodes only | |||||
vis |
analysis | 24:00:00 | All (77) nodes | N/A | N/A | Can preempt jobs in computation queues |
vis_gpu |
GPU nodes only | |||||
vis_mem |
High-memory nodes only | |||||
If your jobs require resources outside of these limits, please complete the relevant request form on the Special Requests page.
Users may have a maximum of (1) running job in each of the computation queues, with a maximum of (2) jobs (in any state) in each of them.
Any job can request any number of processors (up to the maximum number physically available for the queue being used).
8.9. Job Execution on Commodity Clusters
Once resources have been allocated through the batch system, users have the option of running commands on the allocated resources' primary compute node (a serial job) and/or running an MPI/OpenMP executable across all the resources in the allocated resource pool simultaneously (a parallel job).
8.9.1. Serial Job Execution on Commodity Clusters
The executable portion of batch scripts is interpreted by the shell specified on the first line of the script. If a shell is not specified, the submitting user’s default shell will be used.
The serial portion of the batch script may contain comments, shell commands, executable scripts, and compiled executables. These can be used in combination to, for example, navigate file systems, set up job execution, run serial executables, and even submit other batch jobs.
8.9.2. Parallel Job Execution on Commodity Clusters
(Back to Top)
Using
mpirun
By default, commands will executed on the job's primary compute node, sometimes referred to as the job's head node. The mpirun command is used to execute an MPI executable on one or more compute nodes in parallel. Lens's hardware configuration should be kept in mind when running an MPI executable via mpirun. Lens nodes consist of (4) quad-core sockets per node.
mpirun accepts the following common options:
-display-map |
Can be used to view layout |
-npernode |
Number of cores per node |
-n |
Number of total cores |
mpirun via -n, the system will default to all available cores allocated to the job.
MPI Task Layout
Round-robin by Core
The default MPI task layout on the system is to round-robin task on cores. For example, if (2) nodes with (2) cores on each are requested via:
#PBS -l nodes=2:ppn=2
The following:
mpirun -n 4 a.out
Will run the MPI executable a.out on a total of (4) cores, (2) cores on (2) compute nodes. The MPI tasks will be allocated round-robin by core:
| Compute Node 0 | Compute Node 1 | |||
|---|---|---|---|---|
| core 0 | core 1 | core 0 | core 1 | |
| 0 | 1 | 2 | 3 | |
Round-robin by Node
The following command:
mpirun -n 4 -bynode a.out
Will run the MPI executable a.out on a total of (4) cores, (2) cores on (2) compute nodes. The MPI tasks will be allocated round-robin by node:
| Compute Node 0 | Compute Node 1 | |||
|---|---|---|---|---|
| core 0 | core 1 | core 0 | core 1 | |
| 0 | 2 | 1 | 3 | |
8.9.3. Resource Sharing on Commodity Clusters
Jobs on OLCF clusters are scheduled in full node increments; a node's cores cannot be allocated to multiple jobs. Because the OLCF charges based on what a job makes unavailable to other users, a job is charged for an entire node even if it uses only one core on a node. To simplify the process, users are given a multiples of entire nodes through PBS.
8.9.4. Task-Core Affinity on Commodity Clusters
In general, the cluster may move MPI tasks between cores within a node.
To help prevent a job’s tasks from being moved between cores each idle cycle the mpi_yield_when_idle OpenMPI option may be used. For example:
$ mpirun -n 8 -mca mpi_yield_when_idle 0 a.out
This will help prevent the core from being given to other waiting tasks. This only affects MPI processes when they are blocking in MPI library calls.
By default OpenMPI will set this variable based on whether it believes the node is over-allocated or under-allocated. If over-allocated, mpi_yield_when_idle, will be set to a value other than (1), allowing the core to be given to other waiting tasks when idle. If under-allocated, mpi_yield_when_idle, will be set to (0).
If more tasks are running on a node than are cores, the OS will swap all tasks between cores on the node. The mpi_yield_when_idle option only helps to slow this down; it will not fully prevent the swaps.
8.10. Job Accounting on Commodity Clusters
Jobs on OLCF clusters are scheduled in full node increments; a node's cores cannot be allocated to multiple jobs. Because the OLCF charges based on what a job makes unavailable to other users, a job is charged for an entire node even if it uses only one core on a node. To simplify the process, users are given a multiples of entire nodes through PBS.
Viewing Allocation Utilization
Projects are allocated time on OLCF clusters in units of core-hours. This page describes how such units are calculated, and how users can access more detailed information on their relevant allocations.
Core-Hour Calculation
The core-hour charge for each batch job will be calculated as follows:
Core-hours = nodes requested * cores per node * ( batch job endtime - batch job starttime )
Where batch job starttime is the time the job moves into a running state, and batch job endtime is the time the job exits a running state.
A batch job's usage is calculated solely on requested nodes and the batch job's start and end time. The number of cores actually used within any particular node within the batch job is not used in the calculation. For example, if a job requests (6) nodes through the batch script, runs for (1) hour, uses only (2) CPU cores per node, the job will still be charged for 6 nodes * 16 * 1 hour = 96 core-hours.
Viewing Usage
Utilization is calculated daily using batch jobs which complete between 00:00 and 23:59 of the previous day. For example, if a job moves into a run state on Tuesday and completes Wednesday, the job's utilization will be recorded Thursday. Only batch jobs which write an end record are used to calculate utilization. Batch jobs which do not write end records due to system failure or other reasons are not used when calculating utilization.
Each user may view usage for projects on which they are members from the command line tool showusage and the My OLCF site.
On the Command Line via showusage
The showusage utility can be used to view your usage from January 01 through midnight of the previous day. For example:
  $ showusage
    Usage on lens:
                             Project Totals
    Project             Allocation      Usage      Remaining     Usage
    _________________|______________|___________|____________|______________
    abc123           |  20000       |   126.3   |  19873.7   |   1560.80
The -h option will list more usage details.
On the Web via My OLCF
More detailed metrics may be found on each project's usage section of the My OLCF site.
The following information is available for each project:
- YTD usage by system, subproject, and project member
- Monthly usage by system, subproject, and project member
- YTD usage by job size groupings for each system, subproject, and project member
- Weekly usage by job size groupings for each system, and subproject
- Batch system priorities by project and subproject
- Project members
The My OLCF site is provided to aid in the utilization and management of OLCF allocations. If you have any questions or have a request for additional data, please contact the OLCF User Assistance Center.
- Principal Investigators (Non-Profit)
- Principal Investigators (Industry)
- All Users
Title: Lens Scheduling Policy
Version: 13.01
Jobs on Lens run in a first-in, first-out (FIFO) order. The is the case across all Lens queues, with the notable exception that queues designated as analysis queues can preempt jobs in queues designated as computation queues.
For complete information on batch queues available on Lens, please see the Batch Queues on Lens page.
