Featured Web Tutorials
Feedback
Dear Customer:
Thank you for your feedback regarding Find Out How. We cannot respond to you personally, but please know that your message has been received and will be reviewed by the Find Out How Feedback Team. If we need to follow up with you on your ideas for improving Find Out How, we will contact you directly.
We appreciate your assistance in making Find Out How better.
Find Out How Team
Apple
Browse all video tutorials
Easy, Flexible Website Design
-
Creating a Website
src="http://images.apple.com/findouthow/images/qt_endstate.jpg"
Websites
iWeb ’08 makes it easy to create a website that’s stunningly beautiful, and totally you. You can even add a Blog.
-
Customizing Your Pages
src="http://images.apple.com/findouthow/images/qt_endstate.jpg"
-
Adding Live Web Content
src="http://images.apple.com/findouthow/images/qt_endstate.jpg"
Add Photos and Movies to Your Site
-
Creating a Photo Album Page
src="http://images.apple.com/findouthow/images/qt_endstate.jpg"
-
Creating a Movie Page
src="http://images.apple.com/findouthow/images/qt_endstate.jpg"
Express Yourself with Blogs and Podcasts
-
Creating a Blog
src="http://images.apple.com/findouthow/images/qt_endstate.jpg"
-
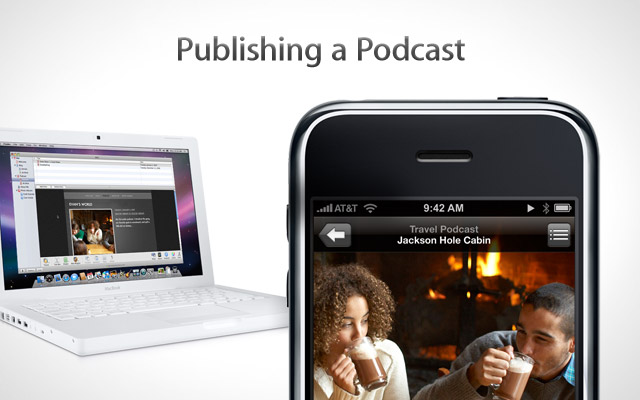
Publishing a Podcast
src="http://images.apple.com/findouthow/images/qt_endstate.jpg"
Publish and Manage Your Website
-
Publishing Your Site
src="http://images.apple.com/findouthow/images/qt_endstate.jpg"
-
Managing Your Site
src="http://images.apple.com/findouthow/images/qt_endstate.jpg"
Browse all text tutorials
Creating a Website
-
Designing Websites
Designing Websites
If you’re going to build a website, it helps to have a plan. You can start by answering these two questions:
- What are you trying to say?
- Who is your audience?
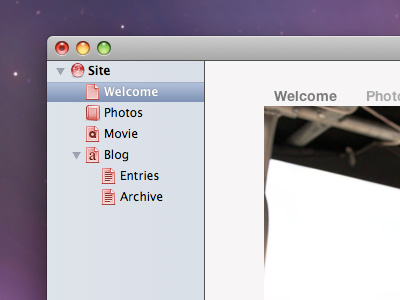
The answers to these questions are connected. You may want to build your site to express your opinions, to share your experiences with others, or maybe even to talk about your business. If you’re simply trying to share your photos, movies, and thoughts with friends and family, you may want to start with:
- a home page
- a photo page
- a movie page
- a blog page
-
Using the Inspector Toolbar
Using the Inspector Toolbar
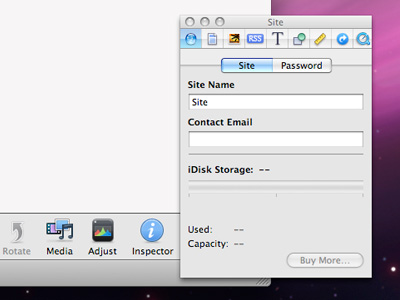
Click the Inspector button (located at the bottom of the iWeb window) to display the Inspector window. The Inspector helps you:
- Add and edit text
- Add and edit images
- Add and edit graphics
- Add and edit movies
- Add and edit RSS feeds
-
Duplicating Page Templates
Duplicating Page Templates
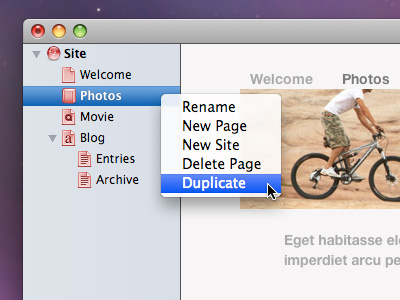
Duplicating a well-designed page and modifying it offers an easy way to give your website visual consistency and reduce the amount of layout work you have to do.
To create a page template:
- In the iWeb sidebar, right-click on a web page you’d like to duplicate and choose Duplicate from the contextual menu that appears.
- A new page appears in the sidebar, colored red to indicate that the page has not yet been published.
- To rename the page, right-click on the page name, choose Rename from the contextual menu that appears, and give it a new name.
-
Changing Font Size
Changing Font Size
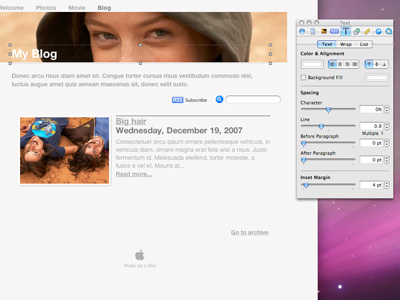
The Inspector provides the best way to add and control text on your web page. However, if all you want to do is make some text larger or smaller, iWeb offers an easy shortcut.
To quickly change font size:
- Select the text you want to edit.
- To make the text larger, press the Command and “+” keys at the same time.
- To make the text smaller, press the Command and “-” keys at the same time.
-
Adding a Google Map
Adding a Google Map
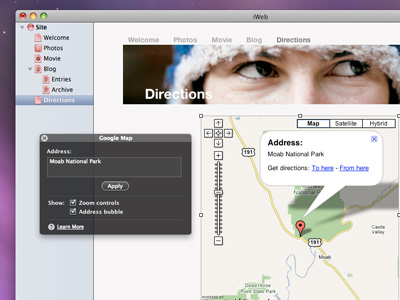
To add interest for visitors, you may want to add a Google Map to one or more pages on your website.
To add a Google Map to a web page:
- With a new page template open, go to the iWeb toolbar, click Web Widgets, and choose Google Map from the menu that appears.
- A Google map appears on your page with a Google Map window.
- Enter an address you want the Google map to display and click Apply. The map displays the location.
- Drag the map to the position where you want it to appear. Use the handles on the sides and corners of the map to adjust its height and width.
Creating Blogs
-
Adding More Entries to Your Blog
Adding More Entries to Your Blog
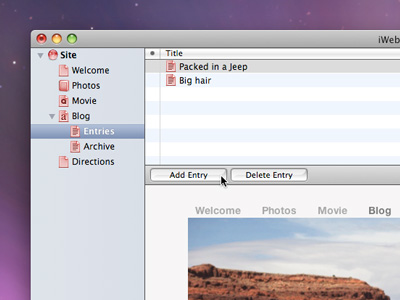
After you’ve created your blog and the first entry, iWeb makes adding new blog entries easy.
To add a blog entry:
- In the sidebar, click Entries.
- In the entries list, click the first entry and choose Edit > Duplicate. A new entry appears on the list.
- Double-click the name of the new entry and replace the selected title with a new title. Then set the date for the new entry. The title and date appear above the text in the entry's main content area.
- Select the text in the new entry and delete it. Then type new text or simply drag a text file into the content area. The new blog entry appears in the content area.
- In the Photos pane of the Media browser, click iPhoto and select a photo from your iPhoto library. Drag the new photo onto the existing photo in your blog entry.
-
Adding Videos to Blog Entries
Adding Videos to Blog Entries
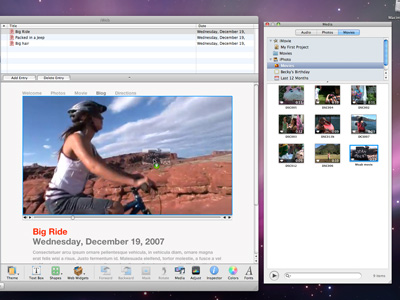
iWeb makes adding a QuickTime video to your blog entry as easy as adding a photo.
To add a QuickTime video:
- In the sidebar, click Entries.
- Select the blog entry to which you want to add a QuickTime video.
- Go to the Media browser or to the Finder and locate the QuickTime video file you want to add to your blog entry.
- Drag the QuickTime video file onto the existing image in your blog entry, replacing the existing image with the new QuickTime video file.
To make sure your friends and family can view your QuickTime video file quickly when they come to your website, size it appropriately for the web. Click here to find out how.
Creating Photo Pages
-
Placing Photos Accurately
Placing Photos Accurately

To make your website look great, make sure all your photos and text are lined up uniformly on your page. iWeb makes it easy to view the vertical and horizontal placement of photos and text boxes.
To view content alignment:
- Select one of your web pages and click a photo.
- Dragging the photo slightly up and down reveals the horizontal alignment guide. Dragging the photo slightly left and right reveals the vertical alignment guide.
Use the guides to straighten and align photos with other content on your web page.
-
Downloading Photos
Downloading Photos
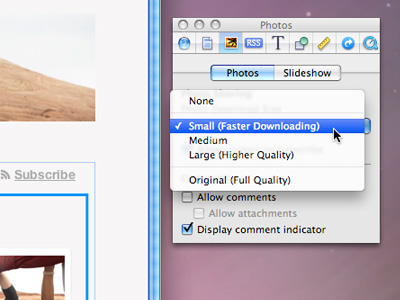
When visitors come to your Photos page and click a thumbnail to jump to a photo’s detail page, you can give them the opportunity to download a copy of the photo. In fact, you can even specify the size of the image they download.
To size photos for download:
- With your Photos page open in the photo grid view, double-click one of the photos in the grid. A larger version of the photo appears.
- In the Inspector toolbar, click the third button from the left to show the Photos Inspector pane.
- In the “Photo Sharing” section, use the pop-up menu to select the photo size you want visitors to download.
-
Allowing Viewers to Add Comments
Allowing Viewers to Add Comments to Photos
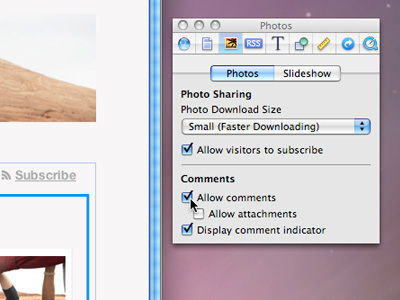
iWeb lets you give visitors the option of adding comments directly below photos on photo detail pages. This can be an enjoyable way for friends and family to interact with your website. Of course, you'll want to check comments frequently to make sure they’re all appropriate for your site.
To enable viewer comments:
- Open your Photos page in the photo grid view and double-click one of the photos in the grid. A larger version of the photo appears.
- In the Inspector toolbar, click the Photos Inspector button.
- In the “Comments” section, click the Allow comments checkbox.
When visitors view the photo, they can now add their own comments, and future visitors can view the photo and all of its associated comments.
Creating Podcasts
-
Optimizing File Size
Optimizing File Size
When you share a podcast on your website or blog, you want to make sure you’ve compressed the podcast file size properly to allow visitors to download it quickly.
To optimize a podcast file:
- Open GarageBand. Then open the audio file you want to share as a podcast.
- Choose Share > Send Podcast to Web.
- In the resulting dialog, use the Compress Using pop-up menu to indicate how you want to compress the podcast.
- From the Audio Settings pop-up menu, choose a Sound quality setting.
- To have GarageBand prepare your podcast episode for delivery, click Share.
When GarageBand finishes, it sends the episode to iWeb, which publishes the finished podcast on a new blog or podcast entry on your website.