
About X-Win32
X-Win32, from StarNet Communications, lets your Windows PC run the X Window System, and enables you to run graphical applications from Helix. It is the only PC X server that lets you connect to multiple Unix/Linux desktops at the same time. X-Win32 also runs X Windows applications in separate XTerm windows. Installation includes integrated secure shell (SSH). The secure shell is also compatible with PuTTY.
Installing X-Win32
Helix users can download and install a licensed version of X-Win32 on their Windows PC by following these one-time instructions.
1. Obtain X-Win32 Serial Number
Obtain an X-Win32 license by logging on to Helix and type the command xwinlicense at the helix prompt. The output from this command will be used in step 3 and is necessary to activate X-Win32 on your PC.
helix% xwinlicenseIf you do not already have a way to login to Helix to run this command you should first install PuTTY, a free SSH terminal client for Windows.
NOTE: You will need PuTTY for when your password expires and you need to change it. XWin-32 will not allow you to change your password after it expires.2. Download X-Win32
Follow this link to download the X-Win32 installation archive to your computer:
3. Install X-Win32
Locate where xwin32_current.exe was downloaded. One way to do this is to go to the Start menu, click Find -> Files or Folders and type xwin32_current.exe and click Find Now.
Once you have located xwin32_current.exe, double click the file to start the InstallShield Wizard. The Wizard will guide you through the installation process.
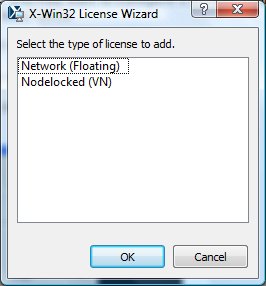
IMPORTANT: When prompted for the X-Win32 serial number, you should see a window similar to the image below. Click "Network (floating) and in the next window, cut and paste the license information obtained in step 1, then click "ok" or "finish".
4. Start X-Win32
To start X-Win32 click on Start -> Programs -> X-Win32 (Version #) -> X-Win32
5. Configuring and using X-Win32
Although X-Win32 is easy to install and use, you may want to configure it to meet your needs on the Helix systems. Examples are listed below.
Create a login window for your desktop and start X-Config either by clicking
Start -> Programs -> X-Win32 (Version #) -> X-Config
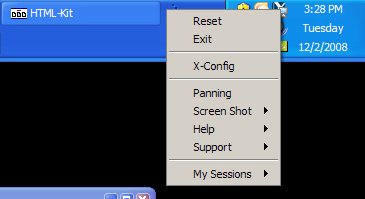
or if X-Win32 is already running, right-click on the X icon in the System Tray, then XConfig on the drop-down menu.
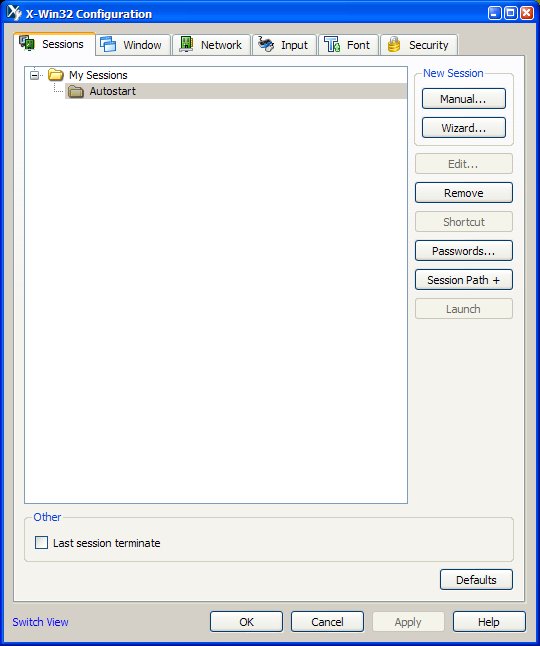
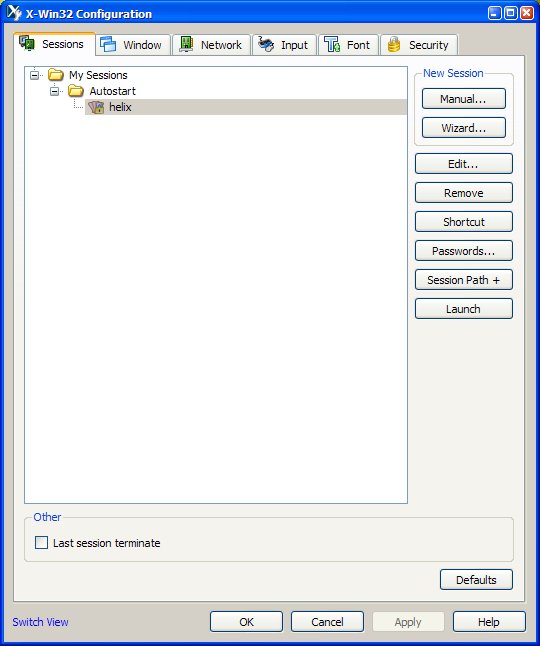
The "X-Win32 Configuration" Window should display.
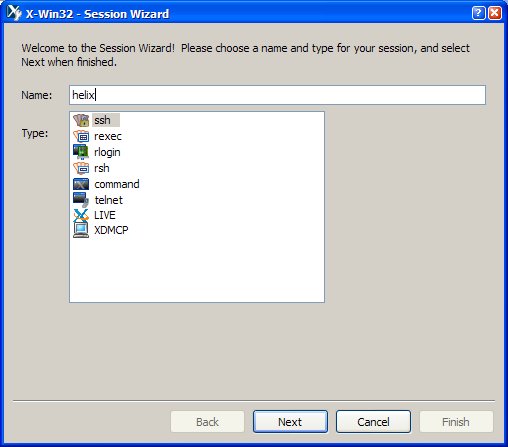
Click the "Wizard" button to get started. The "Session Wizard" popup window should display; click "ssh" for connection type. Type "helix" for the Name field.
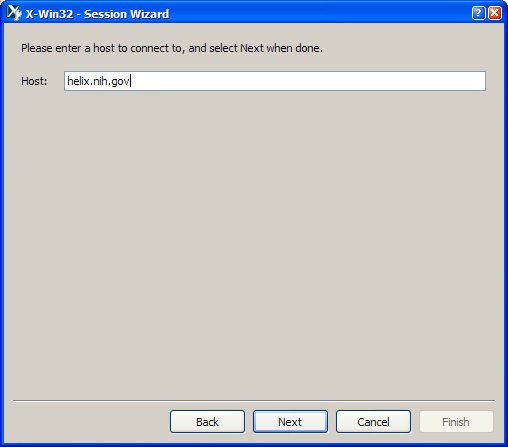
In the next popup window, enter the following information:
- Host: helix.nih.gov; click next
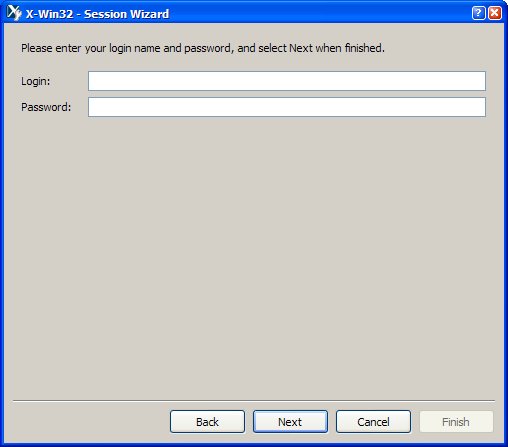
- Login and password: leave blank; click next
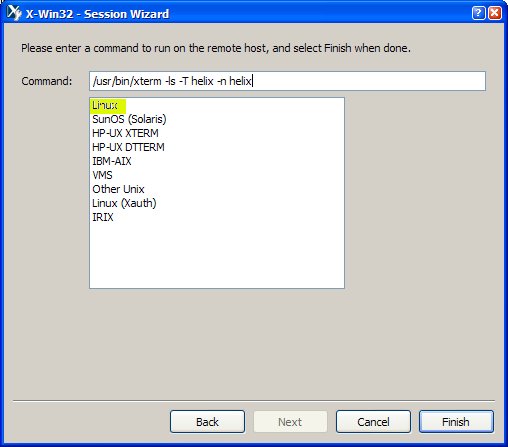
- Command: click Linux; can add '-T helix -n helix' if so desire.
Click the "Finish" button which will take you back to the "X-Win32 Configuration" popup window.
6. Create a Shortcut on Your Desktop
Click on "helix" in the Sessions menu, then the "Shortcut" button on the right
This will create an icon on your desktop
To connect to helix, click on the "helix" icon on your desktop.
NOTE: To create other sessions, simply follow instructions 5 and 6 listed above. You will need to know/change the command you want to run and the host you want to connect to.


Helix X Applications
Once X-Win32 is installed on your PC, you can try some Helix X applications such as xterm, xcalc, xclock, etc, by logging in to helix/biowulf. If you have questions about or problems using X-Win32, see the X-Win32 Knowledge Base before contacting the Helix staff.
