
There are several secure options for transferring files to and from Helix and Biowulf, which use encrypted passwords (unlike FTP). File transfers to and from the systems should be performed using one of these more secure services. Detailed setup & usage instructions for each method are below. Click on each section to expand, or click here to expand/collapse all sections.
 Windows: Mapped Network Drive
This method will allow you to easily drag/drop files between your local machine and your global Helix Systems directories. This includes /home, /data, and /scratch. Please see disks.html for more information about /home, /data, and /scratch.
This method can only be used for machines that are within the NIH network, including VPN connections. The NCI-Frederick campus is outside the main NIH campus firewall, so users at NCI-Frederick will need to use VPN.
NOTE: Helix network drives require NTLM version 2 for authentication. See the NTLMv2 WIKI for more information on NTLMv2.
-
On your desktop machine, go to the 'My Copmuter' folder and open the Tools → Map Network Drive... tab.

-
Enter the directory you want to mount as follows:
- /home/[user]: \\helixdrive.nih.gov\[user]
- /data/[user]: \\helixdrive.nih.gov\data
- /scratch: \\helixdrive.nih.gov\scratch
Make sure to replace [user] with your Helix login!!!

Click the 'Finish' button.
-
If your NIH login and password are not the same as your Helix login and password, then you will need to enter your Helix login and password.

-
You have successfully mapped your Helix Systems directory to your desktop machine!

-
You should see a network icon in the My Computer folder. You can create a shortcut to this drive on your desktop.

Macs: Mapped Network Drive
Desktop machines within the NIH network can map the Helix directories, so that you can easily drag/drop files between your local machine and your Helix /home, /data and /scratch directories. [More information about /home, /data, and /scratch]. Note that this is most suitable for transferring small files. Users transferring large amounts of data to and from Helix/Biowulf should continue to use scp or sftp.
This method can only be used for machines that are within the NIH network, including VPN connections. The NCI-Frederick campus is outside the main NIH campus firewall, so users at NCI-Frederick will need to use VPN.
- From the main Mac menu, click on Go → Connect to server.
- For 'Server address', enter the Helix directory you want to mount:
- /home/[user]: smb://helixdrive.nih.gov/user
- /data/[user]: smb://helixdrive.nih.gov/data
- /scratch: smb://helixdrive.nih.gov/scratch

- Click 'Connect' and in the subsequent window, enter your Helix username and password.

- The requested area should now be mounted as a shared drive. In your Finder window, you will see 'helixdrive.nih.gov' listed under 'Shared', and can drag and drop files to your Helix directories.

Linux: Mapped Network Drive
Windows: WinSCP
Download from winscp.net
Click 'Open'
Select 'Next'
Select 'I Accept' then click 'Next'
Accept the default location or choose one yourself then click 'Next'
Click 'Next'
Click 'Next'
Click 'Next'
Click 'Next'
Click 'Install'
Uncheck the 'Launch WinSCP' box then click 'Finish'.
To open WinSCP, double click on the shortcut on your desktop.
Fill the host name, your helix user ID and password, select 'SFTP', then click 'Login'.
Click 'Yes'. This window only show up the first time you use WinSCP.
The left panel shows the directories on your desktop PC and the right panel shows your directories on Helix.
Click on the 'Preference' icon and browse through the tags to get an idea of all the options available.
To locate the file source and destination, simply use the two drop down boxes. Drag and drop files or folders to start transfer.


Macs: Fugu
Fugu is a graphical frontend to the commandline Secure File Transfer application (SFTP). SFTP is similar to FTP, but unlike FTP, the entire session is encrypted, meaning no passwords are sent in cleartext form, and is thus much less vulnerable to third-party interception. Fugu allows you to take advantage of SFTP's security without having to sacrifice the ease of use found in a GUI. Fugu also includes support for SCP file transfers, and the ability to create secure tunnels via SSH.
Download Fugu from the U. Mich. Fugu website.
Doubleclick on the downloaded Fugu_xxxx.dmg file to open. A small window with the Fugu icon will appear,

Grab the fish and copy it to your Applications folder, your Desktop and/or your Dock.
Start Fugu by clicking on the Fugu icon. In the box for 'Connect to:', enter 'helix.nih.gov' and click 'Connect'. Enter your Helix password when requested. You should now see a window with one pane listing files on your local desktop machine, and the other pane listing files in your Helix account space.

Windows/Mac/Linux: Filezilla
Download Filezilla from sourceforge.net (current version = 3.0.0).
Save the setup.exe to your desktop.
Double-click on the setup.exe icon, and accept the license agreement.
Choose components, install location, and start menu folder. The defaults are almost always acceptable.
Click install. Accept and finish.
Start the Filezilla client.
Select File > Site Manager...
Click New Site and configure for helix as detailed below:
Click connect, and drag and drop files across systems.


Windows: secure FTP and secure copy with PuTTY
Both psftp and pscp are run through the Windows console (Command Prompt in start menu), and require the directory to the PuTTY executables be included in the Path environment variable. This can be done transiently through the console:
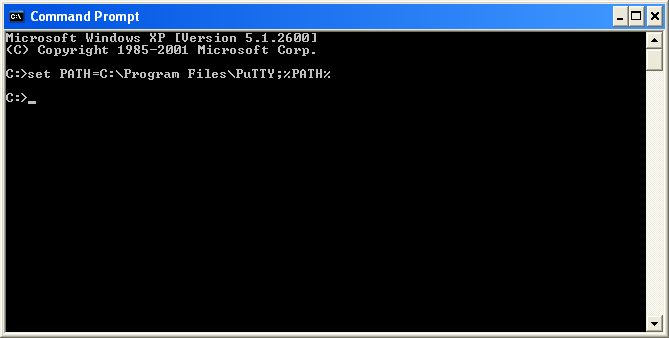
or permanently through the System Control Panel (see here for more information).
pscp
Secure Copy (pscp) is a command line mechanism for copying files to and from remote systems.
From the console, type 'pscp'. This will bring up a help menu showing all the options for pscp.
PuTTY Secure Copy client
Release 0.58
Usage: pscp [options] [user@]host:source target
pscp [options] source [source...] [user@]host:target
pscp [options] -ls [user@]host:filespec
Options:
-V print version information and exit
-pgpfp print PGP key fingerprints and exit
-p preserve file attributes
-q quiet, don't show statistics
-r copy directories recursively
-v show verbose messages
-load sessname Load settings from saved session
-P port connect to specified port
-l user connect with specified username
-pw passw login with specified password
-1 -2 force use of particular SSH protocol version
-4 -6 force use of IPv4 or IPv6
-C enable compression
-i key private key file for authentication
-batch disable all interactive prompts
-unsafe allow server-side wildcards (DANGEROUS)
-sftp force use of SFTP protocol
-scp force use of SCP protocol
To copy a file from the local Windows machine to a user's home directory on helix, type
You will be prompted for your helix password, then the file will be copied.
To do the reverse, i.e. copy a remote file from helix to the local Windows machine, type
(you must include a '.' to retain the same filename, or explicitly give a name for the remotefile copy).
psftp
Secure FTP (psftp) allows for interactive file transfers between machines in the same way as good old FTP (non-secure) did.
From the console, type 'psftp'. This will start a sFTP session, but it will complain that no connection has been made. To transfer a local file to helix, at the psftp prompt type:
You will again be prompted for a password.
Once a session to helix has been established, the standard FTP commands can be used.
For even more information, see http://the.earth.li/~sgtatham/putty/0.58/htmldoc/
Macs & Unix/Linux: Secure Copy
Macs & Unix/Linux: SFTP
File transfer via web browsers
FTP is inherently insecure because it sends data and most importantly your password in plain, unencrypted text. SCP and sFTP use an SSH2 encrypted connection to transfer both data and password information. While security is good, it comes at the price of slower transfer rates than FTP.
The rate of data transfer is only an issue for data amounts greater than 256MB. For amounts less than this, any application will suffice. To optimize transfer rates for large amounts of data, use less demanding encryption ciphers, such as blowfish or arcfour, and try to transfer the data when the network is less busy (before 10 am and after 6 pm). Also use the most appropriate application based on the table below.
The Helix Staff has compared the applications and our results are below. For the most part we recommend using Filezilla for Windows and Fugu for Macs. scp is the default and best option for Linux/Unix machines.
| Platform | Application | Pros | Cons |
|---|---|---|---|
| All platforms | Filezilla v3.0 | Better control over transfer during the process, fewer and simpler controls than WinSCP, fastest transfer rates by sFTP. | scp not an option. |
| Windows | WinSCP | Much faster transfer rates than PuTTY-pscp/psftp, but slightly faster than Filezilla for uploads using scp (rates were found to vary considerably by cipher used, in the order of Blowfish > AES >> 3DES), highly comprehensive configuration. | Cumbersome user interface for changing local and remote directories. |
| pscp/psftp | Direct command line control over process. | Need to run through the command prompt, slowest transfer rates seen. | |
| Mapped Network Drive | Convenient. | Fairly slow transfer rates, especially very large files. | |
| Macs | Fugu | Easy to configure and use. Same transfer rates as scp. | None. |
| Mapped Network Drive | Convenient | Fairly slow transfer rates, especially for large files. | |
| scp,sftp | Can be used for scripting & automatic file transfers, fastest transfer rates with appropriate ciphers. | non-GUI interface. | |
| Linux/Unix | scp,sftp | Same as for Macs. | Same as for Macs. |
