Below is the text for a brochure that summarizes the 2nd Battle of Fredericksburg & Salem Church and contains a driving tour of the battlefield.
The fighting at 2nd Fredericksburg and Salem Church comprises an important if often overlooked, phase of the Chancellorsville Campaign. Major General Joseph Hooker, commander of the Union army, began the campaign by splitting his forces. { Read General Hooker's Report} While Major General John Sedgwick's VI Corps crossed the Rappahannock River below Fredericksburg to hold the Confederates' attention, Hooker sent three corps (later reinforced to six)across the river above Fredericksburg, turning the Confederate' left flank. General Robert E. Lee responded by diving his army as well. {Read General Lee's Report}While Lee led 45,000 men west to engage Hooker's main force at Chancellorsville, Major General Jubal A. Early remained at Fredericksburg with 12,000 men to block Sedgwick. { Read General Early's Report,} After two days of fighting, Hooker ordered Sedgwick to seize the heights behind Fredericksburg and march to his assistance at Chancellorsville.{ Read General Sedgwick's Report}
Daybreak, May 3, 1863, found Sedgwick's 25,000 troops facing Early's 12,000 across a seven-mile front. Early concentrated his strength near Prospect Hill, where Union troops had enjoyed brief success during the Battle of Fredericksburg the previous year. Sedgwick, however, attacked Marye's Heights, five miles further north. Although Marye's Heights was a strong position, fewer than 1,000 men of the 18th and 21st Mississippi Infantry regiments of Barksdale's brigade and seven guns of the Washington Artillery the ground defended it. { Read General Barksdale's Report} 8,000 Confederates had successfully defended the previous December.
Despite the paucity of Confederate defenders, Sedgwick's first two attacks against Marye's Heights failed, recalling images of the December 1862 slaughter. During a truce to remove the wounded, Union soldiers discovered how few Southerners held the ridge. Confident of success, they renewed their attack and on the next try succeeded in capturing the heights. Early rallied his troops and retreated down the Telegraph Road (modern Lafayette Boulevard), thus blocking any direct advance by Sedgwick on Richmond.
Sedgwick instead headed for Chancellorsville. In his path were 10,000 Confederates led by Major General Lafayette McLaws and Brigadier General Cadmus Wilcox. These Southern troops held Salem Church ridge, four miles west of town. The sun was low in the sky when Sedgwick reached Salem Church and deployed his corps for the attack. Utilizing just one of his three divisions (Brooks'), he made a costly and unsuccessful frontal assault against the center of the Confederate line. Nightfall put an end to what Sedgwick termed a "sharp and prolonged attack."
On May 4 Lee took the offensive against Sedgwick. Jubal Early reoccupied Marye's heights at dawn, cutting off the Union general's escape via Fredericksburg.
Later in the day, Lee brought General Richard Anderson's division from Chancellorsville to fill the gap between Early and McLaws. { Read General Anderson's Report,} By sunset, Sedgwick found himself confronted by Confederates on three sides. When Lee attacked at 6 p.m., Sedgwick was forced to retire across Scott's Ford. The following day, as Sedgwick's soldiers returned to their winter camps, Lee hurried west to resume assaults on Hooker. Before he could attack, however, Hooker withdrew across the Rappahannock, bringing the campaign to an end.
The fighting at 2nd Fredericksburg and Salem Church prevented Sedgwick from striking the main Confederate army at Chancellorsville while it was engaged with Hooker. By forcing Lee to divert two divisions to Chancellorsville at a critical juncture of the battle, however, Sedgwick may have spared the Union army a much greater defeat.
DIRECTIONS TO THE BATTLEFIELD
Little remains of the 2nd Fredericksburg and Salem Church battlefields. Marye's Heights and Salem Church are within the national park boundary and have been preserved, but much of the remaining historic landscape has been lost to modern development.
To reach the first stop on the tour, turn left from the Fredericksburg Battlefield Visitor Center parking lot onto Lafayette Boulevard. Proceed east 0.5 mile to the second traffic light. Turn right onto Route 2/17, also known as Charles Street. Drive 0.2 mile and turn right at the traffic light, staying on Route 2/17. Proceed 2.5 miles farther turn right into the Fredericksburg Business Center on Pierson Drive. Find a place to park, step out of your car and face west with your back to Route 2/17.
TOUR STOP 1: UNION POSITION
On April 29 Sedgwick's corps crossed the Rappahannock and assumed a threatening position in open fields that once stretched between here and the river, one mile behind you. Confederate troops occupied a wooded ridge about three-quarters of a mile in front of you. Sedgwick's lack of aggression led General Lee to conclude that the Fredericksburg crossing was a diversion and that Hooker planned to make his main effort at Chancellorsville. Leaving Early to hold the line at Fredericksburg, Lee led the rest of the army toward Chancellorsville on the night of April 30th.
Return to Route 2/17 and turn left. Drive north 1.2 miles and turn left at the traffic light onto Lansdowne Road. Proceed 1.6 miles and turn right on a National Park Service road called Lee Drive. The road parallels trenches dug by Confederates after the 1862 Battle of Fredericksburg. Breastworks like these discouraged Hooker from making his main attack at Fredericksburg. In 2.4 miles you will reach the parking lot for Lee Hill. The short trail is fairly steep, but worth the exercise. Exhibits at the top of the hill discuss the fighting here in two separate campaigns. These are the only exhibits that deal with 2nd Fredericksburg. Union General Albion Howe's division successfully attacked the Confederates in this vicinity on May 3, 1863. Just 0.2 mile beyond Lee Hill you will come to the Fredericksburg Battlefield Visitor Center. Turn left into the parking lot and walk north along the Sunken Road for 300 yards until you come to the original section of the stone wall near the Kirkland Monument. Stand beside the road with your back to the monument facing the heights.
TOUR STOP 2: MARYE'S HEIGHTS
The ridge in front of you is Marye's Heights, a scene of intense fighting in two battles. Seven guns of the Washington Artillery stood on the ridge in 1863, supported by troops of the 21st Mississippi Volunteers. Three hundred soldiers of the 18th Mississippi occupied this 400-yard stretch of road at the foot of the heights. Sedgwick focused his assaults here. Although his first two attacks failed, his troops surged over the wall bordering the road in the third attempt and engaged the Mississippians here in hand-to-hand combat. Many of the Southerners were killed or captured; the rest fled. The famous picture of dead lying in the Sunken Road shows some of the Mississippians killed in this fighting.
For more information on the 1st Battle of Fredericksburg in this area, click on Sunken Road Walking Trail. For more information on the fighting on the heights see Marye's Heights.
Stroll over to the small white house at the corner of Mercer Street. As you stand with your back to the house and face the Sunken Road, notice the two driveways. This house called the Innis House was owned during the war by Martha, an interesting lady who used several last names including Innis. Look in the windows to see bullet holes. Follow the left driveway through the ravine to the top of Marye's Heights. The 6th Maine used this ravine to reach the summit, where they surprised and overpowered soldiers of the 21st Mississippi and Washington Artillery. Confederate cannoneer Edward Owen recalled, "much to our astonishment, we were fired upon from the rear by the Sixth Maine, which had run over our infantry on our left, . . . and came in our rear while we were busy with those in our front."
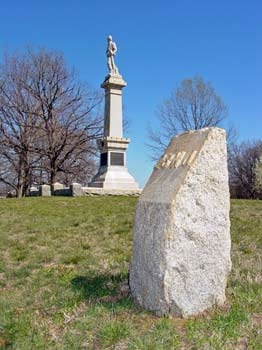
Follow the ridge crest south into the national cemetery. At the southeast corner of the cemetery is a monument to Parker's Battery, the only monument to the fighting at 2nd Fredericksburg. {For more information on the National Cemetery, click Fredericksburg National Cemetery.} Descend the hill to your car. Exit the parking lot, turning right on Lafayette Boulevard. Proceed 0.4 mile to the first stoplight (Route 3) and turn right. Go 3.4 miles and turn left at the traffic light on Salem Church Road (Route 639). Drive 0.2 mile to the stoplight and turn left on General Semmes Road. Proceed to the end of the road and turn left onto Old Salem Church Road. Follow this road to the end, where you will encounter a sign that reads "Do Not Enter." Turn left there into the National Park Service parking lot. Walk over to the historic church and stand with your back to the building so that you are facing east toward the cemetery. This is the direction the Confederates faced. Route 3 - the Orange Plank Road - is on your left.
TOUR STOP 3: SALEM CHURCH
After fighting a classic series of delaying actions on the ground now occupied by shopping malls, General Wilcox deployed his brigade of Alabamians along this ridge to block Sedgwick's advance. The arrival of McLaws' division here later that afternoon prolonged the Confederate line in each direction until stretched for more than a mile. { Read General McLaws Report,}At 5:30 p.m., Sedgwick attacked. South of the road, where you are standing, Brigadier General Joseph Bartlett's brigade swept past the church, momentarily rupturing the Confederate line. A counterattack by Wilcox's 10th Alabama, located a short distance to your rear, drove Bartlett back. The many bullet marks that scar the building testify to the ferocity of this encounter. North of the road, to your left, Colonel Henry Brown's New Jersey brigade met repulse at the hands of Brigadier General Paul Semmes' Georgians. { Read General Semmes' Report,}The two armies lost approximately 2,000 men at Salem Church. Sadly, the ground where they bled and died is now covered by subdivisions and shopping centers. The heaviest action, occurred the next day about two miles to the northeast. Although modern urban sprawl has not destroyed this part of the battlefield, there is no place for public parking to gain access to this area.
For more information on Salem Church, read a separate brochure by clicking here.
To reach the final stop on the tour, retrace your steps. Return to the Orange Plank Road, modern Route 3. Turn right on Route 3. At the third stoplight turn left onto Bragg Road. Drive 0.9 mile and turn left on River Road. As you descend to the river, notice the rugged terrain that characterizes this area. Confederate pursuit on the evening of May 4 was slowed by darkness and rough terrain. Drive 0.6 mile and pull over to the right at the bottom of the hill, when you first see the river.
TOUR STOP 4: BANKS' FORD
This ford was an important place on the Chancellorsville battlefield on several occasions. On the 1st of May, two Union divisions of the V Corps were marching toward this temporarily undefended ford. Occupation of this ford by Hooker's men would have greatly shortened his line of communications. However, Hooker's decision on that afternoon to withdraw to Chancellorsville prevented Union occupation of this important site. Wilcox's brigade then reoccupied this area only to leave on the morning of May 3 to support Confederate troops then under attack in Fredericksburg. Two days later Sedgwick's corps escaped to safety over Scott's Ford, one-half mile downstream - to your right as you face the river.
Retrace your route along River Road to Bragg Road. Turn right and drive 0.9 mile to Route 3. To reach I-95 or to return to Fredericksburg turn left. To reach Chancellorsville and points west, turn right.
To learn more about visiting the Chancellorsville Battlefield, click here.
To learn more about the Battle of Chancellorsville, click here.


