Featured Photo Tutorials
 Creating a Photo Book in iPhoto iPhoto ’08 3:41 Now Playing
 Creating a Web Gallery iPhoto ’08 2:01 Now Playing
 Creating a Slideshow iPhoto ’08 1:48 Now Playing
 Sharing by Email iPhoto ’08 0:44 Now Playing
 Retouching Images Aperture 2 1:29 Now Playing
 Exploring the Interface Aperture 2 2:12 Now Playing
Feedback
Dear Customer:
Thank you for your feedback regarding Find Out How. We cannot respond to you personally, but please know that your message has been received and will be reviewed by the Find Out How Feedback Team. If we need to follow up with you on your ideas for improving Find Out How, we will contact you directly.
We appreciate your assistance in making Find Out How better.
Find Out How Team
Apple
iPhoto
Aperture 2
Browse all video tutorials
Quickly Organize All Your Photos
-
Importing Photos
src="http://images.apple.com/findouthow/images/qt_endstate.jpg"
-
Organizing Photos Using Events
src="http://images.apple.com/findouthow/images/qt_endstate.jpg"
-
Creating an Album
src="http://images.apple.com/findouthow/images/qt_endstate.jpg"
-
Adding Titles, Descriptions, Rating and Keywords
src="http://images.apple.com/findouthow/images/qt_endstate.jpg"
-
Finding Photos
src="http://images.apple.com/findouthow/images/qt_endstate.jpg"
View and Enjoy Your Photos
-
Reviewing and Comparing Photos
src="http://images.apple.com/findouthow/images/qt_endstate.jpg"
-
Creating a Slideshow
src="http://images.apple.com/findouthow/images/qt_endstate.jpg"
Improving Your Photos
-
Improving the Appearance of Photos
src="http://images.apple.com/findouthow/images/qt_endstate.jpg"
-
Cropping a Photo
src="http://images.apple.com/findouthow/images/qt_endstate.jpg"
Sharing Your Photos
-
Creating a Web Gallery
src="http://images.apple.com/findouthow/images/qt_endstate.jpg"
Web Gallery
.Mac and iPhoto ’08 make it easy to share photos with friends and family in just a couple of clicks.
-
Sharing by Email
src="http://images.apple.com/findouthow/images/qt_endstate.jpg"
Creating Photo Gifts and Keepsakes
-
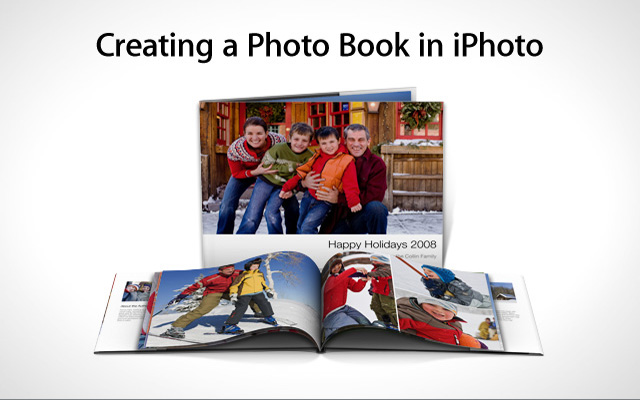
Creating a Photo Book in iPhoto
src="http://images.apple.com/findouthow/images/qt_endstate.jpg"
Photo Books
Photo Books are an amazing way to remember an event, and the perfect gift as well.
-
Printing Your Photos
src="http://images.apple.com/findouthow/images/qt_endstate.jpg"
-
Creating a Card
src="http://images.apple.com/findouthow/images/qt_endstate.jpg"
-
Creating a Calendar
src="http://images.apple.com/findouthow/images/qt_endstate.jpg"
Calendars
iPhoto calendars keep the smiles going all year long. Choose a colorful Apple-designed template and put your photos on display.
Browse all text tutorials
Getting Photos into iPhoto
-
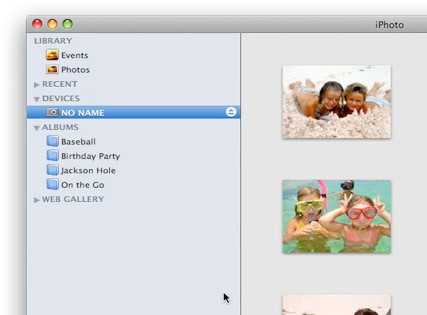
Importing Photos from a Digital Camera
Importing Photos from a Digital Camera
Once you’ve take photos with your digital camera, you need to move them from your camera into iPhoto. This is easy on a Mac and requires no additional software.
To connect your digital camera:
- Use the USB cable that came with the camera to connect it to your Mac.
- Turn on your camera. In the viewing area, iPhoto displays the photos stored on your camera.
To import all the photos on your camera:
- Click the Import All button in the lower-right corner of the iPhoto window.
To import some of the photos on your camera:
- In the iPhoto viewing area, click the first photo you want to import. To select a range of photos, hold down the Command key and click the next photo you want to import.
- After selecting all the photos you want to import, click the Import Selected button in the lower-right corner of the iPhoto window.
When the import finishes, turn off your camera and disconnect it from your Mac. If you capture images on flash cards, simply connect a card reader to your Mac, insert a card, and let iPhoto take over from there.
-
Importing Video from a Digital Camera
Importing Video from a Digital Camera
Many digital cameras let you capture video as well as still images.
To import video from your digital camera into iPhoto ’08:
- Connect your camera to your Mac and turn the camera on.
- In the viewing area, you can easily identify video thumbnails: they all have small white camera icons in the lower-left corner.
- Select the video you want to import and click Import Selected; or click Import All to import everything in the camera.
iPhoto adds the imported items to your iPhoto library. In the iPhoto library, you can identify video by looking for the small white camera icon. To find out how to make a movie with iMovie, click here.
-
Adding Other Photos to the iPhoto Library
Adding Other Photos to the iPhoto Library
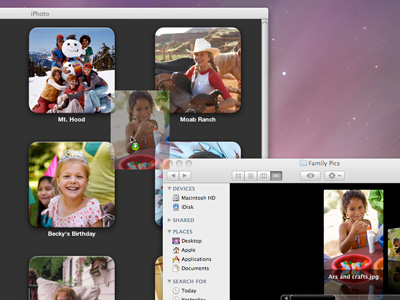
iPhoto can import photo and image files in a variety of formats, making it useful for storing and arranging images other than those that come from your digital camera. For example, you can import photos emailed to you from friends and family.
To add any photo or image on your Mac to your iPhoto library:
- Open iPhoto. The viewing area displays your iPhoto library.
- Find the photo you want to add to your iPhoto Library. Drag the photo into the iPhoto viewing area. The photo becomes a new Event.
- You can do the same with entire folders of photos. Just find a folder of photos on your Mac, and drag it into the iPhoto viewing area.
Arranging Your Photos
-
Viewing Photos
Viewing Photos
When you view the Events in your iPhoto library, iPhoto uses a thumbnail of one of the photos in the Event to represent all the photos in that Event. To adjust the size of Event thumbnails:
- When you open iPhoto, the Events pane appears. (If you already have iPhoto open, click Events at the top of the Source list on the left.)
- To change the size of the thumbnail images, locate the size slider in the bottom right corner of the iPhoto window. To make the thumbnails smaller, drag the slider to the left. To make them larger, drag the slider to the right.
Use this same technique to change the size of thumbnail images in each Event.
-
Splitting Events
Splitting Events
When you import photos, iPhoto automatically creates Events based on the date you took the photo. (Most digital cameras automatically assign photos a date/timestamp.) If you find that photos in one iPhoto Event actually represent two or more real events, you can split a single Event into two or more Events.
To split an Event:
- Open the Event you want to split.
- Select all the photos you want to be part of a new event.
- Click the Split button in the bottom-left corner of the viewing area. iPhoto creates a new untitled Event containing the photos you selected and removes them from the original Event.
To name the new Event:
- Click the datestamp below its thumbnail. In the resulting field, type a name for the new Event and press Return.
-
Merging Events
Merging Events
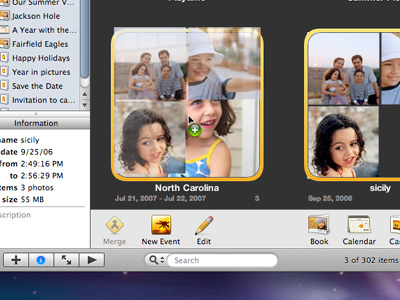
When importing photos, iPhoto sometimes splits them into multiple Events even though they all belong in a single event. For example, iPhoto may place the photos shot during the three days of your tropical vacation into three events. But you can easily merge them into one.
To merge events:
- Select two or more Events that you want to merge.
- In the bottom-left corner of the viewing area, click the Merge button.
- You can also merge Events by dragging one Event onto another.
-
Using Keywords to Search
Using Keywords to Search
Once you have a lot of photos in your iPhoto library, you’ll want a way to find them fast. Keywords make that task easy. Assign keywords — such as vacation or Mother — to your photos, and you’ll be able to find them quickly and easily weeks or months later by searching iPhoto by those keywords.
To assign keywords:
- Open an Event in your iPhoto library and select a photo.
- Choose View > Keywords or press Command-Shift-K.
- Choose Window > Show Keywords. The Keywords window appears. You’ll find several keywords already available, and you can add new ones.
- In the Keywords window, click Edit Keywords to have the window display a scrolling list of editable keywords.
- In the bottom-left corner of the window, click the Add (+) button. A new entry appears at the bottom of the keywords list, ready for you to customize.
- Type the keyword you want to add and click OK. The new keyword appears in the Quick Group section of the Keywords window.
- Go back to your Event and select the photos you’d like to associate with this keyword. Click the keyword button in the Quick Group area. All the selected photos now have the keyword assigned to them.
In the future, when you want to find a specific photo, just go to the search field, choose Keyword from the pop-up menu, and select a keyword button to find associated photos.


Editing Your Photos
-
Rotating and Straightening Photos
Rotating and Straightening Photos
iPhoto makes it easy to change the orientation of a photo in your iPhoto library.
To rotate a photo:
- Click the photo you want to rotate.
- In the toolbar, click the Rotate button one to three times to achieve the proper orientation.
In addition to making it easy to rotate photos, iPhoto also provides a Straighten tool you can use to straighten them.
To straighten a photo:
- Click the photo you want to straighten.
- Click the Edit button in the toolbar.
- Click the Straighten button. The Straighten slider appears, and iPhoto superimposes a grid of yellow lines on the photo.
- Drag the slider to the left or right to adjust your photo. In many cases, aligning the horizon in your photo with one of the yellow horizontal grid lines works well.
- Click Done to complete the process.
-
Removing Red-Eye from Photos
Removing Red-Eye from Photos
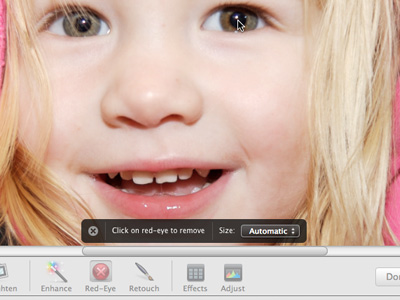
If you take photos of your friends at night while using your camera’s flash, you may need to use the Red-Eye tool to remove the red spots from the eyes of your subjects.
- Click the photo you want to edit.
- Click the Edit button in the toolbar.
- Drag the size slider at the bottom of the iPhoto window far enough to the right to allow you to see the eyes of the image in detail.
- Click the Red-Eye button in the toolbar. The Red-Eye tool appears and your cursor becomes a crosshair pointer.
- Place the crosshair over the red spot on an eye, and click. The red spot turns black.
- Click Done to complete the process.
Publishing Your Photos
-
Sharing Photos over a Network
Sharing Photos over a Network
Share photos with your friends and family simply and safely by using your local network — including a Wi-Fi network set up with an AirPort Extreme Base Station.
To share photos from your iPhoto library over a network:
- Choose iPhoto > Preferences to open the iPhoto Preferences window.
- In the toolbar, click the Sharing button.
- Select the “Share my photos” checkbox. You can share all the photos in your library or just the photos in albums you select.
- Give your photos a title that will appear to other networked users by typing a name in the “Shared name” text field.
- For extra security, you can password-protect your photos by selecting the “Require password” checkbox and entering a password in the text field. This allows other networked users to see that you’re sharing photos. However, it also requires them to enter the password before they can view your photos.
- Close the Preferences window.
-
Viewing Shared Photos over a Network
Viewing Shared Photos over a Network
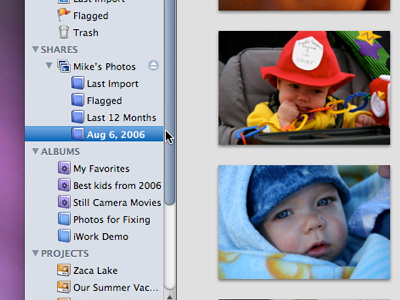
To view shared photos over a network, make sure you have Sharing turned on.
To view shared photos over a network:
- Choose iPhoto > Preferences to open the iPhoto Preferences window.
- Click the Sharing button in the toolbar.
- If the “Look for shared photos” checkbox is not selected, click it.
- Close the Preferences window.
That’s it. Now when you open iPhoto, a Shares heading appears in the Source list on the left, and the names of the shared photo collections appear below it.
-
Using Photo Descriptions
Using Photo Descriptions
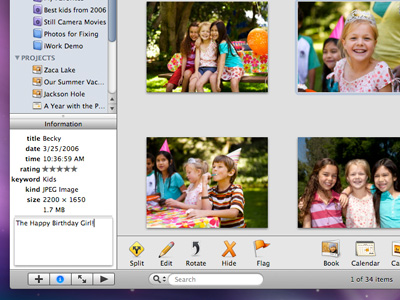
You can assign a description to any photo in your iPhoto library. This description appears as a photo caption when you add the photo to a web gallery or photo book.
To add a description to a photo:
- Click a photo in your iPhoto library.
- Click the Information button (represented by an “i” icon) in the lower-left corner of the iPhoto window to have the Information pane appear.
- Click the dimmed word “description” and type a description of the photo.
Browse all video tutorials
Introduction
-
Exploring the Interface
src="http://images.apple.com/aperture/tutorials/images/qt_endstate.jpg"
-
Customizing the Keyboard
src="http://images.apple.com/aperture/tutorials/images/qt_endstate.jpg"
Organize
Importing
-
Importing Basics
src="http://images.apple.com/aperture/tutorials/images/qt_endstate.jpg"
-
Tethering
src="http://images.apple.com/aperture/tutorials/images/qt_endstate.jpg"
-
Using Aperture and iPhoto Together
src="http://images.apple.com/aperture/tutorials/images/qt_endstate.jpg"
Compare and Select
-
Making Multiple Selections
src="http://images.apple.com/aperture/tutorials/images/qt_endstate.jpg"
-
Using the Loupe Tools
src="http://images.apple.com/aperture/tutorials/images/qt_endstate.jpg"
-
Using the Zoom Tool
src="http://images.apple.com/aperture/tutorials/images/qt_endstate.jpg"
-
Using Quick Preview
src="http://images.apple.com/aperture/tutorials/images/qt_endstate.jpg"
-
Using the Sort Tool
src="http://images.apple.com/aperture/tutorials/images/qt_endstate.jpg"
-
Applying Ratings
src="http://images.apple.com/aperture/tutorials/images/qt_endstate.jpg"
-
Using Compare Mode
src="http://images.apple.com/aperture/tutorials/images/qt_endstate.jpg"
-
Using Stacks
src="http://images.apple.com/aperture/tutorials/images/qt_endstate.jpg"
-
Using Stack Mode
src="http://images.apple.com/aperture/tutorials/images/qt_endstate.jpg"
-
Assigning Keywords
src="http://images.apple.com/aperture/tutorials/images/qt_endstate.jpg"
-
Viewing Multiple Displays
src="http://images.apple.com/aperture/tutorials/images/qt_endstate.jpg"
Searching and Sorting
-
Filtering and Searching in Aperture
src="http://images.apple.com/aperture/tutorials/images/qt_endstate.jpg"
-
Skimming All Projects
src="http://images.apple.com/aperture/tutorials/images/qt_endstate.jpg"
Organizing
-
Creating Albums and Smart Albums
src="http://images.apple.com/aperture/tutorials/images/qt_endstate.jpg"
-
Using Light Tables
src="http://images.apple.com/aperture/tutorials/images/qt_endstate.jpg"
Adjust
Image Editing
-
Using RAW Fine Tuning
src="http://images.apple.com/aperture/tutorials/images/qt_endstate.jpg"
-
Cropping and Straightening
src="http://images.apple.com/aperture/tutorials/images/qt_endstate.jpg"
-
Adjusting White Balance
src="http://images.apple.com/aperture/tutorials/images/qt_endstate.jpg"
-
Adjusting Exposure
src="http://images.apple.com/aperture/tutorials/images/qt_endstate.jpg"
-
Recovering Highlights
src="http://images.apple.com/aperture/tutorials/images/qt_endstate.jpg"
-
Enhancing Your Images
src="http://images.apple.com/aperture/tutorials/images/qt_endstate.jpg"
-
Setting Levels
src="http://images.apple.com/aperture/tutorials/images/qt_endstate.jpg"
-
Setting Advanced Levels
src="http://images.apple.com/aperture/tutorials/images/qt_endstate.jpg"
-
Adjusting Highlights and Shadows
src="http://images.apple.com/aperture/tutorials/images/qt_endstate.jpg"
-
Improving Color
src="http://images.apple.com/aperture/tutorials/images/qt_endstate.jpg"
-
Using the Retouch Brush
src="http://images.apple.com/aperture/tutorials/images/qt_endstate.jpg"
-
Applying Vignette and Devignette
src="http://images.apple.com/aperture/tutorials/images/qt_endstate.jpg"
-
Applying Black & White and Color Effects
src="http://images.apple.com/aperture/tutorials/images/qt_endstate.jpg"
-
Sharpening Images
src="http://images.apple.com/aperture/tutorials/images/qt_endstate.jpg"
-
Using Lift and Stamp
src="http://images.apple.com/aperture/tutorials/images/qt_endstate.jpg"
Metadata
-
Editing Metadata
src="http://images.apple.com/aperture/tutorials/images/qt_endstate.jpg"
-
Adjusting Date and Time
src="http://images.apple.com/aperture/tutorials/images/qt_endstate.jpg"
-
Embedding and Exporting Metadata
src="http://images.apple.com/aperture/tutorials/images/qt_endstate.jpg"
Publish
Output
-
Exporting Versions, Masters, and Projects
src="http://images.apple.com/aperture/tutorials/images/qt_endstate.jpg"
-
Making Prints and Contact sheets
src="http://images.apple.com/aperture/tutorials/images/qt_endstate.jpg"
-
Making Books
src="http://images.apple.com/aperture/tutorials/images/qt_endstate.jpg"
Making a Book
Aperture provides all the tools you need to create stunning small, medium, and large photo books.
-
Creating Web Pages
src="http://images.apple.com/aperture/tutorials/images/qt_endstate.jpg"
Creating Web Pages
Create your own photo site using templates for Web journals and gallery-style. Customize your site using the built-in Webpage editor.
-
Creating Web Galleries
src="http://images.apple.com/aperture/tutorials/images/qt_endstate.jpg"
Web Gallery
With a .Mac account, you can create beautiful, interactive websites in minutes. You can even let visitors download JPEG or original RAW files.
-
Creating Slideshows
src="http://images.apple.com/aperture/tutorials/images/qt_endstate.jpg"
-
Using Export Plug-ins
src="http://images.apple.com/aperture/tutorials/images/qt_endstate.jpg"


Presets
-
Exploring Presets
src="http://images.apple.com/aperture/tutorials/images/qt_endstate.jpg"
Integration
-
Using Aperture and iPhoto Together
src="http://images.apple.com/aperture/tutorials/images/qt_endstate.jpg"
-
Creating Advanced Slideshows with Keynote
src="http://images.apple.com/aperture/tutorials/images/qt_endstate.jpg"
-
Making Photo Movies with iMovie
src="http://images.apple.com/aperture/tutorials/images/qt_endstate.jpg"
-
Accessing Aperture through Leopard
src="http://images.apple.com/aperture/tutorials/images/qt_endstate.jpg"
Browse all text tutorials
Managing and Organizing
-
Importing Photos from Your Hard Drive
Importing Photos from Your Hard Drive
If you already have your photos organized into folders and subfolders on your hard drive, you can save yourself a lot of time by importing multiple folders into Aperture at once. Aperture will even preserve the folder hierarchy you’ve created, so that everything stays organized.
- In the Projects pane, click the Library icon.
- From the File menu, choose Import > Folders as Projects.
- An Import dialog appears. Select the folder you want to import into Aperture. You can Command-click to select multiple folders. Each folder you select will become a project in Aperture. If the folders you select contain subfolders of photos, those will be imported too.
- Use the Store Files pop-up menu to determine where you want Aperture to put your imported photos. Choose “in their current location” if you don’t want Aperture to duplicate your photos. With this option, your image files stay where they are and Aperture simply references them — saving you disk space. If you choose “in the Aperture Library,” your photos will be copied (duplicated) when imported.
POWER TIP: You can also drag-and-drop folders directly into the Aperture Projects pane for fast, easy import. Hold down the Command and Option keys while dropping a folder into the Projects pane to reference the images, so that they’re not duplicated on import.
-
Navigating: The Five Essential Shortcuts
Navigating: The Five Essential Shortcuts
Keyboard shortcuts make navigating through your photos faster and easier. Here are five of the simplest and most useful shortcuts. Learning these five one-key shortcuts can save you a lot of time.
- V
- Cycles through the three main view modes — Browser Only (just thumbnails), Viewer Only (big photo, no thumbnails), and Browser and Viewer (a split view, with thumbnails on the bottom and the Viewer above).
- W
- Switches to the next pane in the Inspector — Projects, Metadata, or Adjustments. Just press W to get to the pane with the tools you need. The same shortcut works when you’re in Full Screen mode and using the heads-up display.
- F
- Enters and exits Full Screen mode.
- Z
- Zooms your selected photos to 100 percent in either the main Viewer or Full Screen mode. Pressing Z again turns zooming off, returning you to Fit-to-View mode.
- P
- Activates Quick Preview mode. In Quick Preview, Aperture loads previews only instead of full-resolution images, so you can browse through photos extremely fast. If you find an image you want to adjust, just press P again to leave Quick Preview mode and load the image.
-
Showing Keywords on Images
Showing Keywords on Images
If you’ve added keywords to your images, it can be very handy to have Aperture display those keywords as labels on the bottom of each photo in the Viewer. This way, instead of having to open the Metadata Inspector, you can see at a glance which keywords have been applied to each image.
- Choose Preferences from the Aperture menu and click the Metadata icon at the top of the window.
- Click the Viewer checkbox (if it’s not already checked) and click the Set 2 radio button, which activates the “Viewer - Expanded” metadata view. In the Viewer, the metadata overlay appears below each photo.
- You can also change the setting of the Placement pop-up menu to control how this data is positioned at the bottom of each photo. Choose the placement you prefer.
- The “Viewer - Expanded” metadata set includes basic camera settings and file information as well as the photo caption and keywords. If you’d like to simplify the overlay so that only caption and keywords are shown, change the Set 2 pop-up menu to Caption & Keywords. Now you’ll see only captions and keywords as an overlay on each image in the Viewer — and you can hide and show the overlays at any time by pressing the Y key.
When it comes to these metadata overlays, you’re not limited to the specific combinations of metadata defined in the preset metadata views pop-up menu. You can use the Metadata Inspector to set up custom metadata views that show exactly the data you want. The setup instructions are on page 281 in the Aperture User Manual.
-
Getting Info Using Image Tooltips
Getting Info Using Image Tooltips
Whenever you need to quickly get information about a photo in your Aperture library — the camera settings used, the file size, even the caption you’ve added to the photo — there’s a lightning-fast way to view the information, without having to open the Metadata Inspector or turn on metadata overlays. Use Image Tooltips.
- Use your mouse to point to any image in your library — either a thumbnail in the Browser or a full image in the Viewer.
- Press the T key to display Image Tooltips. This floating panel, anchored to your mouse pointer, gives you on-the-fly access to the basic information about the photo you’re pointing to, so you can see camera settings, keywords, ratings, and so on. If you point to another image, Image Tooltips will instantly update to reflect the data for the next image. There’s no need to actually select other photos; you can just move the mouse pointer over any number of thumbnails or images in the Viewer, and Image Tooltips will continually update with the data for each photo. When you’re done, press T again to hide Image Tooltips.
Image Tooltips can be used in more than just the Viewer and Browser. You can use this same technique on book pages when you’re creating custom books, on Web Page and Web Journal layouts, and on Light Tables. Wherever images appear in your various Aperture projects, just press T to get the data you need.
-
Searching for Adjusted Photos
Searching for Adjusted Photos
Want to quickly and easily locate all the photos in a project that you’ve spent some time adjusting? Aperture makes it easy, by allowing you to search for photos based on the adjustments that have been applied.
- Open the project or album you want to search, so that its thumbnails appear in the Browser.
- Click the Query HUD button (the icon with the magnifying glass) next to the search field on the top right side of the Browser. This opens the Query HUD.
- Click the Add Filter (+) pop-up menu in the upper right corner of the Query HUD and choose Adjustments. This adds Adjustments as a search parameter in the HUD.
- Set the Adjustments search parameter pop-up menu to “are applied.”
- Close the Query HUD by clicking the close button in the upper left corner of the HUD.
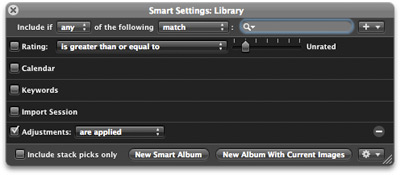
Your photos are automatically filtered so that only the images you’ve adjusted appear in the project or album. To see all images again, click the small x in the Browser search field to clear the query.
You can use this same technique on your entire Aperture library to see all the photos you’ve adjusted in all projects at once. Just click All Photos near the top of the Projects pane, and then filter the images in the Browser using the Query HUD, following the steps shown here.
Image Editing
-
Creating Black and White Photos
Creating Black & White Photos
If you want to create beautiful, richly toned black and white versions of your photos, you can use the Monochrome Mixer to get exactly the look you want.
- Select the photo you want to convert and make sure the Adjustments pane is visible. (If it isn’t, choose View > Inspector > Adjustments.)
- Click the + button near the top of the Adjustments panel and choose Monochrome Mixer from the pop-up menu. This adds the Monochrome Mixer adjustment control near the bottom of the Adjustments pane and applies the default monochrome filter to your image.
- Try using one of the filters from the Preset pop-up menu on the Monochrome Mixer to quickly refine the black and white conversion. You can apply the Monochrome with Red Filter, for example, to add deep contrast to blue skies.
- Fine-tune your results even further using the individual Red, Green, and Blue channel sliders to “mix” a custom black and white conversion that produces the effect you’re looking for.
If you don’t like the results, no problem. Just click the Monochrome Mixer checkbox to temporarily disable the effect, or choose Remove Selected from the Action menu at the top of the Adjustments pane to permanently remove the Monochrome Mixer filter.
-
Setting the White Balance
Setting the White Balance
Aperture lets you remove unwanted color casts from photos with a single click using the White Balance adjustment. This simple adjustment can dramatically improve the look of photos that have been shot under lighting conditions that give them a strong blue or orange tint.
- Select the photo you want to fix and make sure the Adjustments pane is visible. (If it isn’t, choose View > Inspector > Adjustments.)
- On the White Balance adjustment brick, click on the eyedropper tool. Your cursor becomes an eyedropper and the Loupe appears, providing a magnified view of the part of the image directly under the cursor.
- Using the eyedropper, click a part of the photo that you know is supposed to be a neutral gray or white. This immediately adjusts the white balance, neutralizing the color cast.
- If you don’t like the results, just click the White Balance eyedropper again and use it to pick a different neutral area. If you’re not sure where to click, hold the mouse button down as you drag the eyedropper across the image; the white balance will update as you drag. When you see a color balance you like, release the mouse button.
You can also tweak the white balance by using the Temperature and Tint sliders on the White Balance adjustment brick.
Publishing
-
Adding Borders to Photos in a Book
Adding Borders to Photos in a Book
When creating photo books in Aperture, you can design your own page layouts to make one-of-a-kind custom books. One way to introduce a personal touch to your designs is to add a custom border to any photo box.
- Open a book layout in an Aperture project. (To make a new book, select some photos in a project, click the New button in the toolbar, and choose Book from the pop-up menu.)
- Click the Edit Layout button in the book layout toolbar, just above the Pages pane. This allows you to change the actual layout of your book pages — moving, resizing, adding and deleting photo and text boxes on the pages.
- From the Action pop-up menu just below the Pages pane, choose Show Layout Options. The Size & Position and Photo Border controls appear just above the Pages pane.
- Select a photo box on one of the book pages. If it doesn’t have a photo in it, drag a photo thumbnail from the Browser into the photo box.
- With the photo box selected, use the arrow buttons on the Thickness control in the Photo Border pane to add a border to the box. Hold down the Option key when clicking the arrows to increase or decrease the border thickness in smaller increments. You can also just type in a specific thickness.
- Click the Color swatch in the Photo Border pane to bring up the standard Mac OS X color picker, where you can choose the color of the border.
-
Printing Your Photos
Printing Your Photos
Aperture’s printing tools are simple to use, letting you create high-quality prints on your own printer.
- In the Browser, select the photos you want to print.
- Choose Print Image from the File menu to open the Aperture Print dialog.
- Choose a preset from the preset list on the left. Or just choose Sample Single Image Preset. (To print a contact sheet instead, choose Sample Contact Sheet Preset).
- In the Printer Selection area of the dialog, choose the printer you want to use from the Printer pop-up menu. Don’t see your printer listed? Then choose Add Printer from the same menu to see a list of available printers, and pick the one you want.
- After selecting a printer, be sure to properly configure the printer’s software. Click the Print Settings button to access your printer’s specific options and make sure they’re set the way you want. For example, to print borderless images, you may have to turn on a Borderless Printing option in the printer software.
- Choose a paper size from the Paper Size pop-up menu. The menu options change to match the printer. Be sure to select a paper size matching the options set in Print Settings.
- Under Layout Options, use the Scale To pop-up menu to tell Aperture how to size your image on the page. Fill Entire Page yields a full-page print, but may cause cropping if the photo has a different aspect ratio from the paper stock. Fit Entire Image scales the photo so nothing is cropped.
- Once your options are set, click Print to being printing.
- Save the settings you’ve changed as a Print Preset for future use. After you’re happy with the settings, click Save As and name the new preset. The next time you print, all your print options will be configured and ready to go.
For more advanced printing, use other options available in the Print dialog to set a custom ColorSync profile or add sharpening to prints. You can find details one page 474 in the Aperture User Manual.