Abstract
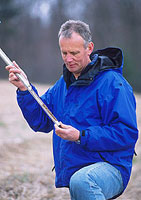
Collecting a soil sample from a test plot.
Photo courtesy: USDA-ARS |
This technical note provides methods to determine biological activity of pasture soils and practical tips on improving the usefulness of typical soil and plant samples. The soil biology sampling methods are easy to learn, and utilize commonly available tools found around any farm. Once these biological assessments are made, more insight into the many benefits of nutrient cycling become apparent. Methods for using soil and plant samples strategically are also covered.
Table of Contents
Making Fertility Assessments
A typical soil analysis will provide a guide to the current plant nutrient levels in a pasture soil. For an analysis to be accurate, good sampling procedure must be followed. Before sampling a pasture soil:
-
Visit the county Extension office and get their guide on soil sampling procedure.
-
Look across the landscape and locate all "hotspots." Hotspots are areas of excessive or unusual nutrient concentration: soils around feedbunks, hay feeding areas, shade trees, watering sites, loafing areas, and wet spots.
-
Sample these hotspots separately, or avoid them during your sampling.
-
Sample according to apparent patterns—such as slope and previous fertilization. When field areas appear dissimilar, sample them separately. Nutrients tend to flow downhill in pastures, meaning that top slopes will tend to have lower nutrient levels and the down slope will tend to have higher levels. Mixing soil samples from all over the pasture will mask these differences and lead to wasted fertilizer dollars. When it comes time to buy fertilizer, if you only need to fertilize the ridge tops, you will be glad you sampled top, side, and end slopes separately.
-
Make sure that sampling depth matches the depth that the soil test report will be based on. Many agronomists advise taking pasture samples at 3 or 4 inches deep because most of the grass roots are in the top 4 inches. The prescribed depth should be in the soil sampling procedure from your Extension office. If you do take a sample depth other than the one the lab specifies, tell them on the sheet that you did this so they can adjust accordingly.
-
Prepare the sample for shipping according to the lab's recommendations.
Producers generally have the choice of using a private laboratory or the state university lab to do their soil analysis. Commercial labs cost more but generally have a quicker turnaround time and a more complete soil test report than university labs. Though hotly contested by some researchers, soil analysis featuring the base saturation percentages provides useful information for making fertilizer choices. If you like to get a second opinion, it may be worthwhile to hire a consultant to help you with the sampling and the fertilizer recommendations.
To back up your fertilization program you may want to take forage samples to see what effect the fertilizer had. You can also utilize soil and forage tissue sampling strategically by making comparisons between poor growth areas and good growth areas, or before-and-after comparisons. The three tables below show some hypothetical examples of strategic soil and plant tissue sampling.
Forage analysis can be used to judge the success of a fertilization program by identifying any remaining nutrient deficits. For example, the before and after forage analysis shown in Table 1 shows that the applied fertilizer met all crop needs for major and secondary nutrients. In addition, soil and forage analysis—taken from adjacent poor and productive field areas—can be used to better identify nutrient imbalances. (Tables 2-3) Visit your county Extension agent or a private consultant to learn effective methods for taking a forage sample.
| Table 1. Forage Tissue Analysis before and after fertilization |
| Nutrient |
Before Fert. |
After Fert. |
| Nitrogen |
low |
OK |
| Phosphorus |
OK |
OK |
| Potassium |
low |
OK |
| Calcium |
OK |
OK |
| Magnesium |
OK |
OK |
| Sulfur |
low |
OK |
| Table 2. Forage Tissue Analysis between a poor area and a good area |
| Nutrient |
Poor Area |
Good Area |
| Nitrogen |
low |
OK |
| Phosphorus |
OK |
OK |
| Potassium |
low |
OK |
| Calcium |
OK |
OK |
| Magnesium |
OK |
OK |
| Sulfur |
low |
OK |
| Table 3. Soil Test Analysis between a poor and good area of a pasture |
| Nutrient |
Poor Area |
Good Area |
| Nitrogen |
— |
— |
| Phosphorus |
OK |
OK |
| Potassium |
low |
OK |
| Calcium |
OK |
OK |
| Magnesium |
OK |
OK |
| Sulfur |
OK |
OK |
Back to top
Assessing Soil Biological Activity/Health
While nutrient status is essential to soil health and vitality, biological activity and soil structure should be appraised to get a more complete picture. The biological soil component creates and maintains many desirable soil conditions. It's true that many biological parameters are quite costly to measure and require hours of laboratory time. Still, others can be quite inexpensive and convenient to do. The following assessment procedures can be performed in an hour or so using cheap, locally available materials. These procedures are derived from Early Warning Biological Monitoring for Croplands, 2000, available from The Allan Savory Center For Holistic Management. (1) For a more complete cropland assessment, order this publication.
Back to top
When to Make These Assessments
Choose a time of year when soil biological activity is high—usually late spring and mid fall. Select a day when the soil is moist but not wet—moist after all excess water has drained away. Generally, the soil is right for this assessment when you cannot roll soil into a ball, and it crumbles easily in your hand.
Avoid taking samples:
- from wet soils—when the soil sticks to your shoes, it is too wet.
- during drought periods or times of excessive heat.
- from cold soils.
- within a month following tillage, fertilization, or liming.
Back to top
Equipment Needed
- Pencil
- Assessment sheet
- Clipboard to hold the paper
- Shovel
- Can or jar capable of holding 16 fluid ounces (1 pint) but no more
- Small round bottle—large enough to hold ½ cup of water
- Bucket with two gallons of water for each assessment sheet to be filled out
- Watch with a second hand, or a stopwatch
- Tape measure
- Hand grass clippers
- Home-made soil penetrometer, described below
- A wire ring that measures 1 foot across, made of wire or flexible pipe (The length of wire required to make a one-foot diameter circle is approximately 39 inches joined end to end, depending on the thickness of the wire. Remember to allow some extra length to attach the two ends and make the ring. Measure the diameter of the wire ring as the ends are attached to make sure it is one foot across.)
Back to top
Locating Sample Sites
An individual assessment sheet is to be used for each pasture. If a pasture is highly variable, assess each distinct area separately. In each pasture unit, three sampling sites should be selected. Use field maps, compasses, landmarks, or global positioning systems to locate representative sample sites that can be relocated year after year. These then become permanent sites for assessing change over time. Each field site can be marked on a map to aid relocation. At each sampling site two points will be chosen at which to do the actual assessment.
Begin by selecting the first point for evaluation at the sampling site and lay the one-foot diameter ring on the ground. The following assessments (1-6) are most conveniently done by completing all six at the first point before moving on to the second point.
Back to top
- Living Organisms
Clip all the standing vegetation within the wire-ring circle down to the ground and remove it. Pull back the soil surface litter and look for signs of living organisms other than plants. A small hand rake may help in turning the surface litter. Count the number of different kinds of living critters (beetles, ants, millipedes, centipedes, snails, etc.) on the soil surface within the ring. Record the numbers on the assessment sheet.
It is advisable to start turning the surface litter from the outside of the ring toward the center. This forces mobile critters to the center where they will be seen by the observer. If you start at the center and work toward the ring, the critters have a chance to escape outside the ring undetected. With this assessment the number of species (diversity) is more important than the number of individuals.
A higher number of different types of organisms indicates more biodiversity. The more biodiversity, the better the first stage of decomposition will proceed.
Back to top
- Earthworms
While still at the circle, count the number of wormholes inside the ring. The surface holes are the vertical burrows of nightcrawler worms. After counting the wormholes, insert the shovel to its maximum depth and turn over the shovelful of soil. Break the shovelful of soil apart with your hands and count the number of earthworms present. The smaller worms found with the shovel will most likely be the surface-dweller earthworms which do not burrow vertically.
Record the numbers on the assessment sheet. Also note how easy or difficult it was to shovel the soil. Turning a shovel full of soil also correlates well with tilth and ease of tillage. The more earthworms found in this process, the better. Earthworm burrows enhance water infiltration and soil aeration. Their digestion of soil and organic matter cycles nutrients. Worms are a general indicator of soil health. Earthworms may not be present in croplands recently converted to pasture. They should slowly return over several years from adjacent field margins as soil health improves.
Back to top
- Soil Smell
While still at the hole dug for worm counts, grab a handful of topsoil and take a whiff. Record the smell on the assessment sheet as follows:
.0 = putrid/chemical/sour
.2 = no smell
.4 = fresh/earthy/sweet
Back to top
- Aggregation
Select a soil aggregate (crumb) the size of this  from a handful of topsoil. Make sure the aggregate is not a rock pebble. Put the aggregate in the small round bottle of water or the pint container. Allow it to stand for 1 minute (use the stopwatch). Observe if the aggregate is breaking apart or staying intact. If it stays intact after one minute, gently swirl the bottle several times and observe again. If it is still intact, swirl the bottle vigorously and observe the aggregate again for intactness. Record the following scores: from a handful of topsoil. Make sure the aggregate is not a rock pebble. Put the aggregate in the small round bottle of water or the pint container. Allow it to stand for 1 minute (use the stopwatch). Observe if the aggregate is breaking apart or staying intact. If it stays intact after one minute, gently swirl the bottle several times and observe again. If it is still intact, swirl the bottle vigorously and observe the aggregate again for intactness. Record the following scores:
1 = aggregate broke apart within one minute in standing water
2 = aggregate remained intact in standing water but broke apart after gentle swirling
3 = aggregate remained intact after gentle swirling
4 = aggregate remained intact after vigorous swirling
After vigorous swirling, remove the aggregate and smash it between your fingers to make sure it was not a pebble. If it was a pebble, select another aggregate and do the test again. Healthy soils have very stable aggregates—indicated here by a high score. Unstable aggregates break apart easily and the individual soil particles can be easily eroded by runoff water. Higher scores are generally more common under perennial sod. Lower scores are generally more common on soils with annual tillage operations and clean cultivation.Move away from the wire-ring circle to a fresh area. Clip a small area of grass to ground level if necessary to see the soil surface clearly. Fill a pint container with water. Holding the container as close to the soil surface as possible, gently pour the water on the soil. Try to pour all the water out within five seconds, the idea being to avoid disrupting the soil surface with the water flow, but pouring fast enough to determine how quickly the water soaks into the ground. Start timing once all the water has been poured out (use the stopwatch). When the last of the water just finishes soaking into the ground, stop the watch. This is the infiltration time to be recorded on the assessment sheet. Next, measure the wet spot across its widest point with the tape measure and record on the assessment sheet. Pouring on a slope will influence the rate of runoff. If you are comparing two cropping practices on sloping ground, make sure the slope is the same under both practices since slope will influence the runoff rate.
Back to top
- Water Infiltration
The faster that water enters the soil, the less likely it is to run off overland and cause erosion. A well-aggregated soil will take in water rapidly, as will a soil with high numbers of vertical wormholes. Texture plays a significant role in water infiltration. Sandy soils will take in water more quickly than silty-loam soils, and clay soils will take in water quite slowly. Finally, since soil moisture at the time will influence this assessment, don't put too much confidence on an infiltration comparison between two fields if one is irrigated and the other is dry.
Back to top
- Soil Compaction
Assessing soil compaction requires making a simple tool beforehand. The soil penetrometer can be constructed from a 1/4-inch rod sharpened on the end as seen in the drawing below. Start with a rod that is 3 feet long. Use a file to make one-inch marks from the pointed end. (see below)
Push your homemade penetrometer into the soil as deep as you can with modest effort. Record the inches of penetration up to a maximum number of 12 inches. Do not record any penetration depths beyond 12 inches, as we are not testing for deep penetration. Avoid putting all your weight into the pushing, or stomping on the penetrometer to make it go deeper. Record the penetrometer depth on the assessment sheet. If you hit a rock or tree root, try again. For comparison, probe an undisturbed natural area nearby with your penetrometer. As a secondary test you may wish to probe deeper with a longer penetrometer to locate any deeper hard pans and note them on the comment section of the assessment sheet.
The more deeply and easily the probe penetrates the soil, the better. Ease of soil penetration with the penetrometer correlates to deep root development, ease of downward water flow (no hardpan), and tillage ease. A probe that won't penetrate the soil indicates compaction of the surface layer, which restricts downward water movement.

Home-made Soil Penetrometer. |
Back to top
Other Observations
Increasing observational skills is always beneficial. Doing the soil organism assessment described will enhance observational skill. Some other useful observations include plant vigor, plant coloration, drought tolerance, and the rate at which livestock manure is dispersed and decayed. Healthy soil conditions are largely created by the helpful soil organisms, which will work for us with a little management to meet their needs.
Don't be discouraged if the pasture assessment numbers come up lower than expected the first time. Rather let the results be an incentive for continued commitment to soil improvement. Pursue progress rather than perfection. An assessment provides a starting point from which to build toward the future. Set your sights high. Discard the idea that soils require hundreds of years to build up. Soils can begin to improve in just a few months after appropriate decisions are made.
Back to top
Resources
Reference
- Early Warning Biological Monitoring for Croplands. April, 2000. 26 p.
To order this publication send $12.00 to:
Savory Center for Holistic Management
1010 Tijeras, NW
Albuquerque, NM 87102
505-842-5252
505-843-7900 FAX
Back to top
Additional Resource
Nation, Allan. 1995. Quality Pasture. Mississippi Valley Publishing, Corp., Jackson, MS. 285 p. To order this publication send $32.50 + $4.70 shipping and handling to:
Stockman Grass Farmer
P.O. Box 2300
Ridgeland, MS 39158-2300
1-800-748-9808
601-853-1861
601-853-8087 FAX
sgfsample@aol.com
Assessing the Pasture Soil Resource
By Preston Sullivan
NCAT Agriculture Specialist
Tiffany Nitschke, HTML Production
IP 128
Slot 46
Back to top |