Drupal Install Guide
StatCounter provides free customisable hit counters, visitor tracking, web analytics and website stats for Drupal.
![]()
- Copy the StatCounter code.
- Log into your Drupal website.
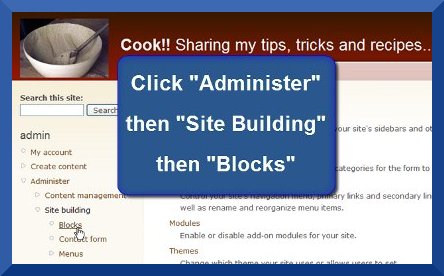
- Under the "Admin" menu, click "Administer" then "Site Building" then "Blocks".
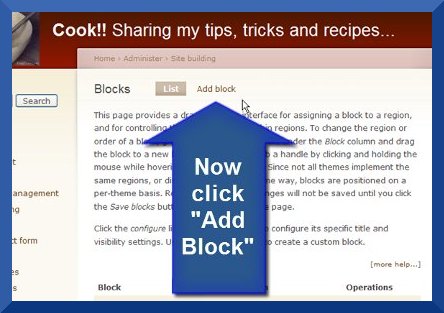
- Now click "Add Block".
- Enter "StatCounter" as the "Block Description" and paste your StatCounter code into the "Block Body".
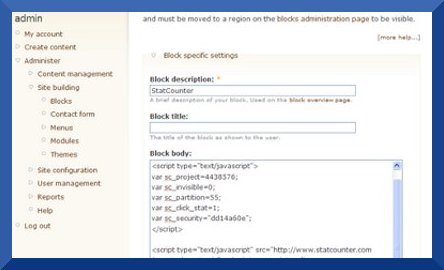
- Make sure that your "Input Format" is "Full HTML" then scroll to the end of the page and click "Save Block".

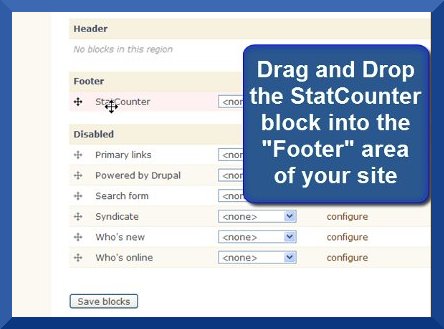
- Now that you have created a StatCounter Block, you need to add the block to the footer area of your website. Scroll down the page to locate your new StatCounter Block.
- Drag and Drop the StatCounter Block into the "footer" section.
- Click "Save Blocks" and that's it!
Your StatCounter will now begin recording visitor information and, if you chose the visible option, your counter will be visible on your website!
Troubleshooting
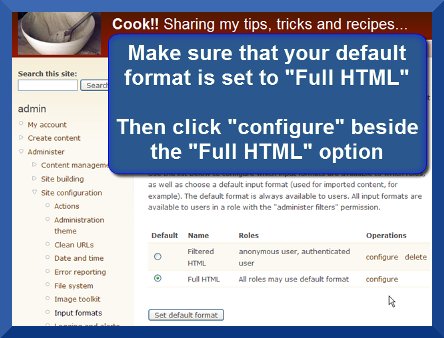
NOTE: If StatCounter CODE instead of a StatCounter COUNTER is being (incorrectly) displayed on your website, then you may need to configure the "Input Formats" of your Drupal website. Here's how:- Under the "Admin" menu, click "Administer" then "Site Configuration" then "Input Formats".

- Make sure that your default format is set to "Full HTML" then click "configure" beside the Full HTML option.
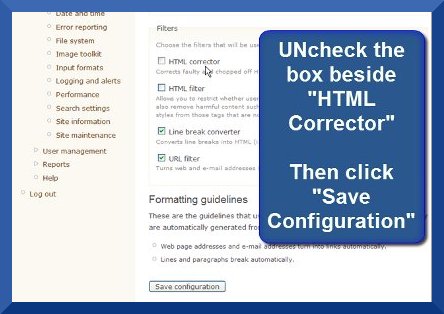
- UNcheck the box beside "HTML Corrector" then click "Save Configuration".
- Your StatCounter should now be correctly displayed on your site.
To assist you further, we’ve also put together a video tutorial which you can see below…