Widgets
Widget is a fancy word for tools or content that you can add, arrange, and remove from the sidebar(s) of your blog. Widgets make it easy to customize the content of your sidebar(s). You can learn more about the widgets we offer by checking out the Related links on the right.
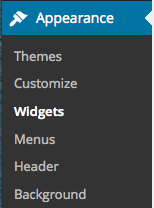
You can access your widgets from the Appearance → Widgets screen in your Dashboard.
Adding Widgets
To add a widget, drag the widget from the Available Widgets or Inactive Widgets area on the left into the Sidebar area on the right. When you see a dashed line appear, you can drop the widget into place.
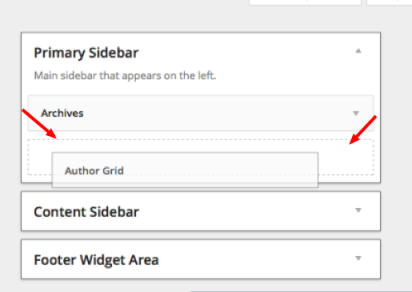
You can also change the order of the widgets by dragging and dropping them around in the sidebar.
Configuring Widgets
Each widget has configuration options. To make changes to a widget in the sidebar, click on the triangle on the right side.
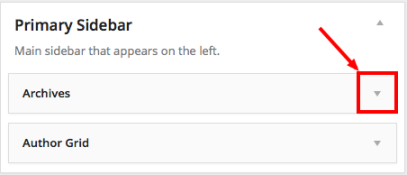
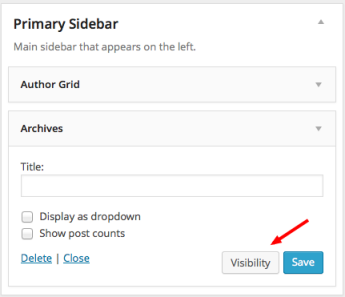
This will open up the options for the widget. Each widget will be different. Here is an example of the Archives widget.
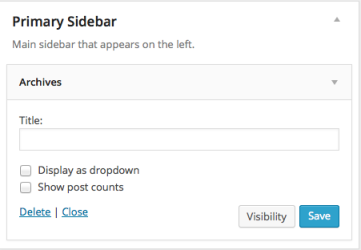
After you have have configured the widget, click the Save button. Clicking the Close link will minimize the configuration options again.
Widget Visibility
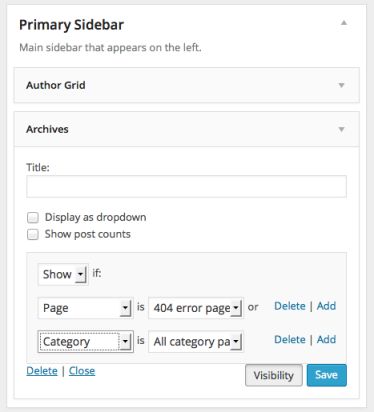
Widgets can be configured to appear only on certain pages (or be hidden on certain pages) by using the Visibility panel.
Visibility is controlled by five aspects: page type, category, tag, date, and author. For example, if you wanted the Archives widget to only appear on category archives and error pages, choose “Show” from the first dropdown and then add two rules: “Page is 404 Error Page” and “Category is All Category Pages.”
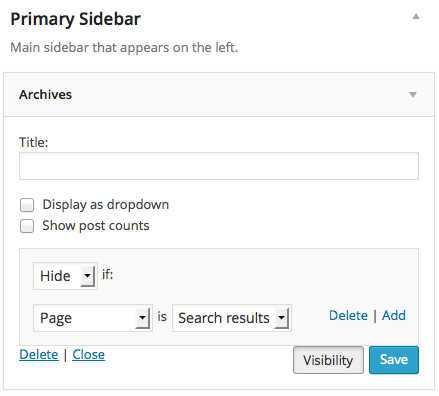
You can also hide widgets based on the current page. For example, if you don’t want the Archives widget to appear on search results pages, choose “Hide” and “Page is Search Results.”
Each visibility rule is handled separately. There isn’t a way, for example, to only display a widget on posts that are categorized as “Summer” and also tagged with “Picnic.”
Removing Widgets
If you would like to remove a widget from the sidebar, click the Delete link in the configuration options as show above.
Accessibility Mode
If you need a more accessible way to add widgets, click Screen Options → Enable accessibility mode to turn off the drag and drop feature.

In accessibility mode, you can add widgets to your sidebar using the Add links next to each widget name

and you can modify widgets using the Edit links.

Instructions to enable Accessibility Mode Via Keyboard
For those using screen readers and keyboard navigation, these instructions should help you enable Accessibility mode:
- In your Dashboard, navigate to the Appearance tab, and then select Widgets.
- Press ‘L’ to skip from list to list till you find ‘HELP’. Alternatively, press ‘landmark’ command once to get to ‘NAVIGATION MENU’.
- Arrow down you will hear ‘screen option – collapsed’
- Press ‘ENTER’ to open drop down menu.
- “Enable accessibility mode” is the only option available. Select that and you will have keyboard options for many of the widgets.
When using a keyboard, if you have trouble modifying widgets or encounter any other accessibility issues, please feel free to contact support for more assistance.
Troubleshooting
Why are there widgets showing up on my blog that aren’t listed under my sidebar on the Appearance → Widgets screen?
With some themes if you haven’t added any widgets to your sidebar(s), the theme will show a default set of widgets, which will not be listed in the Sidebar area.
When you add widget(s) to a sidebar the default set of widgets will no longer be used. Try adding a blank Text Widget if you don’t want anything to show up in a widget area.
Still confused?
Help us improve:
We're always looking to improve our documentation. If this page didn't answer your question or left you wanting more, let us know! We love hearing your feedback. For support, please use the forums or contact support form. Thanks!
